
Prerequisite (server): XPE Desktop 3.7.699 or later. Prerequisite (handheld): latest XPressEntry (Flutter) handheld app version installed.
Server Side — XPressEntry Desktop #
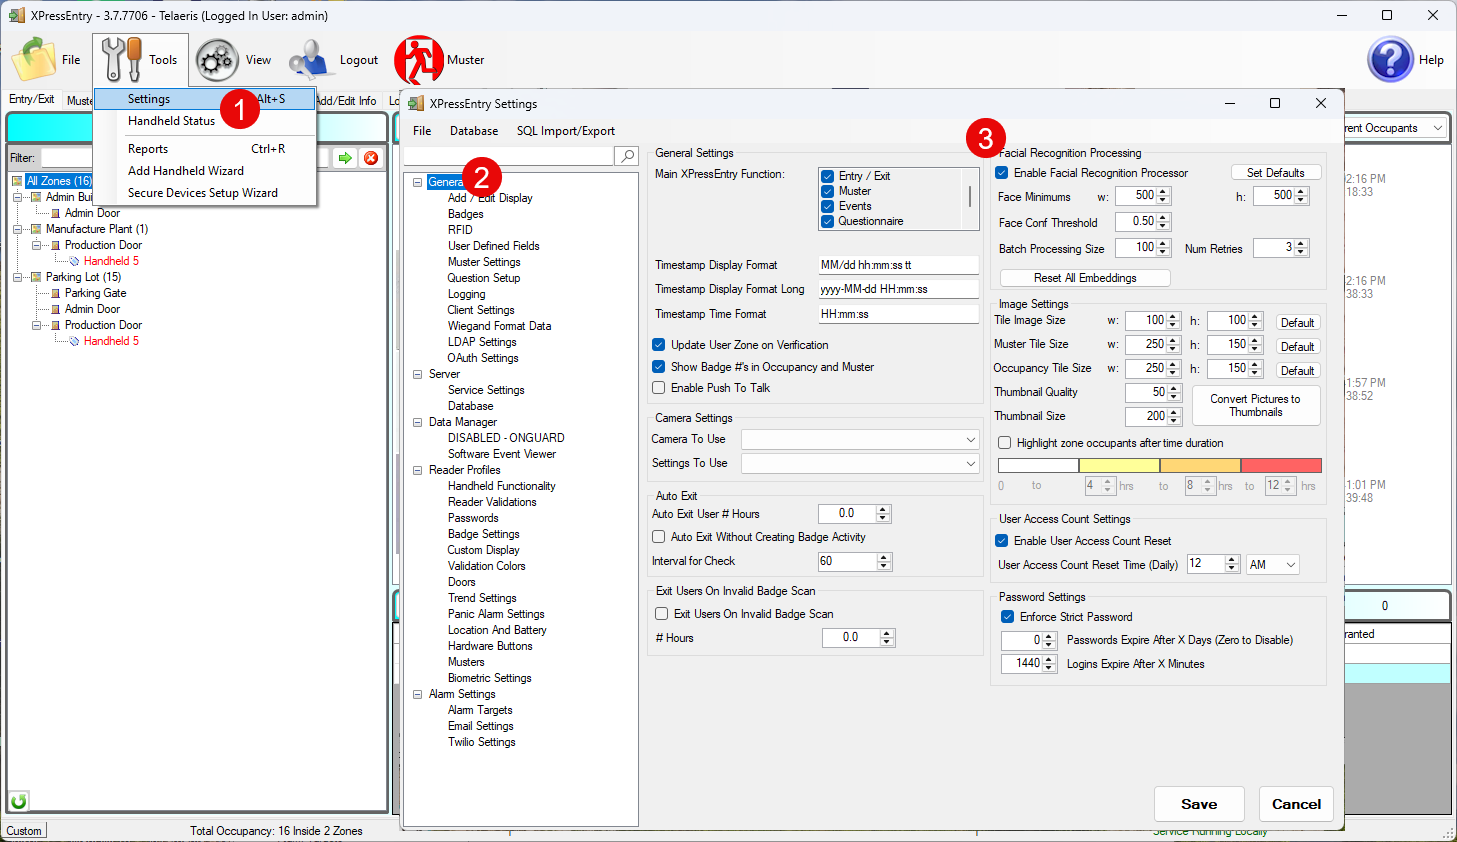
In XPressEntry Desktop, go to Tools → Settings.
In the Settings window, select the General tab in the left-hand tree.
Under the “Facial Recognition Processing” panel, check “Enable Facial Recognition Processor.”
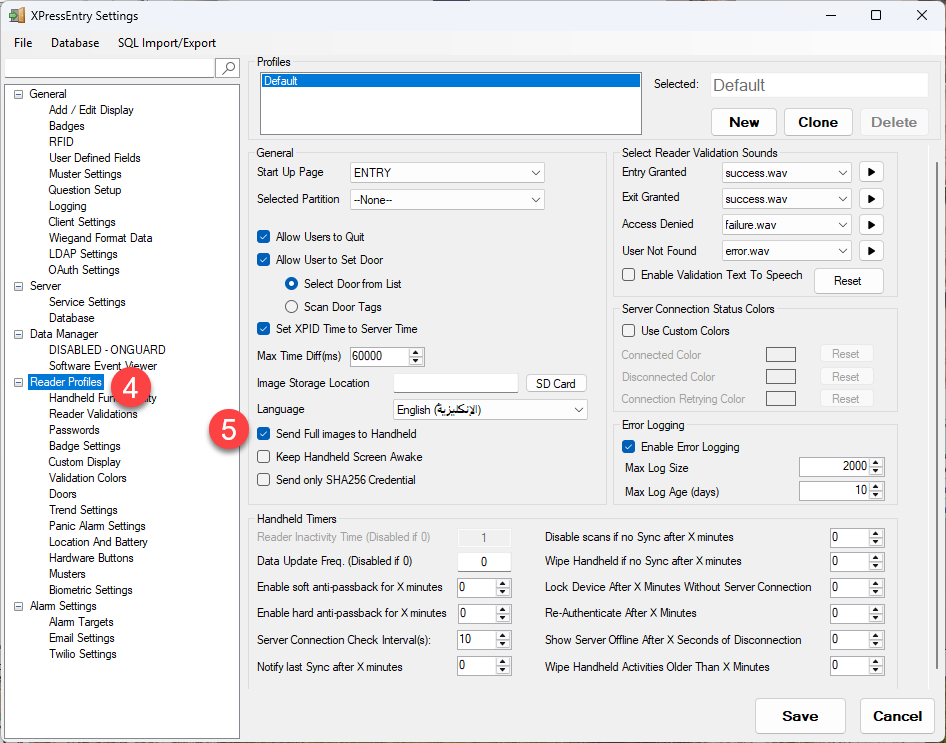
In the left-hand tree, select Reader Profiles.
Check “Send Full Images to Handheld.”
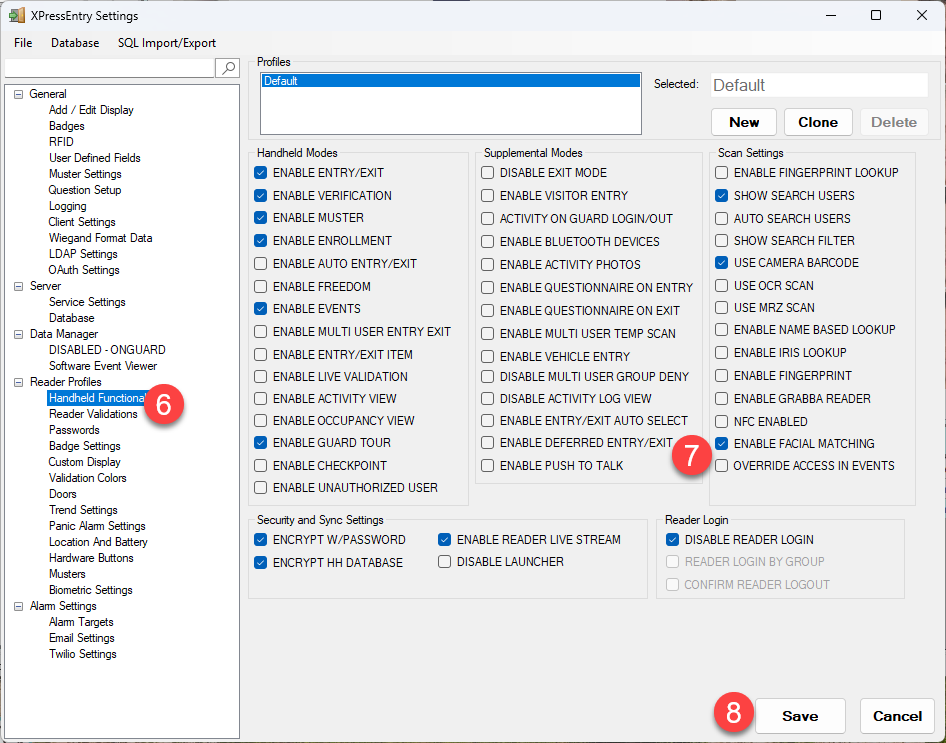
In the left-hand tree, expand Reader Profiles and select Handheld Functionality.
Under the Scan Settings section, check “ENABLE FACIAL MATCHING.”
Click Save.
Handheld Side — XPressEntry Mobile App #
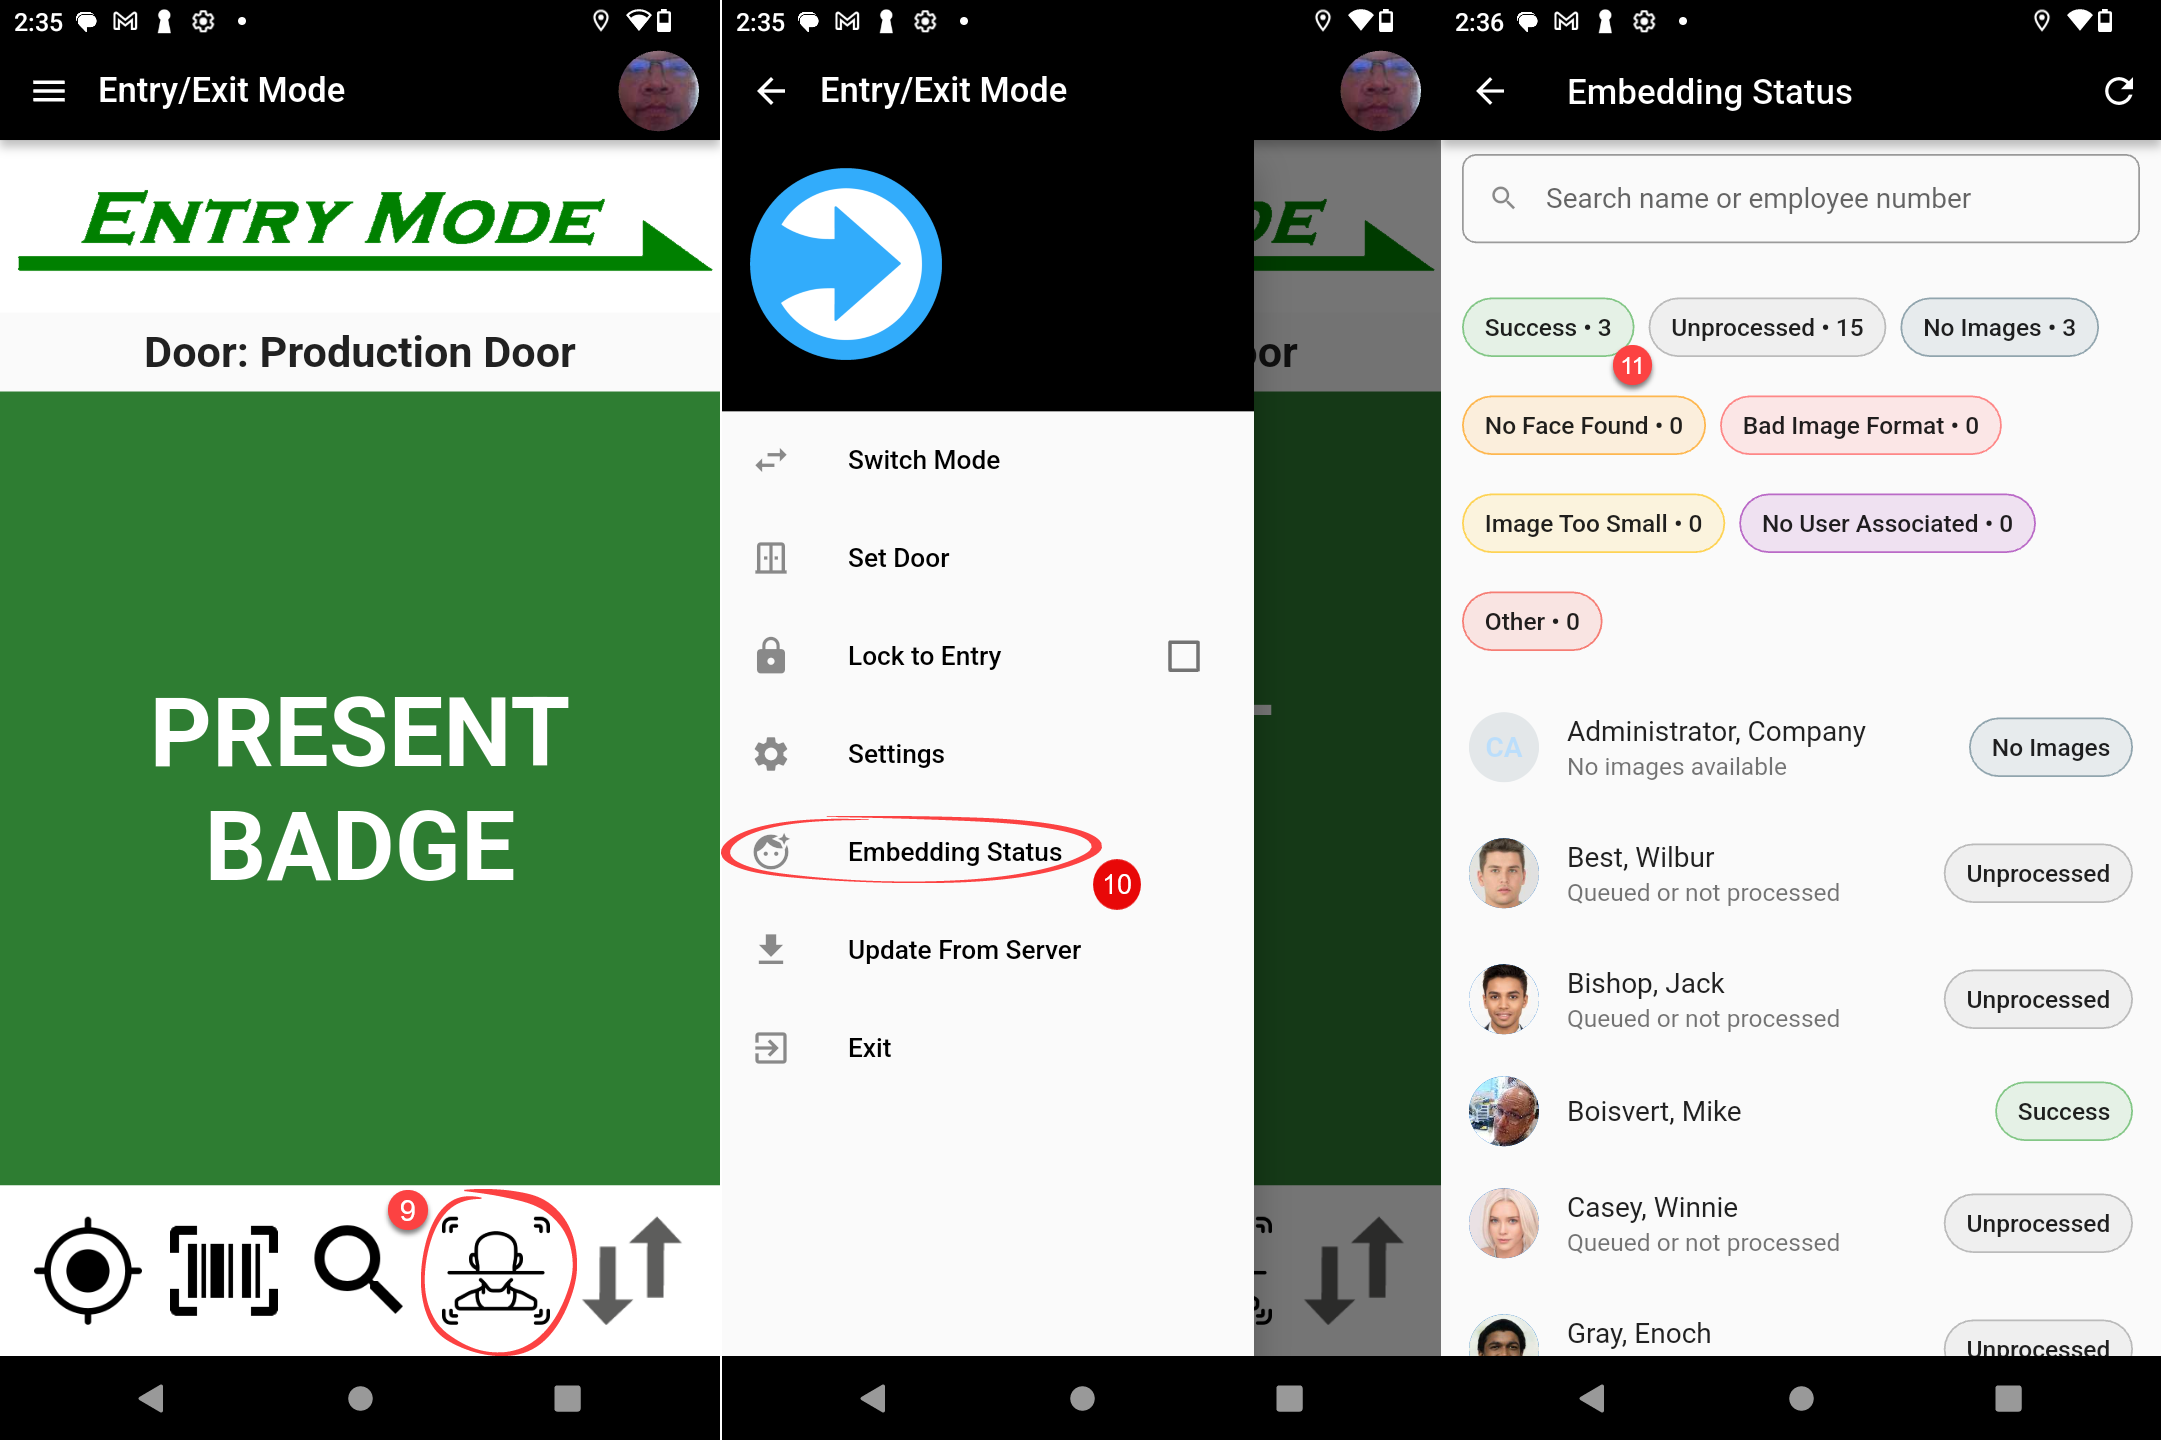
Within the app, confirm the facial recognition icon appears in the bottom toolbar on the Entry/Exit screen. If it’s not shown, resync the handheld to the server.
Open the side Menu and select “Embedding Status.”
On the Embedding Status screen, each user is listed with a processing status (Success, Unprocessed, No Images, etc.). Confirm the specific user you’re testing shows “Success” before attempting a scan for them.
Once embedding shows Success, try a facial scan. Scan success depends on lighting and camera-to-face distance — poor lighting or standing too close/far from the camera are the most common causes of a failed match.
Note: This replaces the older ZKTeco-specific procedure (hardware-fingerprint files or QR/API-key licensing on the handheld) — that flow is deprecated as of XPE Desktop 3.7.699+.
If further assistance is needed, please contact [email protected].


