XPressEntry – CCURE 9000 Documentation

1.Before Synchronizing XPressEntry with CCure, certain requirements must be met
- Make sure that the clients CCURE 9000 License includes the XPressEntry Integration feature in their license feature list. If they do not, please have them contact Software House. This is key to get done before the start of the integration
- Microsoft .NET 4.6.2 is required for XPressEntry Install
- XPressEntry is compatible with Windows 7 and above. XPressEntry is not compatible with windows server 2003 or Windows XP
2.CCure Setup
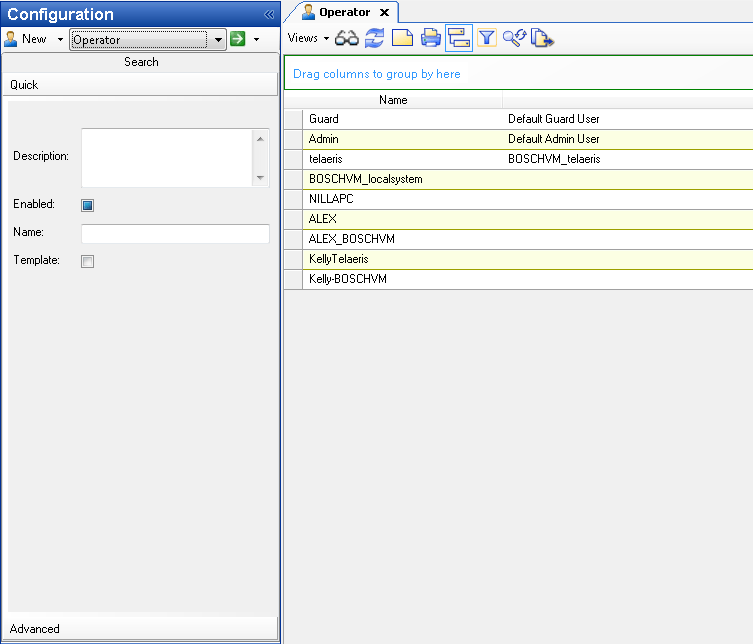
- In the CCURE 9000 Administration Station, create a new operator for the machine that XPressEntry will be running off of, or a new LOCALSYSTEM operator if XPressEntry will be running off the same machine as the CCURE 9000 Machine.
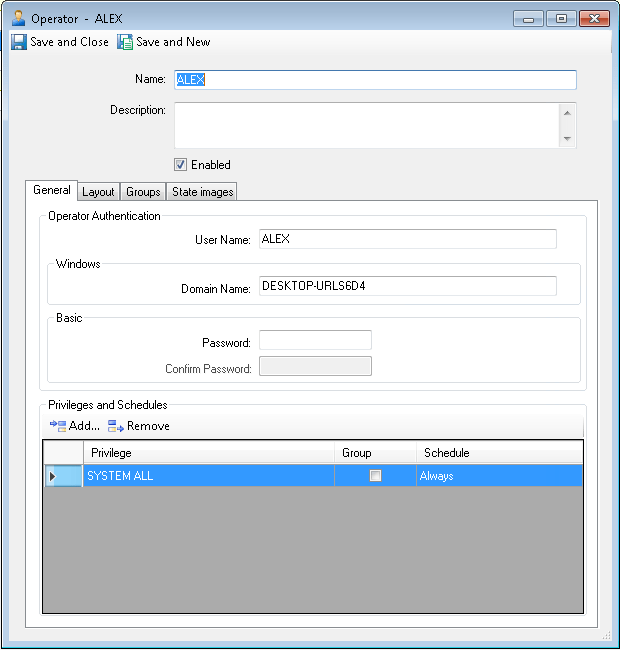
- Select Configuration>Operator and select New
- Configure the Operator as shown below. Ensure the “Enabled” Check box is checked. If XPressEntry will be installed on a remote machine, add the machine name as the “Domain Name”. If XPressEntry is installed on the same box as CCURE, the “User Name” = “LOCALSYSTEM”
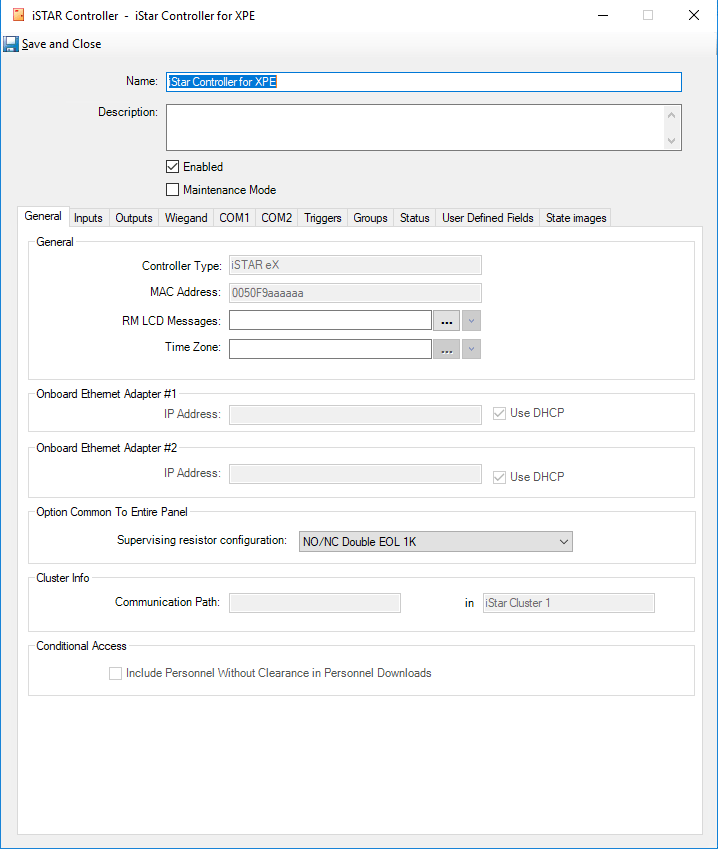
- In the CCURE 9000 administration station, we need to add a new iSTAR classic controller (eX or Ultra are also acceptable) that acts as a logical controller for all XPressEntry handhelds. You can create the controller under a new cluster, or an existing cluster. Add a random MAC Address to this controller. On the boards tab, make sure at least one Access Control Manager (ACM) is configured.
- Double click the ACM that you would like to put the readers on. Click on the Wiegand tab (older versions say Reader’s) and add the different readers. One is required for each entry and exit per passageway. XPressEntry handhelds have an Entry and an Exit mode. If both Entry and Exit will be utilized, add two readers for each XPressEntry handheld.
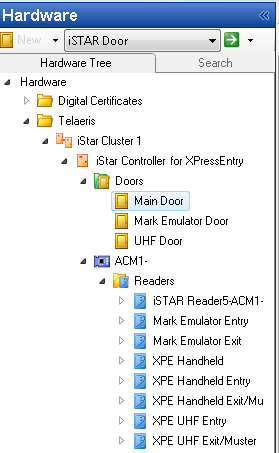
- Next, create a door that uses an inbound and outbound reader that was just created in step 3
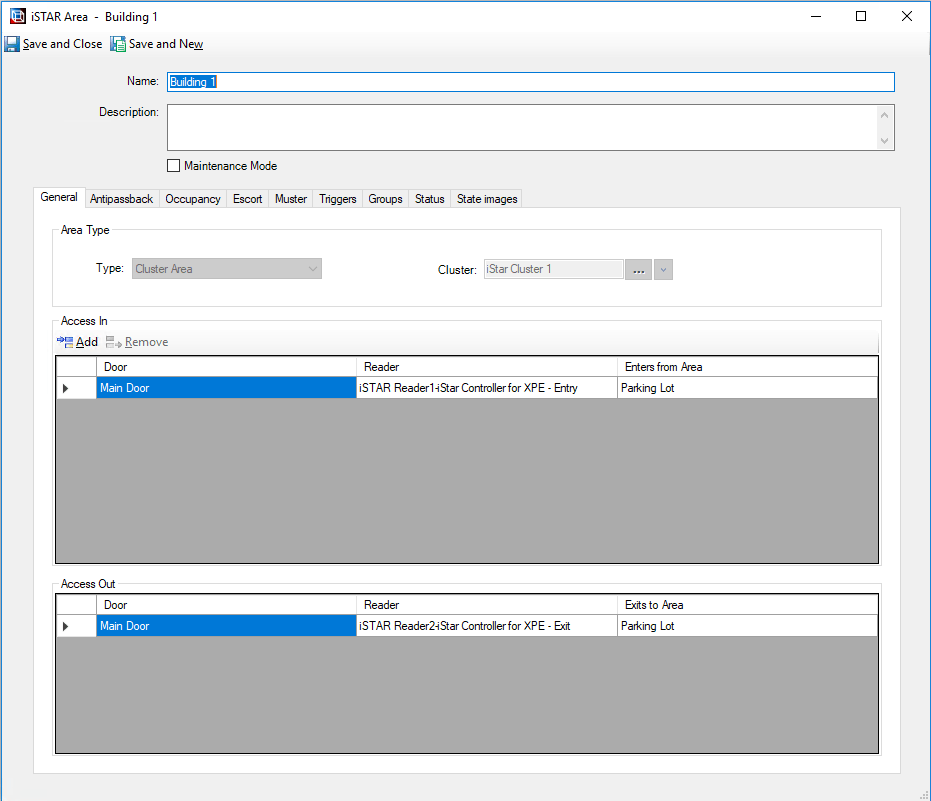
- Go to iSTAR areas and assigned the areas with the doors just created. If the areas are being created for the first time, make sure to create the two areas first before assigning the doors to any of the areas or else CCURE 9000 will not let you save the area with the added doors as there is no second area to add. The Cluster must be set to antipassback if the area is set to antipassback or else you cannot add the door.
- Add the door and readers you have made to their proper zones. Remember to also set appropriate permissions for the readers.
3.XPressEntry Setup on CCure Box
- Install XPressEntry
- Download License file. This license file must have the CCURE 9000 feature enabled
- Set up Service account. XPressEntry utilizes a WCF Service to communicate with CCURE. This Service uses the same username and password as the administrator user account.
- Navigate to Services in Windows. Click on the XPressEntryService. Select Stop.
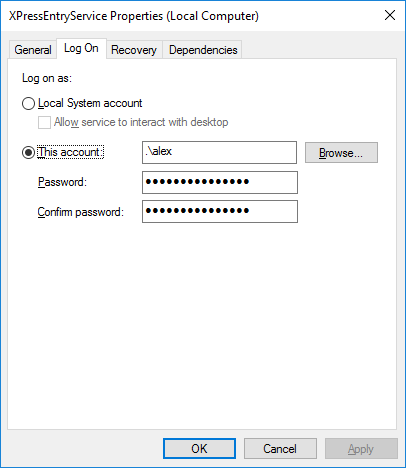
- Right Click the XPressEntryService. Select “Properties”
- Select the “Log On” Tab. Check the “This Account:” radio button. Enter the Windows Username as well as the Password for this Administrator. The Administrator account needs to be the same account as a CCure Operator
- Select “OK”
- Open XPressEntry as an Administrator. If this is the first time you have opened the program, it will have you set up some basic information. Once this is complete, select “Tools>Settings.
- Open the Server Tab. Set the “Server Type” to “Local Windows Service”. Select “Start Service”. The text above will appear green if the service was successfully started.
- Open the Data Manager Tab. Check the box that says “Enable Data Manager”
- Change the “Type” box to say “CCure 9000”
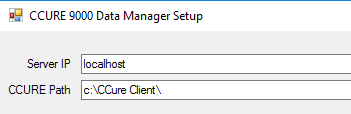
- Click the button that says “Setup Data Manager”
- Under “Server IP”, confirm the value is localhost
- CCure path is the path to the CCure Client folder. By default, it is stored in the program files folder where CCure is installed. Make sure the CCURE Client folder is located at the path specified in this box. If it is not, change the path. Then Select OK.
- 11. Select Ok. Select “Save and Apply Settings”. Then select “Full Sync Now”. If the system is configured correctly, the Data Manager Live Log View will begin to download records from CCure. If errors begin to pop up, navigate to the Trouble Shooting section of this document.
- If the sync is successful, configure the following settings by pressing “Set” and defining the interval in which this action will occur.
- Activity Update Frequency- How often activities are synced between XPressEntry and CCure.
- Partial Sync Update Frequency- How often Occupancy is updated in XPressEntry from CCure.
- Full Sync Update Frequency- How often all records are updated between XPressEntry and CCure.
- Check “Sync Data Manager Activities with XPressEntry” and “Send XPressEntry Activities to Data Manager”
- Select “Save and Apply Settings”

4.XPressEntry Setup on a Remote Box
Settings up XPressEntry on a remote box follows most of the same steps as the instructions before. Below are the exceptions.
- Initial Setup- The box that XPressEntry is installed on must have a User Account with the same username and password as the Operator account on the CCure Box.
- Instruction 3- Navigate to the XPressEntryService Properties. In the “Log On” tab enter the username and password for the User account that is shared between the CCure Box and the XPressEntry Box.
- Instruction 9- In the CCure Configuration, select the set the “Server IP” to the IP address of the Server.
- Instruction 10- Copy the “CCURE Client” folder (Located on the CCure Box where CCure is installed) to the XPressEntry Box. Set “CCure Path” to the location of the file you just moved over.
5.Trouble Shooting
Here are a few possible errors you may see and the ways in which you can fix them.
- Cannot start Service-
- Make sure the software was run as an administrator.
- Make sure the service “Log On” information added is correct (Same as the Windows User Account on both the XPressEntry Box and CCure Box)
- CRITICAL: Error : Could not connect to service at net.tcp://ServerIP:8999/CrossFire/IClientSession
- This message indicates a communication error between XPressEntry and CCure that can be caused by a number of things.
- Start by checking to see if CCure received the log on attempt. To do this, go to the CCure Monitoring Station.
- If there was a log on attempt that failed, the problem is likely an issue with one of your user accounts or the service Log On.
- When remoting into CCure, both boxes must have a Windows Account with the same Username and Password.
- The Windows Account on the CCure box must be set up as an operator. See CCure Setup Instruction 1.
- The Service must have the Windows User Account Credentials. See XPressEntry Setup On CCure Box Instruction 3.
- If there is no log on attempt showing in the CCure monitoring station, check the following.
- Inbound Firewall blocking port 8999 on the CCure Box.
- Outbound Firewall blocking port 8999 on the XPressEntry Box.
- XPressEntry Setup On a Remote Box- Initial Setup
- Verify the CCURE Client folder is in the location specified in the CCURE setup form.
- If the above is configured correctly, copy all files from CCure Client folder to XPressEntry installation.
- The XPressEntry installation is located at “c:\Program Files (x86)\Telaeris\XPressEntry\”
- Move all files in CCure Client folder to above location.
- Move all files in CCURE Client/us-en to above location.
- Select “Replace Files in Destination”