Installation and Upgrade Guide Documentation

1.Foreword
The purpose of this document is to explain the installation requirements, pre-requisites, installation and configuration steps, upgrade procedures, and uninstall steps of your software solution.
2.Installation Preparation
2.1.Installation Requirements
- XPressEntry installer (latest version) and license file. Administrator rights are required for installation.
- Windows Firewall ports 30000/30001 opened for the XPressEntryService executable. This is needed for the handheld devices to find the server.
2.2.Installation Pre-requisites
- Windows 7/Windows Server 2012 or newer, >= 8GB RAM
- .NET Framework 4.7.2
- 20GB free disk space for very large installations.
- A windows domain service account (or local user if no domain) for the XPressEntry Service. Will be set to be either DB Owner or DB Reader/Writer of the XPressEntry SQL Server database.
- SQL Server or SQL Server Express installed and available locally or within the network.
3.Installation of XPressEntry
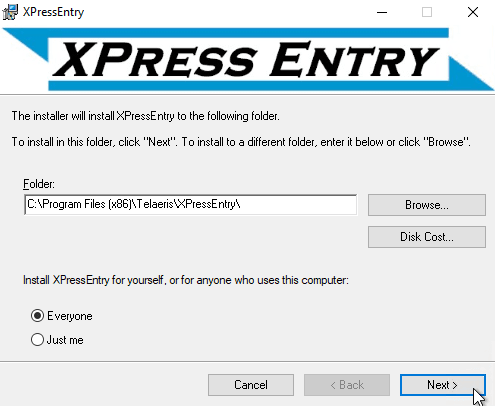
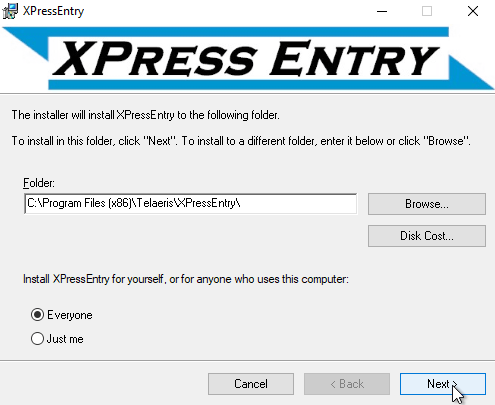
3.1.Run the XPressEntry MSI Installer
- Run the XPressEntry MSI Installer.
- Select the Location to install XPressEntry
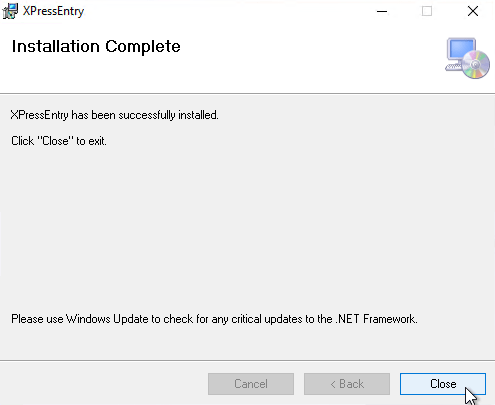
- When the installation is complete, select Close.

3.2.XPressEntry Service Setup
A Windows service account for SQL Server database trusted connection access is required.
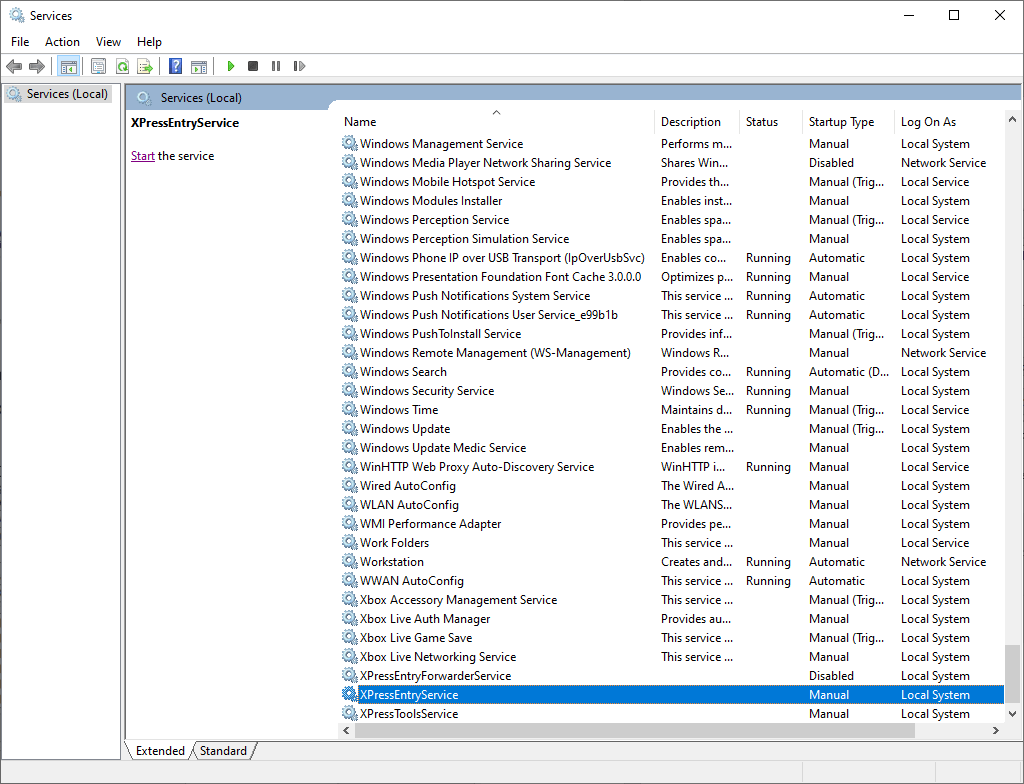
NOTE: If the windows service account that will be used IS NOT an administrator on the Windows machine, first Start the XPressEntry Service for the first time as Local System, and stop the service before continuing.
- Open Windows Services. Search for the XPressEntry Service, Right Click, and click properties.
- Click Log On Tab.
- Click This Account, and enter the Windows domain service account information that will be used to connect to SQL Server. Click Apply.

3.3.Setup SQL Server
SQL Server
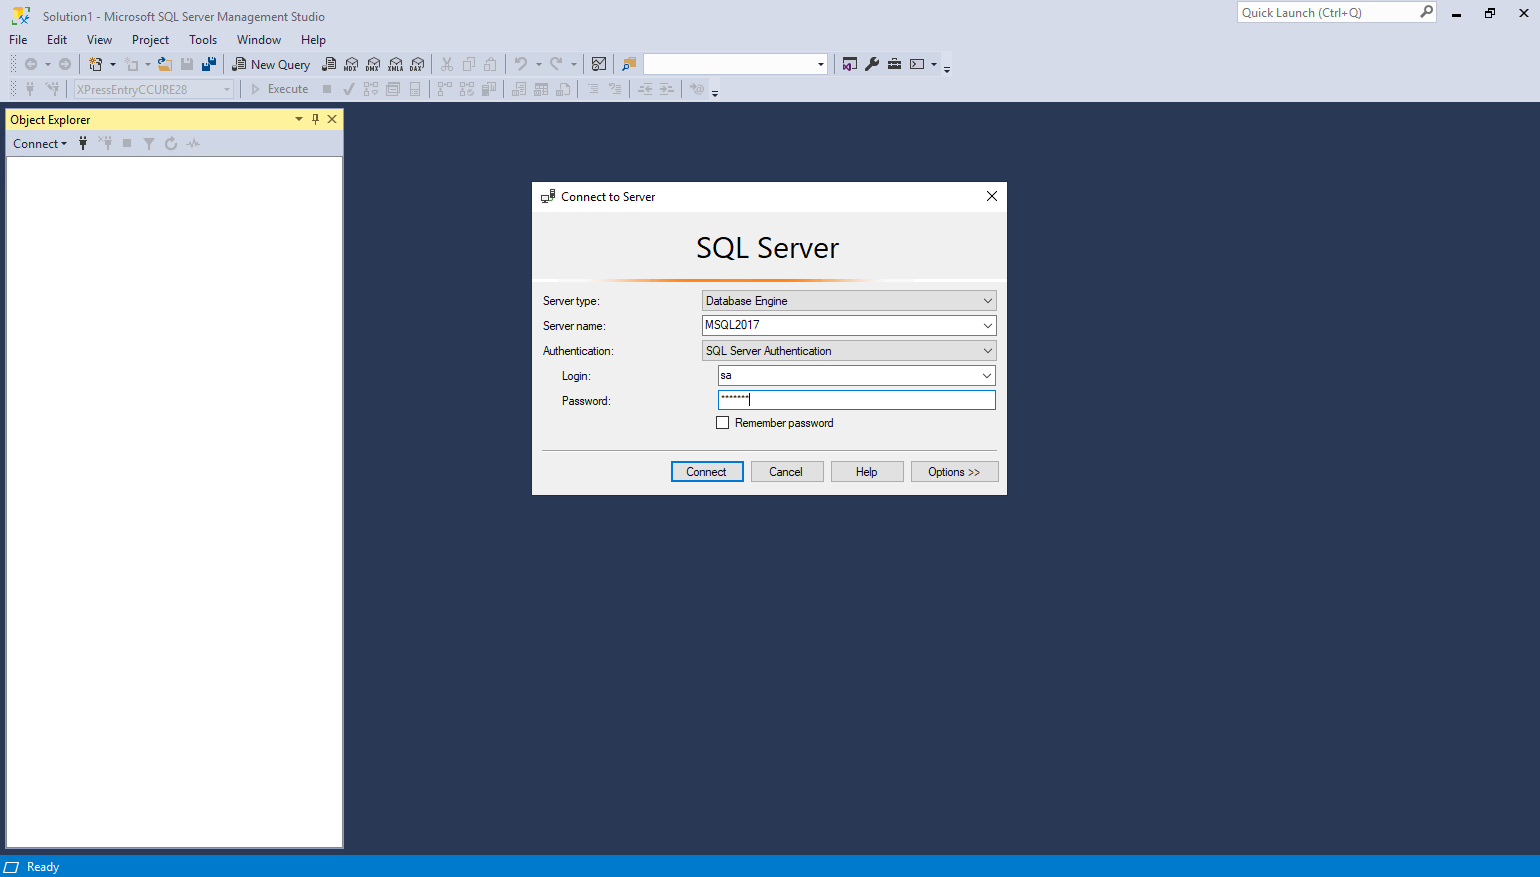
- Open SQL Server Management Studio. Login with an account with database admin access.
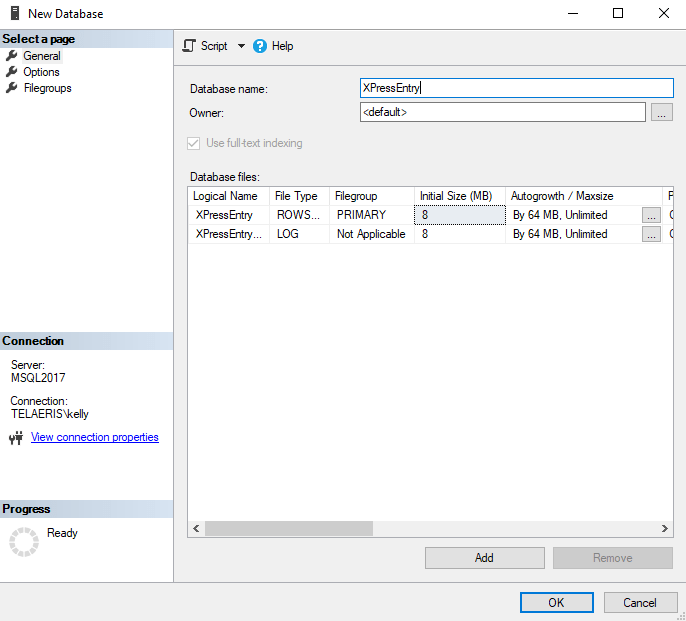
- From the Object Explorer window, right click Databases and click New Database… Name the database for the XPressEntry database. Click OK.
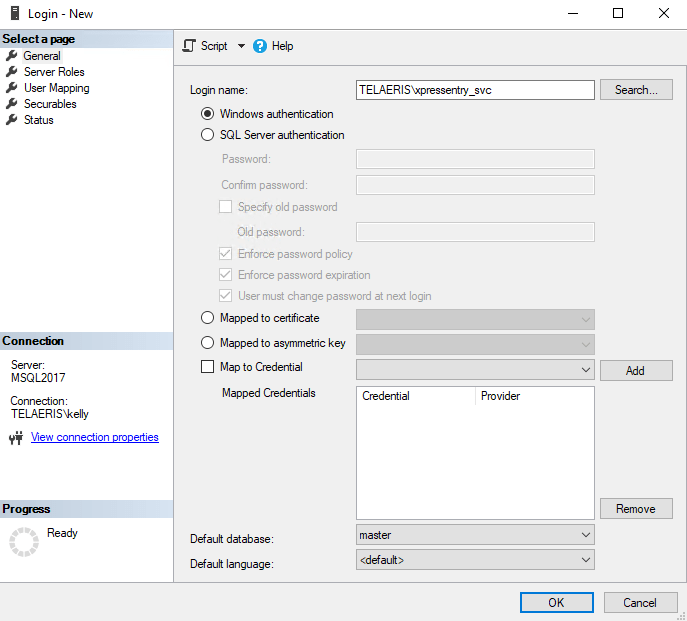
- Next, we need to give the Windows service account dbo.owner access to the newly created XPressEntry database. From Object Explorer window, expand Security, and right click Logins. Click New Login… Search or add the windows service account for the Login name.
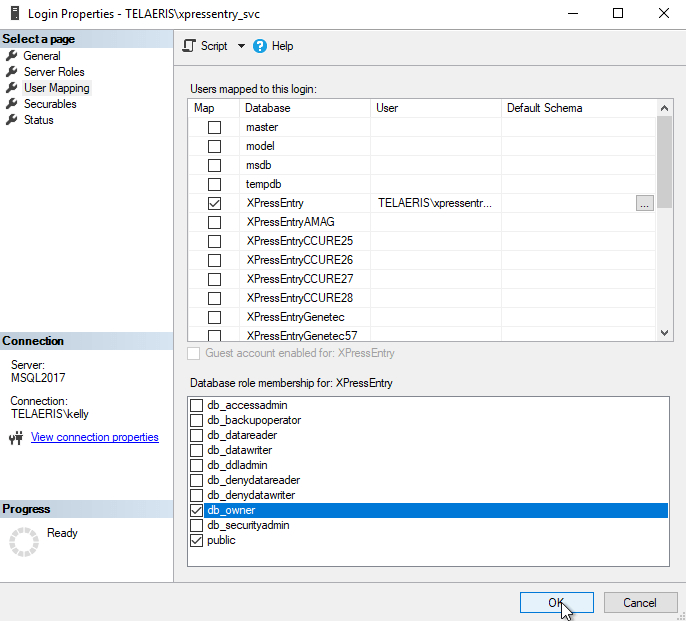
- Click on User Mapping on the left Select a page window. Search for the newly created database, and check the Map box. Below, in the Database role membership, check db_owner, or separately, the combination of db_datareader and db_datawriter. Db_owner supersedes db_datareader and db_datawriter Click OK.
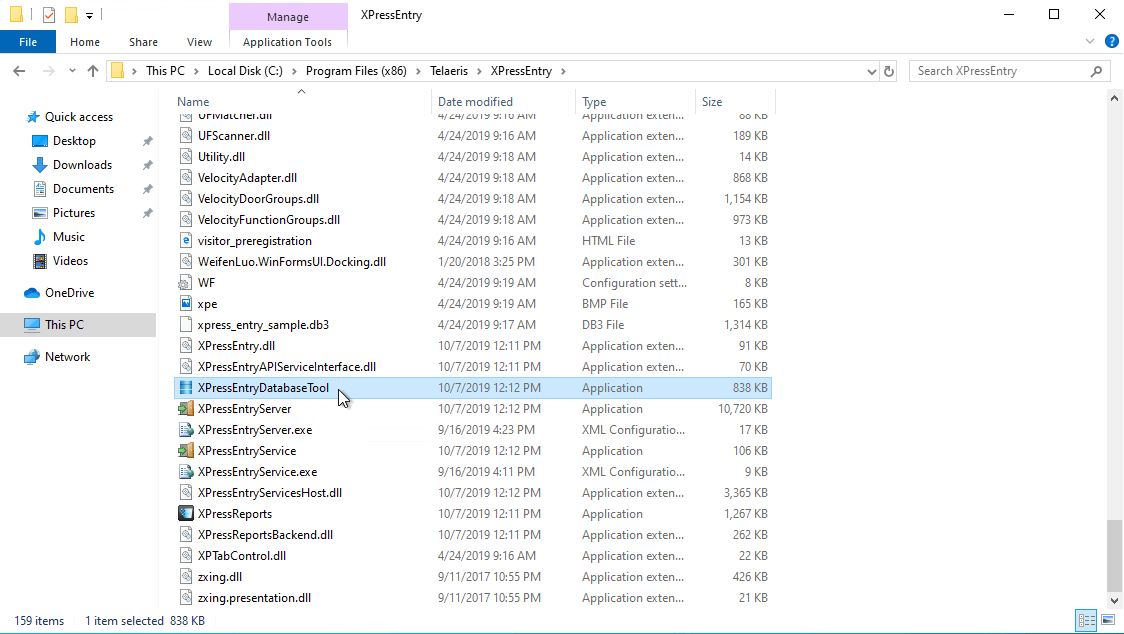
- Go to the location where XPressEntry was installed, or search in the Windows Start Menu for XPressEntryDatabaseTool. Run the XPressEntryDatabaseTool.exe
- Any Windows user that will be accessing the XPressEntryDatabaseTool will require db_owner access to run database migrations. Running XPressEntryDatabaseTool as the service windows user will streamline the process if it is set to db_owner.
- Any Windows users that will be accessing the XPressEntry Server Application will also need db_datareader and db_datawriter access. This can be assigned to the domain users, or explicitly to administrators or specific users only.
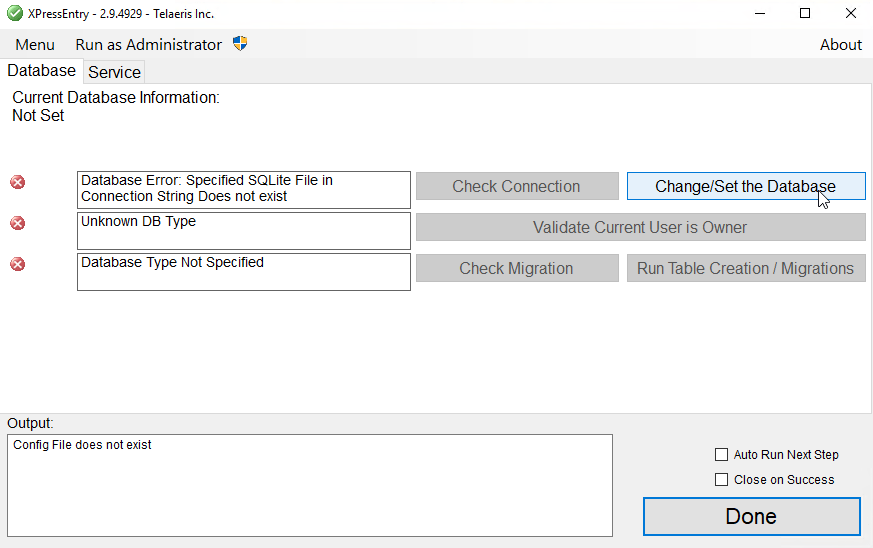
- Add the XPressEntry License – Click Browse for License File and add the license file provided by Telaeris. If successful, the About XPressEntry page will close.
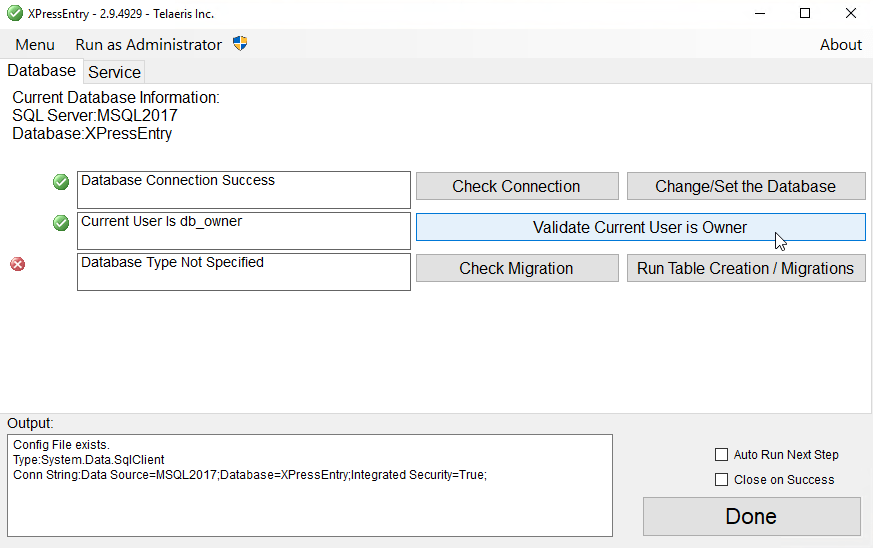
- Click Change/Set the Database
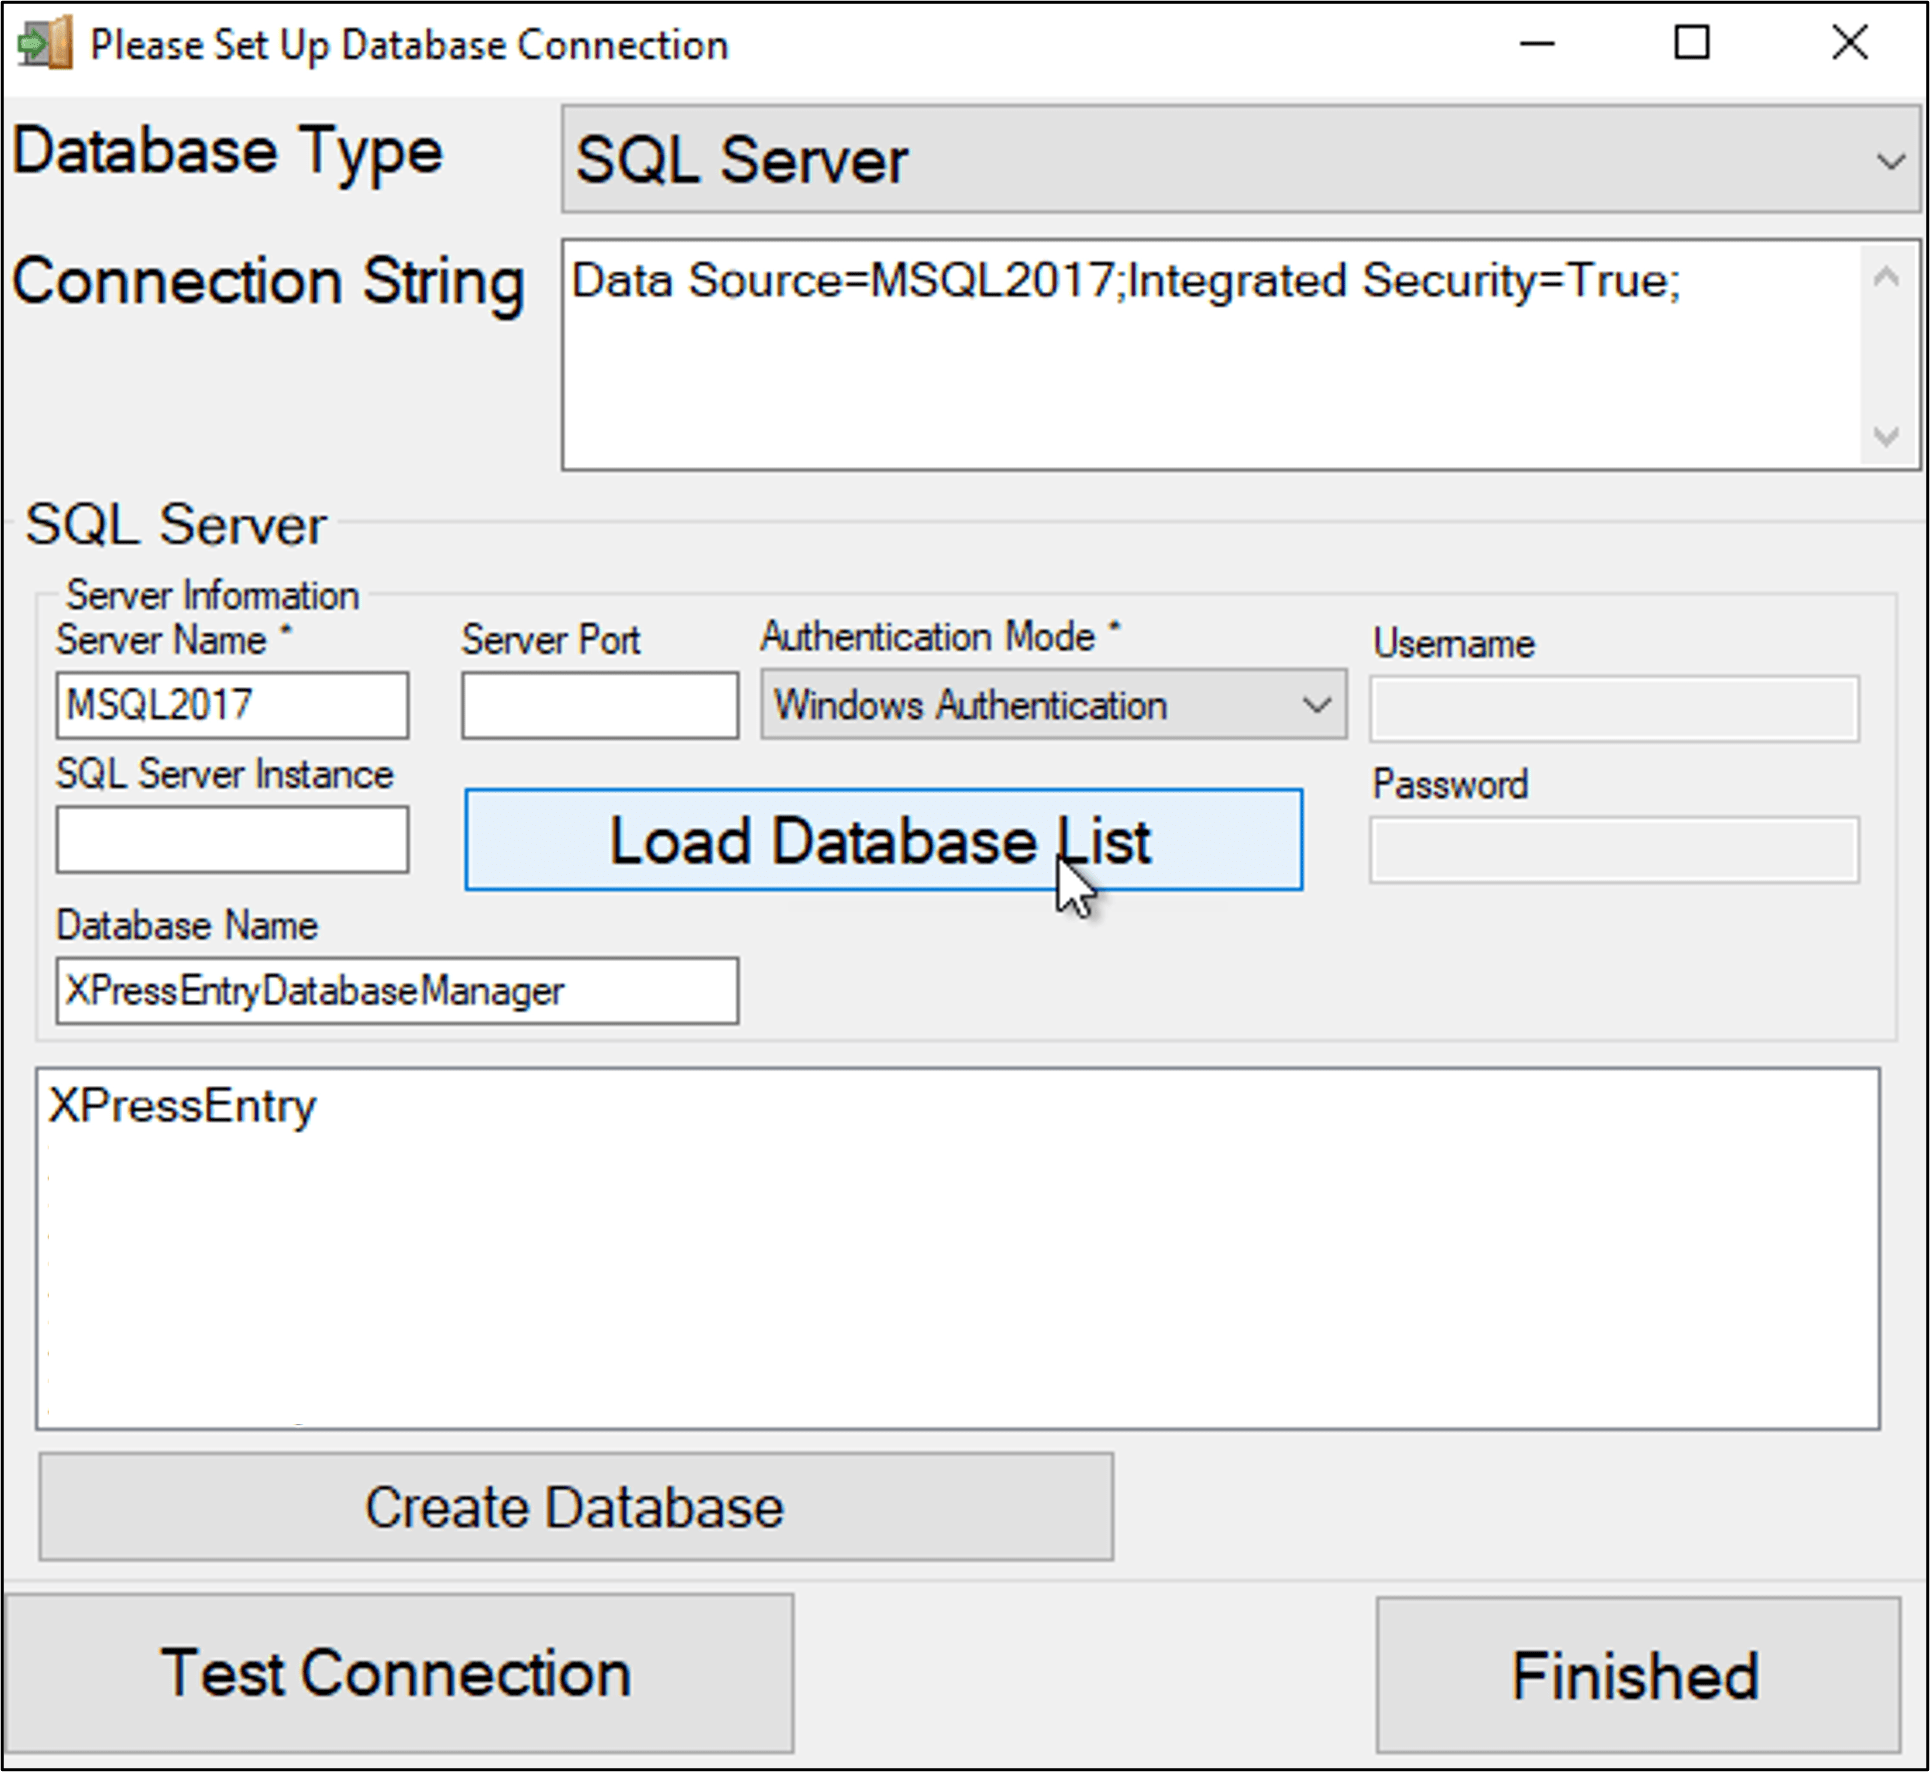
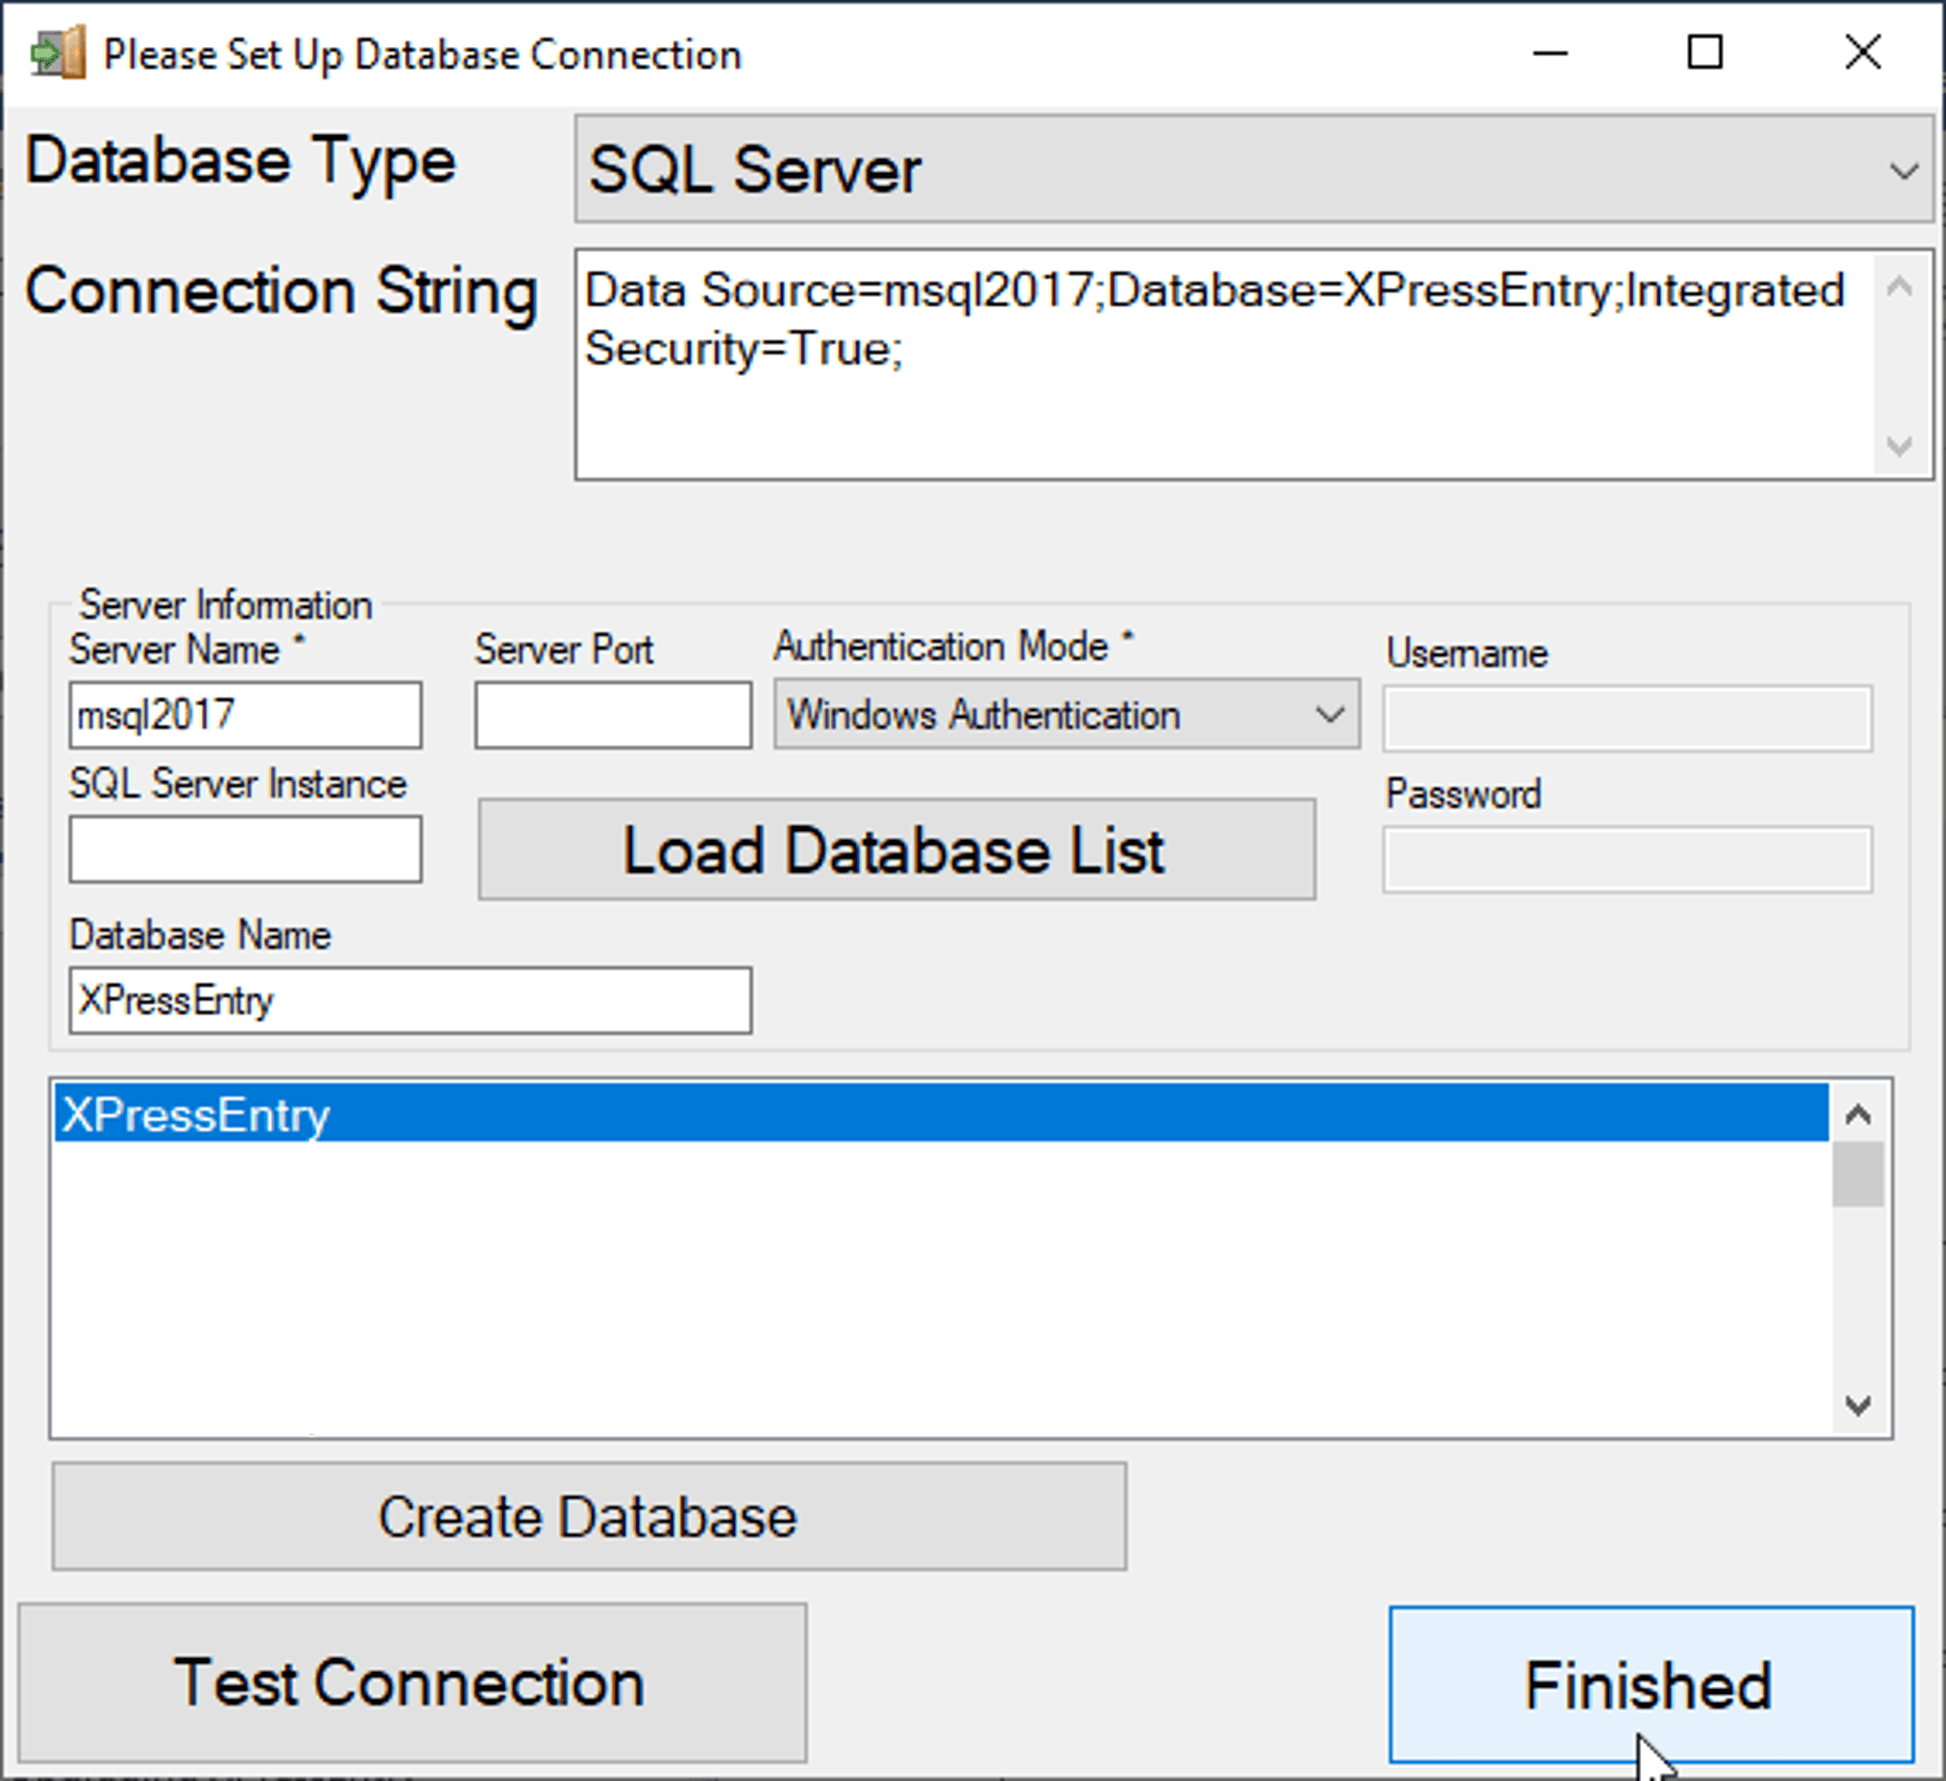
- Set the Server Information of the SQL Server Database, and click Load Database.
- Select the XPressEntry database to connect to, and click Finish.
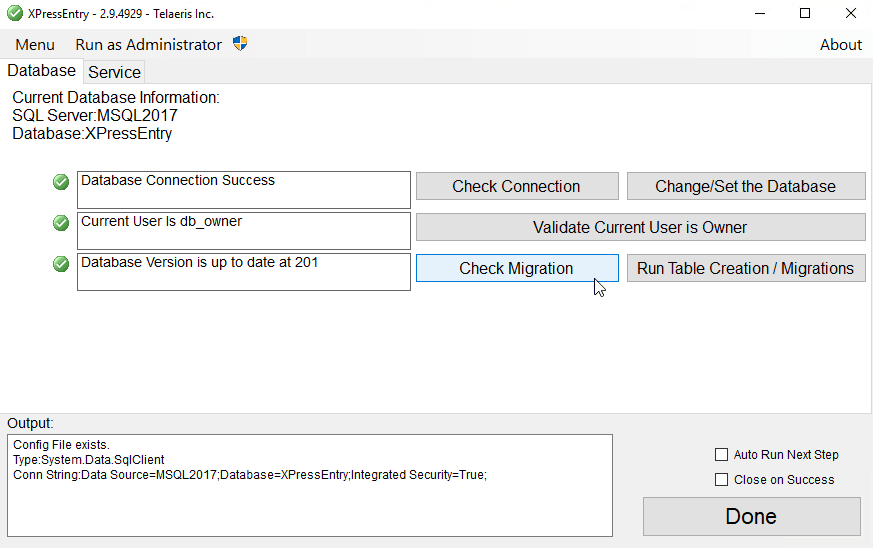
- Click Validate Current User is Owner.
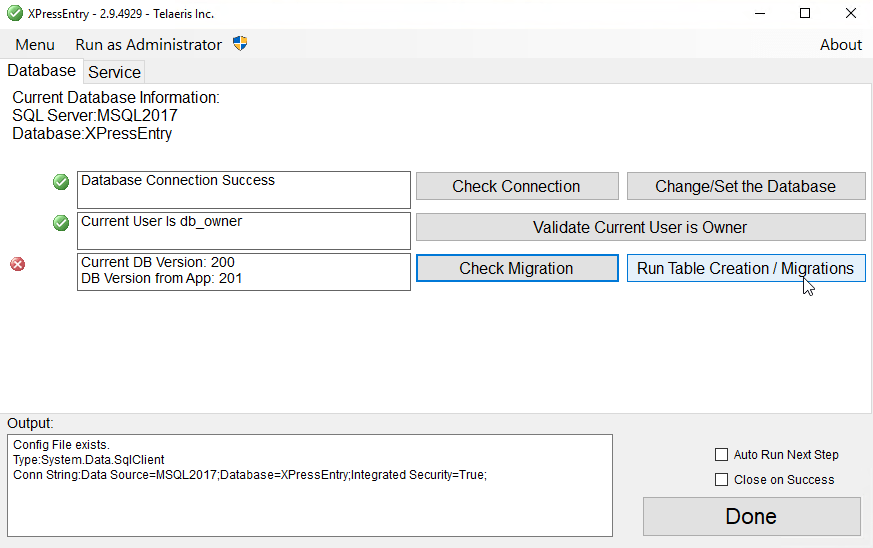
- Click Run Table Creation/Migrations.
- The database connection is setup correctly when Database Connection Success, Current User is db_owner, and Database Version is up to date are shown.
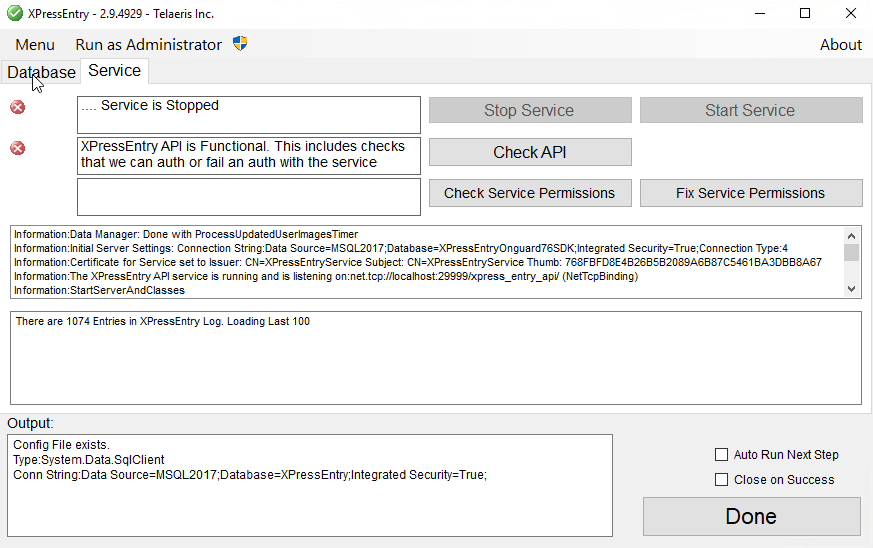
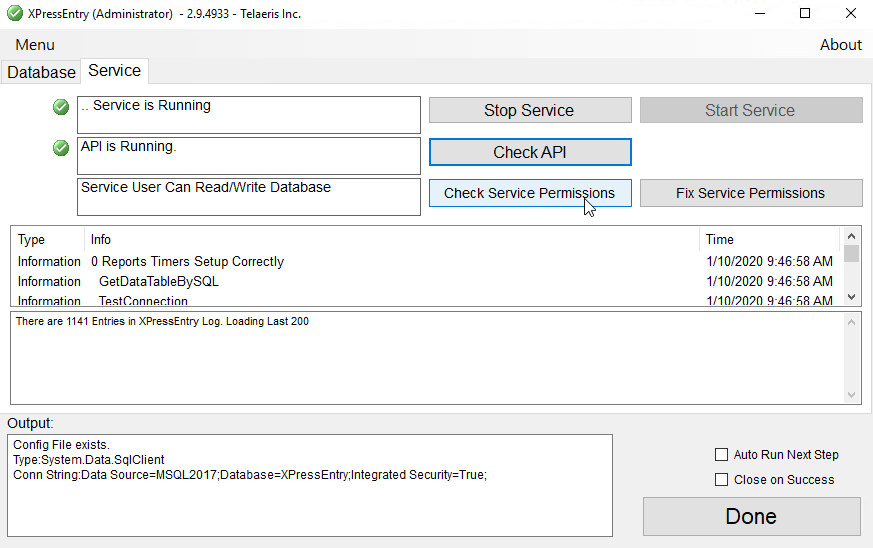
- If XPressEntryDatabaseTool is running as Administrator, you may stop or start the XPressEntry Service. It is okay for the service to be stopped with red X icon.
- Check API will check if the API route is functioning properly. This requires the service to be started.
- Check Service Permissions will check if the Log On user for XPressEntry service has proper read and write permissions to the XPressEntry database.

3.4.Database Troubleshooting
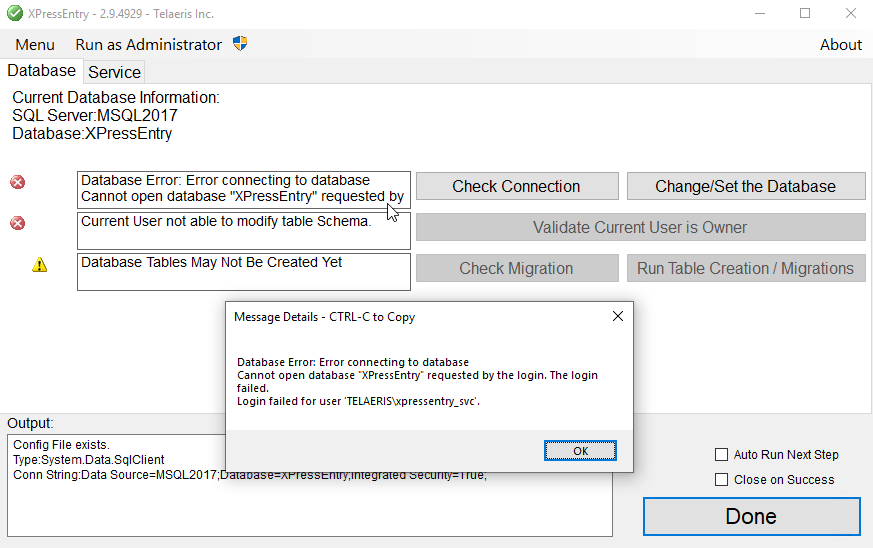
- You may double click any error box to display the full message.
- If the Logged in windows user does not have reader or write access to the XPressEntry database, you will see the following error message during opening, or when click Check Connection. Assign proper read and write access to the current windows user.
4.Upgrading XPressEntry
- Run the XPressEntry MSI Installer and/or the specfic Datamanager Plugin Installer.
- Select the Location to install XPressEntry.
- When the installation is complete, select Close.
- Go to the location where XPressEntry was installed, or search in the Windows Start Menu for XPressEntryDatabaseTool. Run the XPressEntryDatabaseTool.exe
- Check the Database Migration Version by clicking check migration. If the Migration version needs to be updated to the latest version, select Run Table Creation/Migration. If the Migration version is up to date, Database Version is up to date at [VERSION].
- Click Done. Start the XPressEntryService.

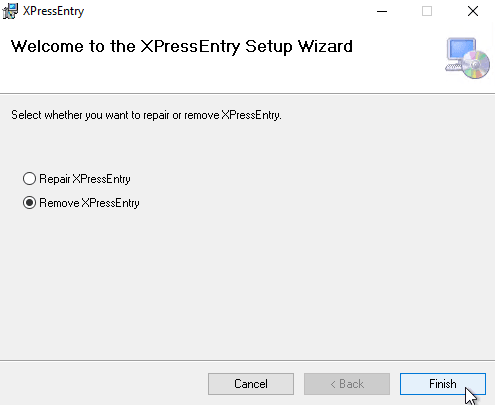
5.Uninstalling XPressEntry
- Stop the XPressEntryService.
- Run the XPressEntry MSI Installer or XPressEntry specific Datamanager Plugin Installer. Select Remove XPressEntry.
- Select Everyone. Click Next.