XPressEntry – Honywell EBI Documentation

1.Purpose
This document is intended to instruct the user on how to synchronize an XPressEntry mobile access control system with a Honeywell EBI access control system.
This will allow XPressEntry to have a copy of the Cardholders and Cards and their access privileges from EBI. Activity records cannot be pushed back into EBI at this time.
1.1.Assumptions
This document makes a few assumptions:
- The reader is familiar with XPressEntry systems and terminology. Basic setup and usage of XPressEntry can be found in the main XPressEntry manual
- The reader has a basic understanding of Microsoft SQL Server Management Studio.
- The Honeywell EBI installation is administered by someone with knowledge and access to SQL Server commands.
- Honeywell EBI includes the Cardholder Services module.
1.2.Installation
We will not cover installation of either XPressEntry or Honeywell EBI here. Refer to the appropriate manual to get that set up.
2.EBI Setup and SQL Server
2.1.EBI Server Version
In order for the XPressEntry integration with Cardholder Services to work properly, EBI needs to be using at least version 410.2 and have the following patch or equivalent installed: Version: Server_R410_2_SP1_ISR159842_Cardholder_Services_Update.exe
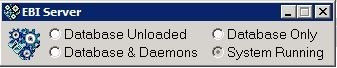
2.2.Is EBI Running
For Cardholder Services to function properly, the EBI server has to be running. It should look something like this:
2.3.Test Harness
The Cardholder Services installation comes with a Test Harness application to check functionality. It is typically located at:
C:\Program Files (x86)\Honeywell\Server\user\CardholderServicesTestHarness.exe
Usage of the test harness is not covered here, but if you can “Get All Types” on the Cardholders tab, you are communicating with EBI through Cardholder Services correctly.
2.4.SQL Scripts
The EBI install should come with two SQL Scripts to enable the Users location and Zones as well as access rights / zones as UserTables through Cardholder Services. These files are named
These scripts should be run on the EBI database by the SQL Server administrator.
3.XPressEntry Data Manager Synchronizer Setup
XPressEntry and EBI communicate through the EBI Cardholder Services interface. From the XPressEntry side, this done by a module called Data Manager. This section will describe how to set up and get the Data Manager running for EBI.
3.1.XPressEntry Enable Synchronization
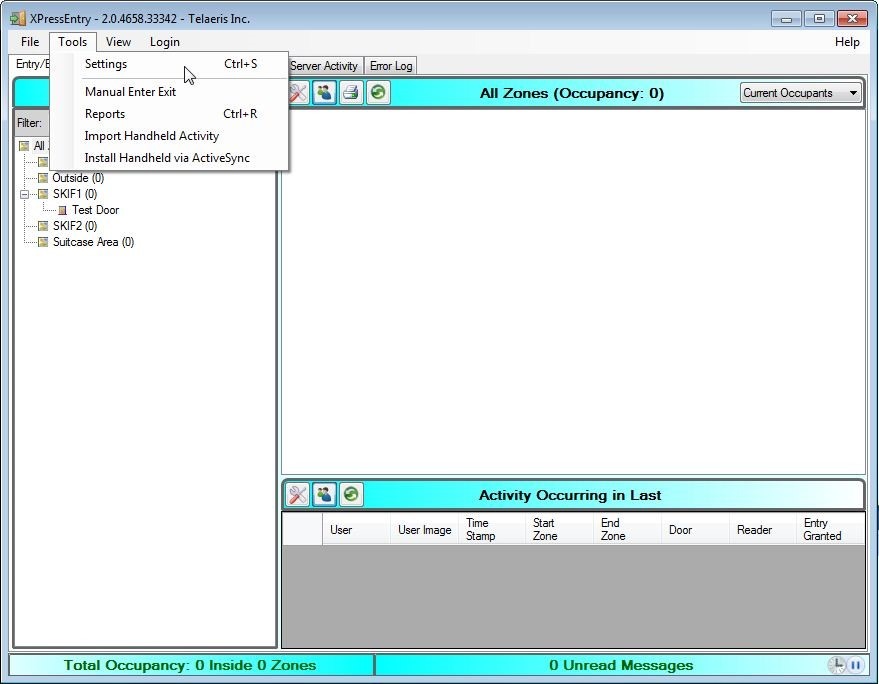
From the main page of XPressEntry, go to XPressEntry / Settings (CTRL+S)
3.2.Data Manager Tab
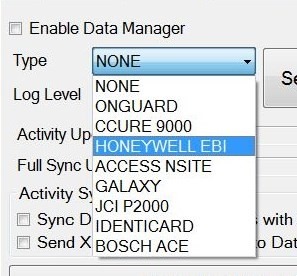
From the Settings Page Select the Data Manager Tab. When it is empty it looks like this:
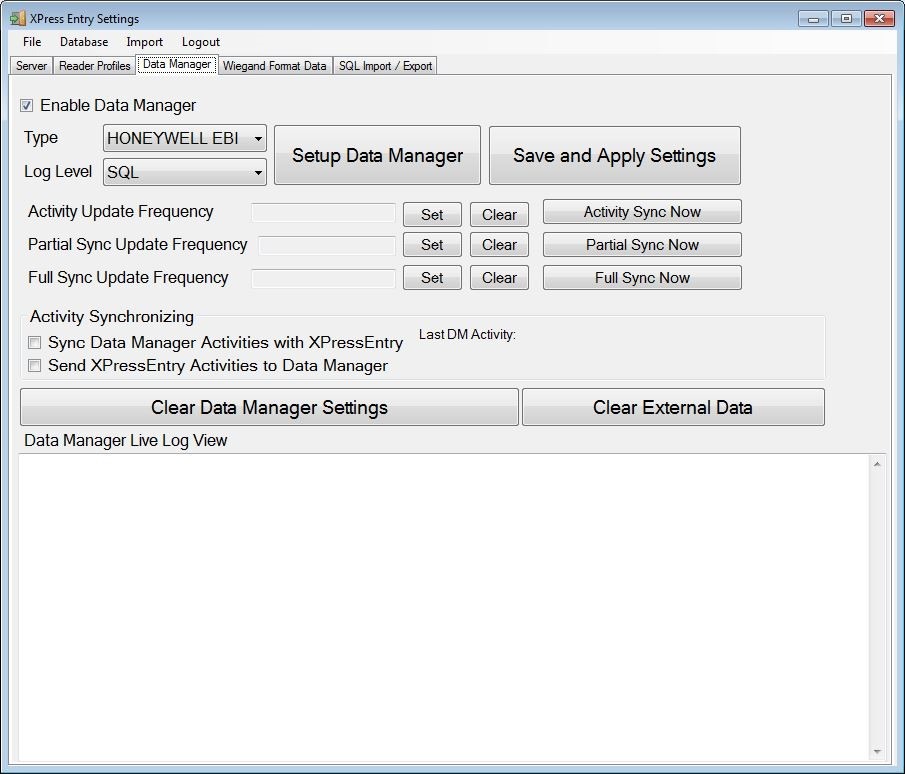
From the ‘Type’ Combo Box, select “Honeywell EBI”.
3.2.1.Update Frequency
Set the Update Frequency to as often as you want the system to update. Note that only one update can run at a time and if this value is very low the system will constantly try to update (this is not always a problem).
For EBI Installations, we want to set both the Activity Update Frequency and the Full Sync Update frequency. Activity Update will fill the locations of the users in EBI at the given frequency. Full Sync will do the rest of the updates. Partial Synchronization is not used with EBI.
3.2.2.Log Level
Select the Log Level desired. When setting up the system, SQL is the suggested Log Level. Once the system is up and functional as desired, CRITICAL should be the default Log Level.
3.2.3.Activity Synchronizing
Activity Synchronizing is not done with EBI at this time and these checkboxes will have no effect when you have EBI selected and set up.
3.3.Honeywell EBI Setup Page
Press the “Setup Data Manager” button to get the EBI specific setup screen.
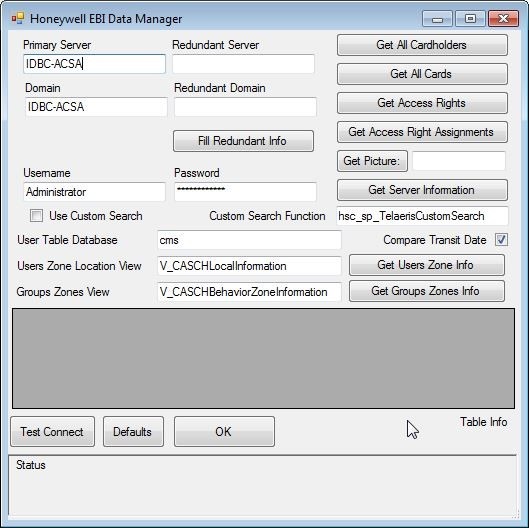
The first thing to do from this page is fill in the primary EBI server which has Cardholder Services running.
3.3.1.Important Fields
There are 3 important fields to fill out on this page:
- Primary Server – the name or IP address of the primary EBI server
- Username – A valid administrator on the EBI server
- Password – The password for that user.
These credentials should be supplied by your EBI administrator.
Once you’ve filled out the basic information, the button: “Get Server Information” or “Test Connect” will attempt to connect to the server.
Redundancy information will be automatically filled out if you press the “Get Server Information” button. If your connection fails, check the text box at the bottom of the screen for information on the failure.
3.3.2.Other Fields
Compare Transit Date – should be checked. It will compare the Users/Zones TRANSIT_DATE field from EBI with the last scan date in XPressEntry. The later date will be applied as the user current location.
User Tables – These fields should not change from the defaults unless the SQL Server Administrator specifies a change.
When you are done with this step, press OK to send the setup information back to XPressEntry Data Manager.
IMPORTANT: You MUST press the “Save and apply settings”button for any data manager changes to take effect!
After you’ve saved, you can press the “Full Sync Now”button to synchronize XPressEntry with EBI. Make sure you’ve set the synchronization update frequency on the main Data Manager tab.
When the Data Manager is setup and running with EBI, it should look something like this:

4.Setup XPressEntry Data
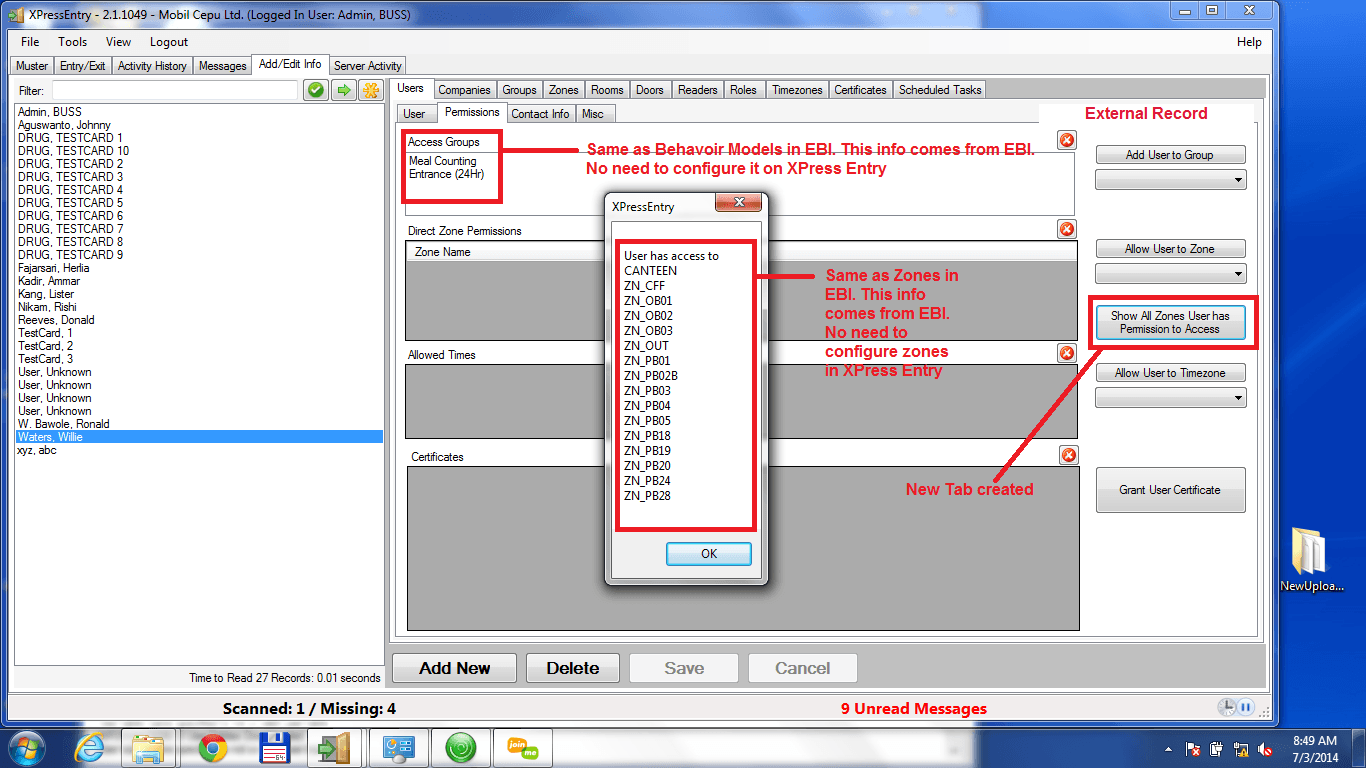
Once the EBI System is set up and synchronizing, you will see the EBI data represented in XPressEntry under the Add/Edit Info tab. Data which is imported from EBI cannot be changed by default and is grayed out / read-only.
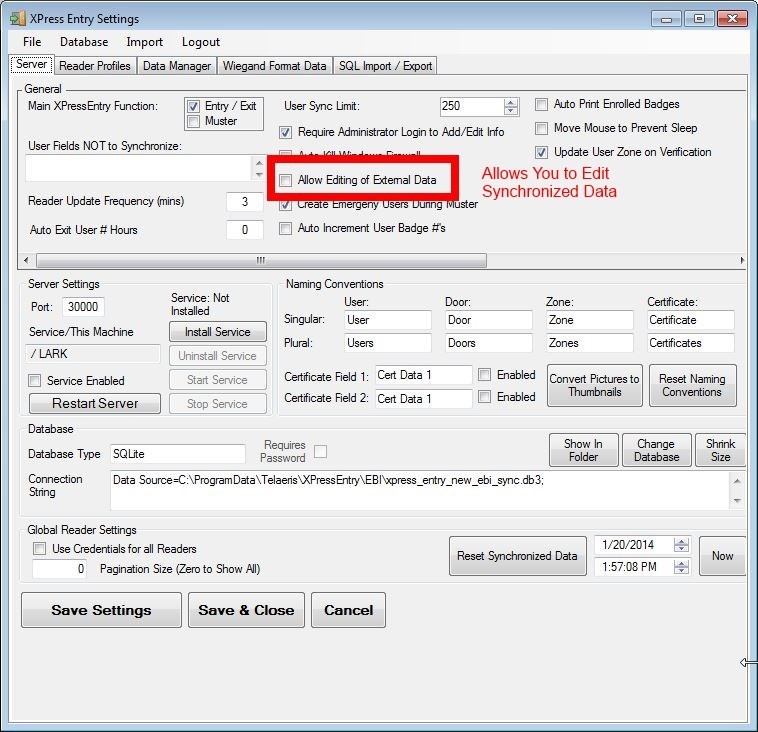
4.1.Allow Editing of External Data
If you want to be able to edit this data for whatever reason after it’s been synchronized, you can do that with the setting on the main settings tab:
4.2.Readers
Readers for EBI Synchronization are strictly an XPressEntry entity. You can set up your readers to have one or many different configurations at a given time. This is done by selecting a Reader Profile for the reader.
There are two types of readers in XPressEntry, physical and logical readers.
4.2.1.Physical Readers
A physical reader in the XPressEntry system is a handheld or other device set up to communicate with the server. It is uniquely identified by the GUID field for the device.
Very often a physical reader will have a long/nonsensical name like: 570069006E00430045000000-00-008703124863. These readers are using the GUID as the default name for the device once they’ve synchronized.
4.2.2.Logical Readers
Logical readers are readers in the system which are usually placeholders for physical readers.
4.2.3.Merging Physical/Logical Readers
Note: This process is irreversible!
To merge the logical and physical readers do the following:
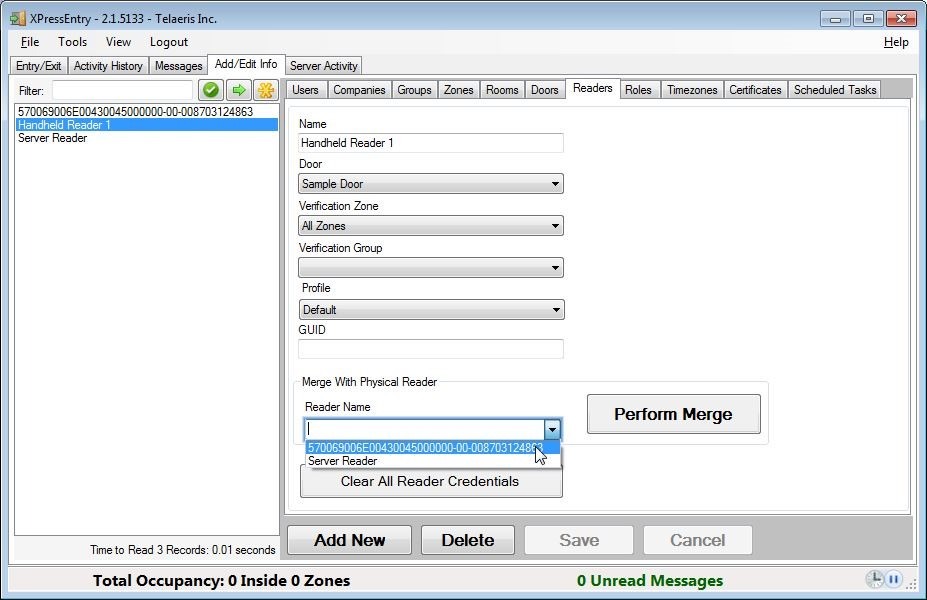
- Select the Logical Reader from the Add/Edit Info Readers tab
- Under “Merge with Physical Reader”, select the physical reader as identified by its name (typically the GUID) from the drop-down list “Reader Name”.
- Press “Perform Merge”.
If you don’t know the GUID of the exact reader you’re merging, the reader GUID is available on the handheld device on the Setup page under the “More” tab.
4.3.Reader Profiles
All readers in the XPressEntry system need a reader profile set up for them. These can be shared across readers with identical responsibilities. See the main XPressEntry manual for more information.
4.4.Doors
Doors are portals from one zone to a different zone. They are a logical way to move from one zone to another. They are primarily used by XPressEntry for handhelds in Entry/Exit mode.
Users “Entering” a door are going from the Start Zone -> End Zone. Users “Exiting” a door are going from the End Zone -> Start Zone
When using XPressEntry for Entry/Exit mode, you should set up XPressEntry to have at least one door and make sure the zones make sense for the EBI integration. If you’ve already synchronized the activities from EBI, you should see the EBI zones here.
4.5.Zones
XPressEntry has two types of zones. “Outside” zones are used for mustering and representing the area outside of the location XPressEntry is tracking. All other zones are considered part of the system. Occupancies are only tracked for users who are in non-outside zones.
As explained below, all zones are coming directly from EBI. The Groups are the same as the Behavior Models in EBI. This information can all be verified in XPressEntry, but it is set in the EBI system.