XPressEntry – Bosch Documentation

1.Purpose
This document is intended to instruct system administrators on how to synchronize an XPressEntry system with a Bosch ACE system.
2.Setting Up Bosch ACE to Synchronize with XPressEntry
It is assumed that BIS (Bosch Integrated System) is installed on a server. Included in this should be the Access Engine (ACE). XPressEntry has been tested on Bosch ACE Version 4.3. For integrations into other versions of Bosch ACE, please contact Telaeris to confirm compatibility.
2.1.Order of Operations
- Create a Bosch API Operator
- Set-Up Bosch Reader Data
- Enable Synchronization from XPressEntry
- Set-Up XPressEntry Data
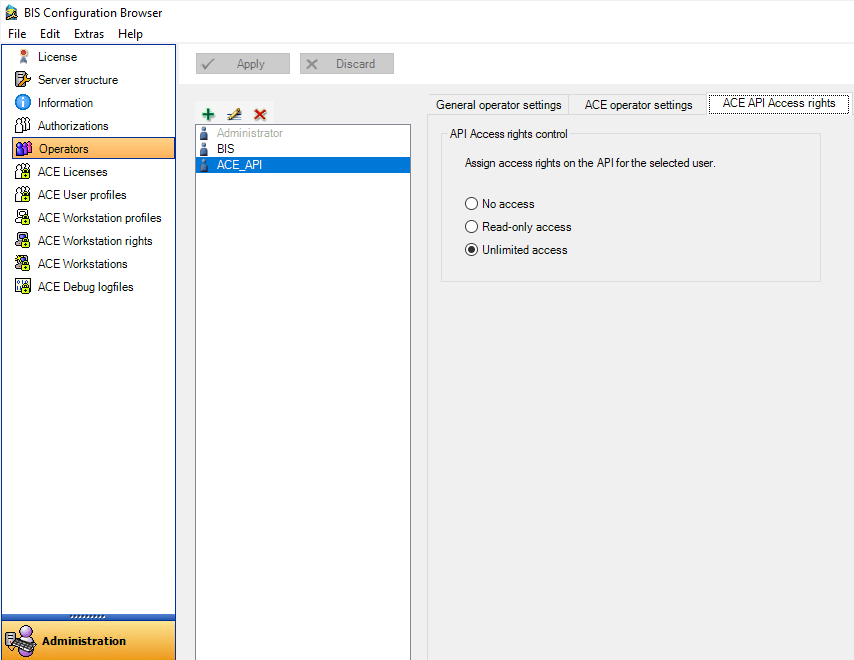
3.Create a Bosch API Operator
Open BIS Configuration Manager. Open the existing active configuration and log in.
Select Operators. Add an Operator that has unlimited access under ACE API Access Rights.
4.Set-Up Bosch Reader Data
XPressEntry has two main modes: Muster and Entry/Exit. This section walks the administrator through the process of setting up Bosch Readers for both of these modes. Both modes can be used simultaneously.
4.1.Entry/Exit Mode Set-Up
Each XPressEntry handheld device can represent two readers in Bosch at any given time: one Entry reader and one Exit reader. This is because an XPressEntry handheld can toggle between Entry/Exit mode. An XPressEntry handheld is assigned to a Door. If the XPressEntry settings permit it, a handheld operator has the ability to switch between Doors dynamically.
Doors (Called ‘Entrances’ within BIS) are configured in BIS Configuration Browser and pulled into XPressEntry. Open BIS Configuration Browser and select ‘Connections’ as shown below.

There are two philosophies that are used when setting up Doors:
- Create one Door in Bosch per handheld device. Each scan from this handheld device will report as a reader from this Door. Additionally, the access rules that are applied to this Door will always apply to a handheld. The handheld will not be able to change access rules on the fly because it is always assigned to the same Door.
- Create a Door in Bosch for each location where a handheld will be used. In this case, the handheld will be assigned to one of these Doors based on where the handheld is physically located at that time.
- EX. A guard is located at the Front Entrance where he/she is scanning cards as people enter. The guard’s handheld is assigned to the Front Entrance Door. A person who enters is validated by the handheld based on whether or not they have access to the Front Entrance Reader within Bosch. The guard is later told to relocate to the Back Gate. The guard changes the Door on his/her handheld to ‘Back Gate’. The handheld now validates a person based on whether that person has permission to access the Back Gate.
With this in mind, create as many Doors as are required for your system. To create a Door, add an Access Control Module by right clicking the MAC and selecting ‘New Object’. Select the 4 Wiegand ACM. This is not a physical controller unit; just a logical unit. Alternatively, you can utilize an existing ACM, but it is recommended to keep the XPressEntry entrances separate for organization purposes.
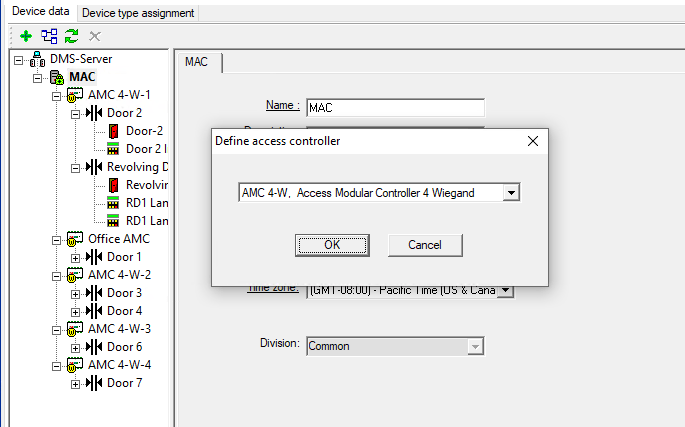
After an ACE has been added, add an Entrance to the Controller. Right click New Controller, select New Object> New Entrance.

The most common configuration is to use a single inbound reader and a single outbound reader. However, XPressEntry can support other configurations with the following rules:
- If an Entrance has two inbound readers, two outbound readers, or two inbound and two outbound readers, this will be reflected as two Doors within XPressEntry. These Doors will share the same access rules.
- If no inbound or no outbound reader exists within an entrance, a scan from the missing side will always result in Access Denied.
Once the Entrance has been created, select OK. It is not required for Entry/Exit, but you can configure the areas a Door is attached to. This is not required for non-mustering systems. Upon an Entry scan, a person moves from the Location area to the Destination area. Upon an Exit scan, a person moves from the Destination area to the Location area.
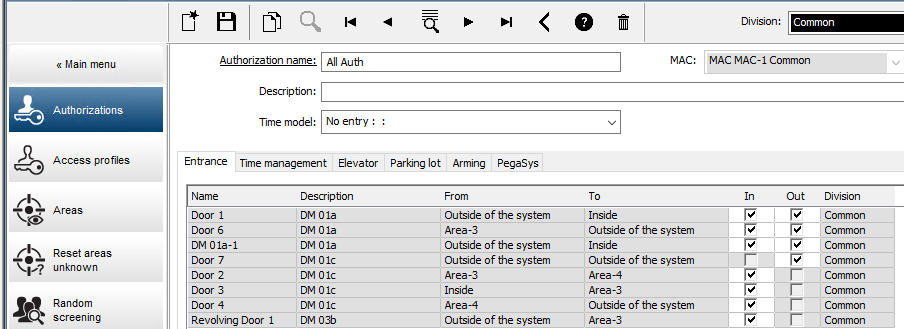
Lastly, give people access to these Entrances by assigning Bosch Authorizations to them. Open the Access Engine software from BIS. Navigate to System Data>Authorizations. Select the relevant system Authorizations and check In or Out on the new Entrances.
4.2.Muster Mode Set-Up
XPressEntry has the ability to monitor all Bosch reader scan activities. In doing this, XPressEntry can determine who is on property, who is off property, and where people are within the property. Doing this does require some configuration.
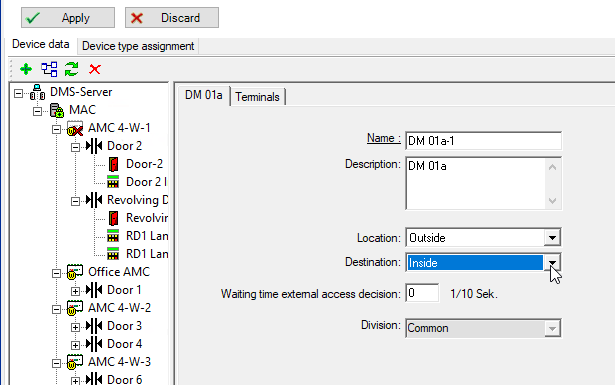
Start by navigating to the BIS Configuration Browser. Select ‘Connections’ and examine each Door at which a person can scan. The Location and Destination fields need to be set for each Door that stands between one Location and another.
The simplest Mustering setups track who is on site and who is off site at exterior readers only. An example of this configuration is shown above. Each time a person scans at the “In” reader, XPressEntry knows to account for this person during an emergency. Each time a person scans at the “Out” reader, XPressEntry knows that this person is no longer on site, thus does not need to be accounted for.
Muster system setups can also be more detailed. To give more detailed information on where people are at the time of emergency, configure the areas attached to inner doors.
EX.
| Entrance Gate- | Location= Outside, | Destination = Lobby |
| Lobby Inner Door- | Location = Lobby, | Destination = Inner Offices |
| Back Gate- | Location = Outside, | Destination = Back Patio |
| Back Door- | Location = Back Patio, | Destination = Inner Offices |
5.Enable Synchronization
XPressEntry uses a module called “Data Manager” to synchronize all data with Symmetry.
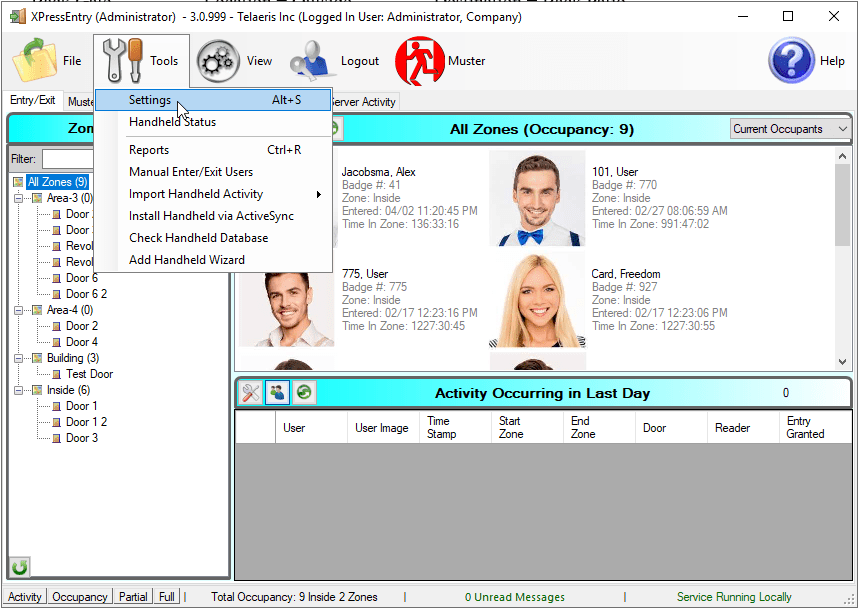
From the main page of XPressEntry, go to XPressEntry / Settings (CTRL+S or Tools>Settings).
5.1.Data Manager Set-Up
From the Settings page select the ‘Data Manager Tab’.
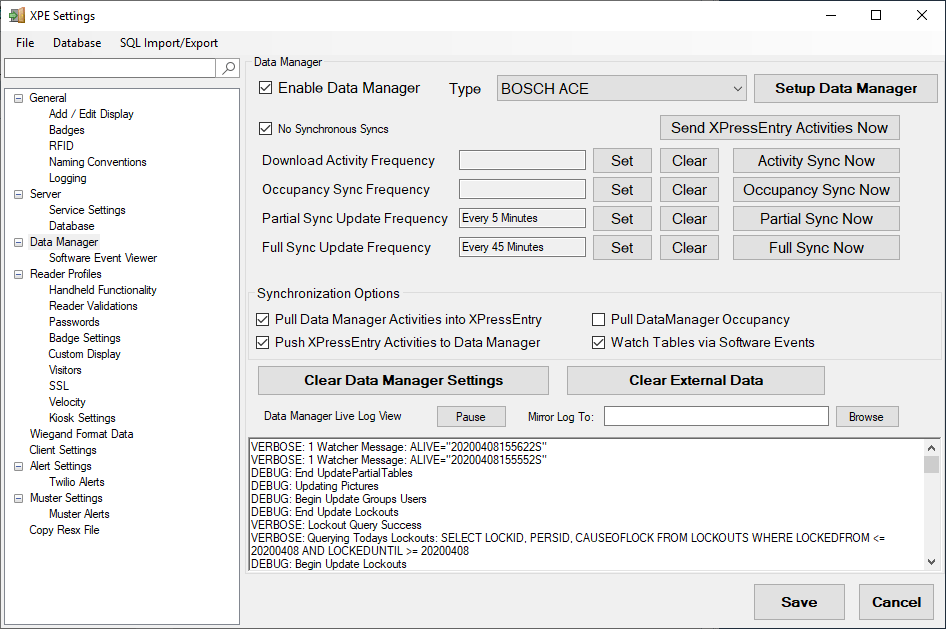
- Type – This is the integration type. Select ‘Bosch ACE’.
- Setup Data Manager – Sends you to the setup form for Bosch’s Data Manager.
- Save and Apply Settings – Saves all settings from the set-up form, update frequencies, and activity Synchronization options. It then restarts the Sync Engine.
- No Synchronous Syncs – Not implemented for Bosch Data Manager.
- Update Frequency Options – Sets and clears the intervals in which the Data Manager updates XPressEntry.
- Sync Now Buttons – Runs an immediate update.
- Synchronization Options – Configure whether XPressEntry will send or receive activities to or from Bosch.
Set the Update Frequency to as often as you want the system to update.
- Full Sync – This sync will pull all relevant records from Bosch ACE and update them in XPressEntry. If there is a large number of people in ACE, this sync option can take some time.
- Partial Sync – This sync will pull only updated records from all tables. Partial Syncs should be run often in order to capture incremental changes.
- Activity Sync – Not necessary.
- Occupancy Sync – Not implemented.
All of these options can be changed at any time. Changing any option will take effect upon save.
5.2.Bosch ACE Set-Up
Press the ‘Setup Data Manager’ button to get the Bosch specific setup screen.
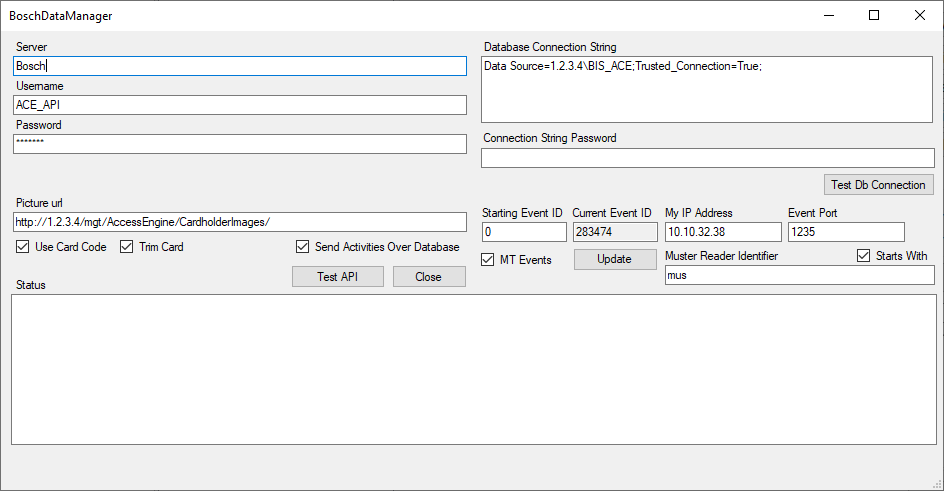
- Server – Name of the server where Bosch Software is located
- Username – Username of Bosch Operator with API Access
- Password – Password of Bosch Operator with API Access
- Picture URL – The route to the picture directory
- Use Card Code – Used to get Card Number and Facility Code
- Trim Card – Remove leading 0s from Card Number and Facility Code
- Send Activities Over Database – Force XPressEntry to utilize
- Database Connection String to insert events into Bosch Events database.
- Database Connection String – Connection string to the BIS Database. This is only used if:
- Send Activities over Database is checked
- BIS database contains a Telaeris provided Stored Procedure that inserts an Event into the BIS events database
- Starting Event ID – The Event ID to reset to. To change the Current Event ID, set the starting Event ID and press Update.
- Current Event ID – The last Bosch Event ID received by XPressEntry.
- MT Events – Multi-Threaded Event Listener. Unchecking this is not recommended.
- My IP Address – IP Address of the XPressEntry Machine. This is needed for the Event Listener, as the IP Address Bosch will send events to.
- Event Port – TCPIP Port Bosch will send events to. This is needed for the Event Listener.
- Muster Reader Identifier – Identifies a Bosch Reader as a Muster Reader. Activities coming from a Bosch Reader with this naming convention are processed in XPressEntry as a Muster Activity (Marking the scanned person as safe).
- Starts With – If unchecked, a Muster Reader only needs to contain the Muster Reader Identifier. If checked, a Muster Reader must start with the Muster Reader Identifier.
6.Bosch ACE Sync Check
The purpose of this section is to help the Operator understand exactly what data XPressEntry is pulling.
The mapping of each table pulled from XPressEntry is shown below.
- Bosch ACE>XPressEntry
- Companies>Companies
- Persons>Users
- Cards>Badges
- WIE1 Readers>Reader
- Entrances>Doors
- Authorizations>Groups
- Time Models>Timezones
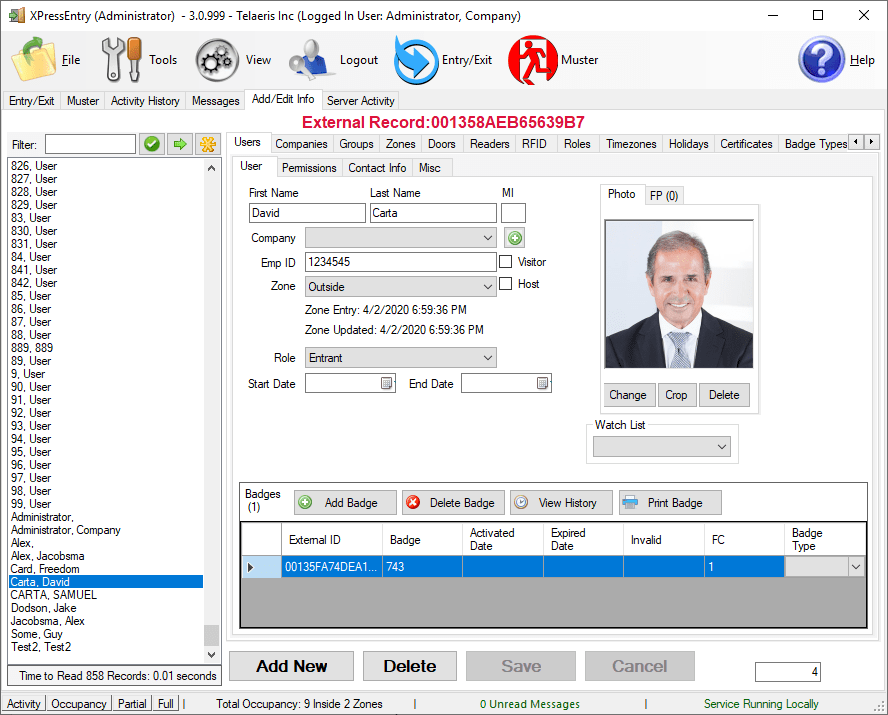
Navigate to the XPressEntry Server Main form to view the data that was pulled over from Bosch. All data is located under the Add/Edit Info tab. Each data type is located under a sub tab.
7.Sending Activities to Bosch
The Bosch ACE API does not have a built-in way to receive handheld scan activities. What Telaeris can provide is a stored procedure that accomplishes two things:
- Adds a Record to the Bosch Events table which shows which person was scanned, when they were scanned, and what Reader they were scanned at. It also includes fields such as Card Number and Facility Code.
- The stored procedure can update the current Area the User is in within Bosch, assuming the User did not perform a more recent scan.
Implementing this stored procedure is not required. Alternatively, activity reporting from the handhelds can be run out of XPressEntry’s reporting module. However, if you would like to see the handheld activity events stored in Bosch, please talk to Telaeris about implementing the stored procedure. The stored procedure is not included in the software by default. Configuring the activity push (as shown in the “Data Manager Setup” section) without the stored procedure will result in an error upon each handheld scan.
Once the stored procedure is implemented with the assistance of Telaeris, scan a card on a handheld device. The XPressEntry Server will push this scan activity to the Bosch events database, which can be viewed as shown below.

8.Activities Caveat
If configured, XPressEntry adds events to the events database. However, it is not possible for XPressEntry to add these activities to the ACE Entrance Events report. This is because the records displayed in this report are not stored in the database, rather they are stored in a file in which XPressEntry does not have access to.