
Table of Contents
If you don’t want to share your Admin login with Guards or Officers, and you don’t have SSO configured, you can create a dedicated Role and User Profile specifically for handheld device logins. This gives each Guard their own restricted credentials, limited to only the permissions they need.
This involves four steps: create a Role, create a User Profile, create a User, and create the Login itself.
Step 1: Create a Role #
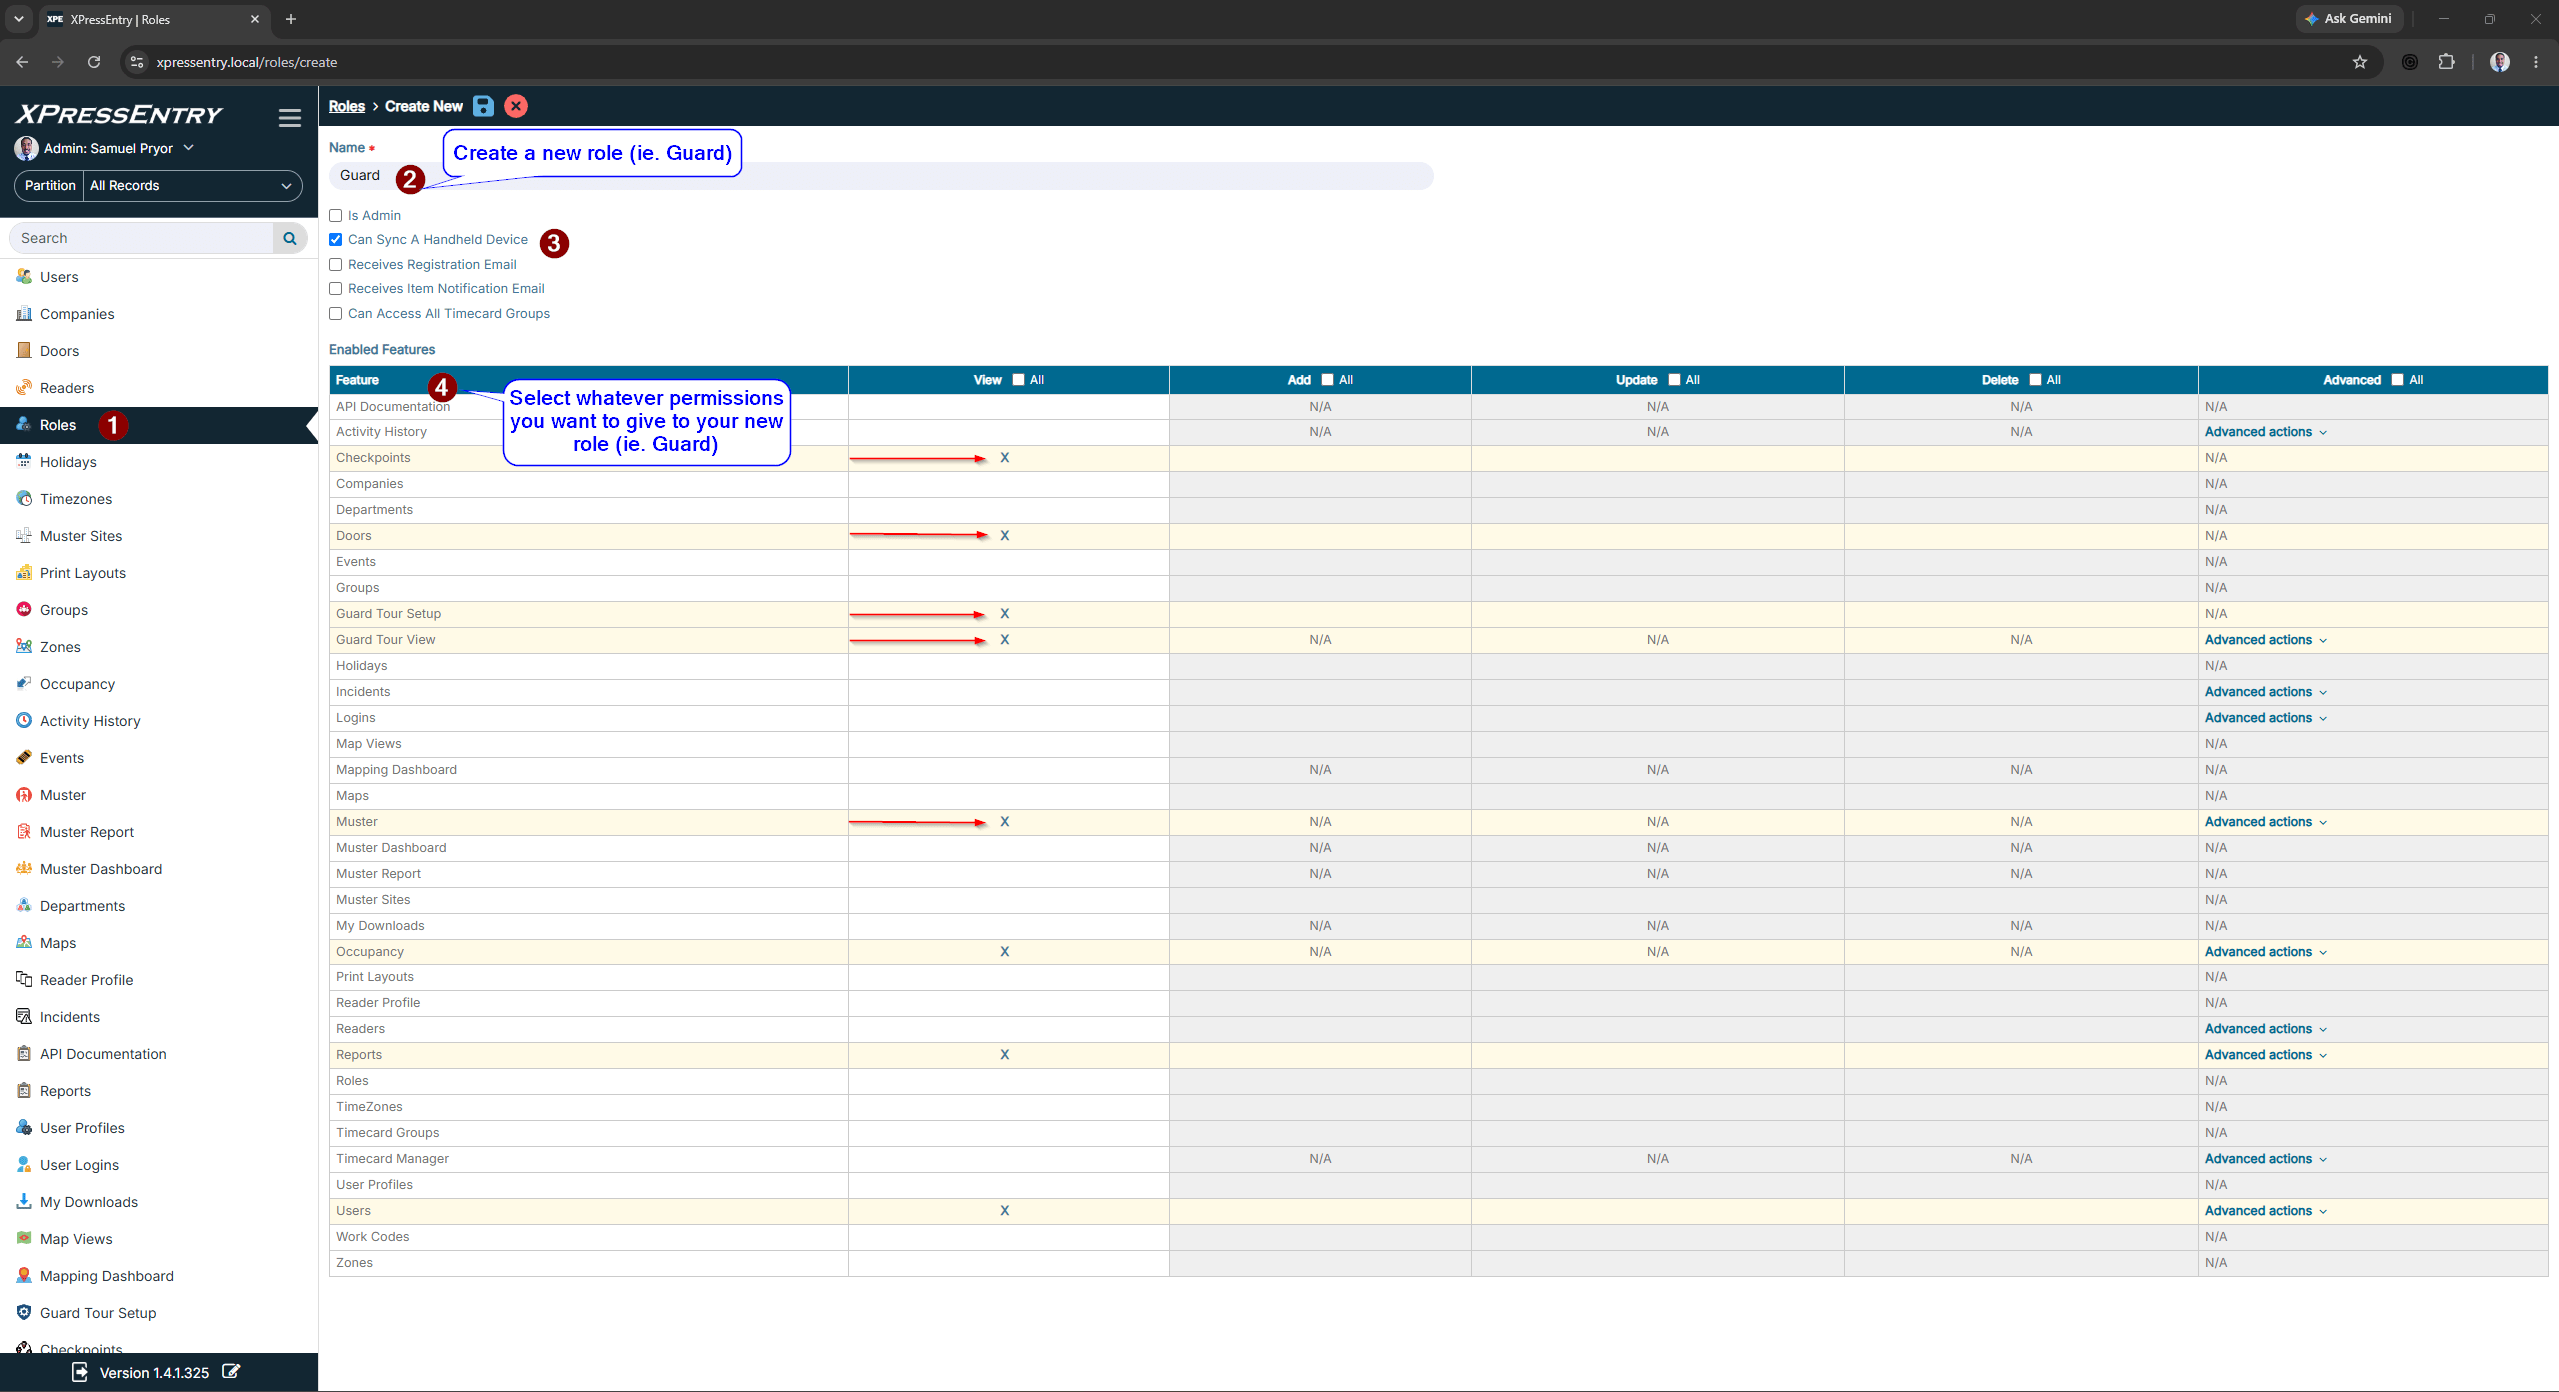
- In the left navigation, click Roles, then click the + Create New icon.
- Enter a Name for the role (e.g. “Guard”).
- Check Can Sync A Handheld Device so this role is allowed to sync and log in to handheld units.
- Leave Is Admin unchecked — this keeps the role limited rather than granting full admin rights.
- In the Enabled Features grid, check the boxes for whatever permissions the Guard should have. At minimum for handheld use, this typically includes View access to: Checkpoints, Doors, Guard Tour Setup, Guard Tour View, and Muster. Add Occupancy, Reports, or Users if you want Guards to see those as well.
- Click the save (disk) icon in the top bar to save the Role.
Step 2: Create a User Profile #
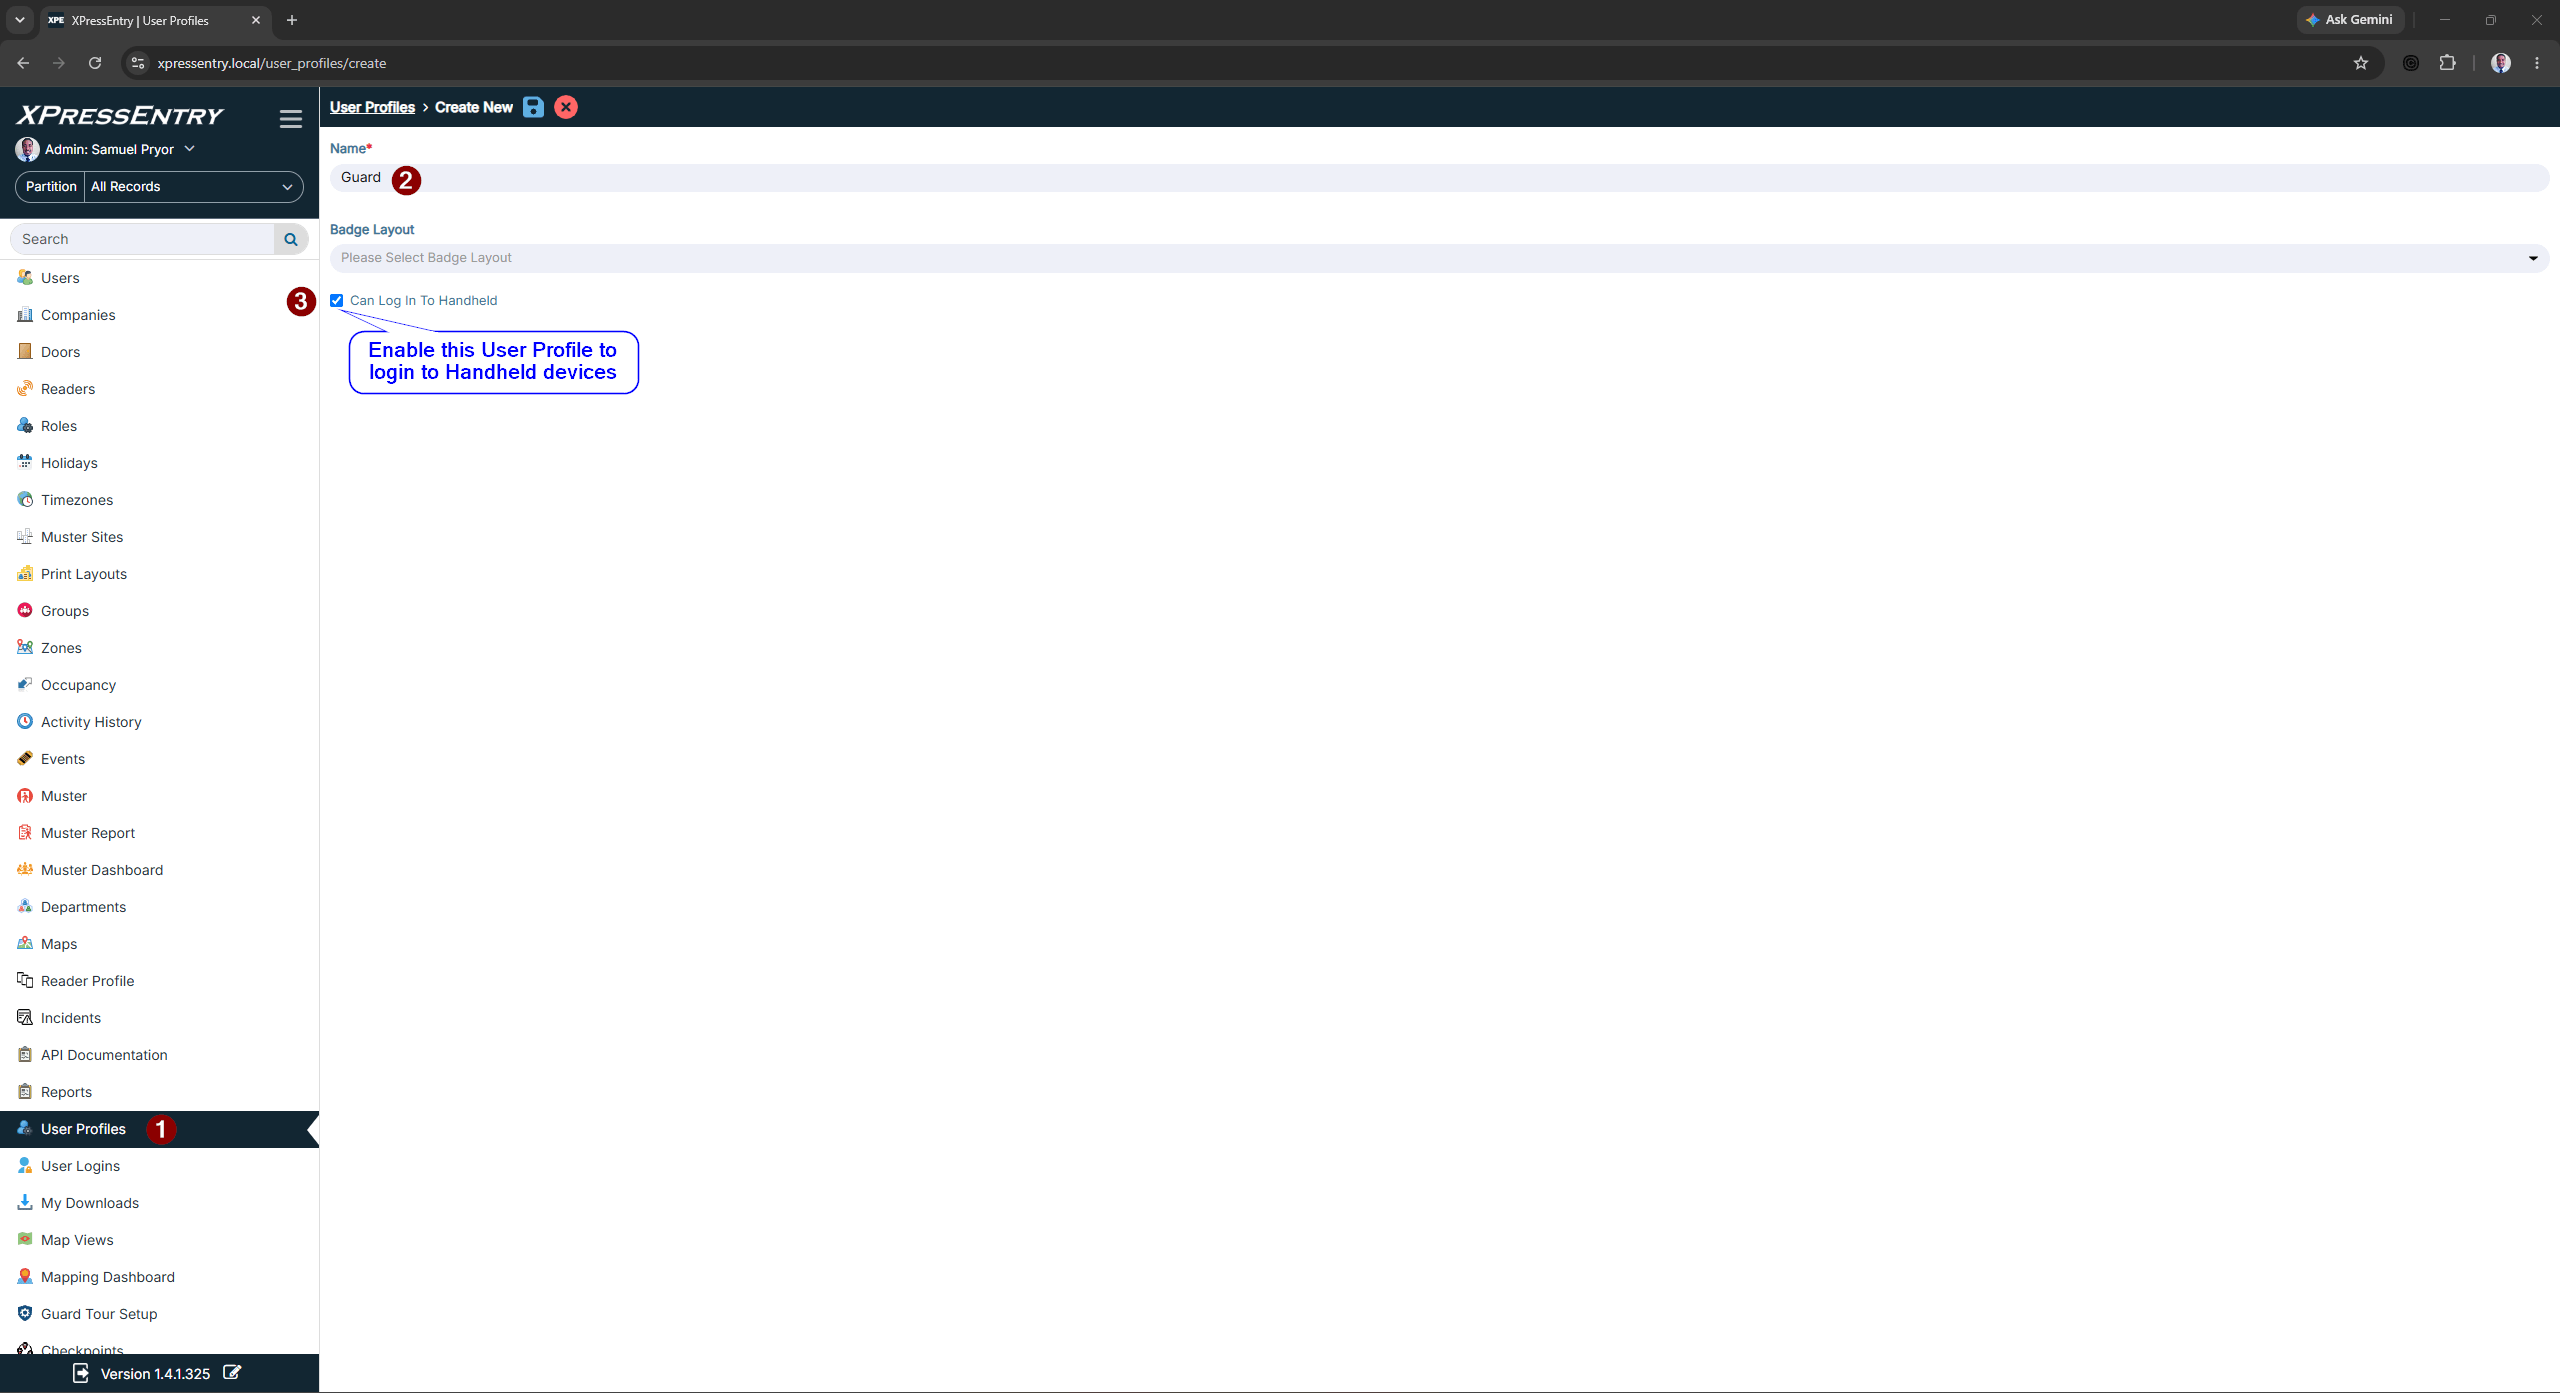
- In the left navigation, click User Profiles, then click + Create New.
- Enter a Name (e.g. “Guard”) — this can match the Role name for clarity.
- Check Can Log In To Handheld so profiles using this template are permitted to log in to handheld devices.
- Badge Layout can be left blank unless you want a specific badge design tied to this profile.
- Click the save icon to save the User Profile.
Step 3: Create a User #
- In the left navigation, click Users, then click the green + icon to create a new user.
- Fill in the user’s First Name and Last Name (e.g. “Guard” / “Profile” — or the actual guard’s name).
- Under User Profile, select the profile you created in Step 2 (e.g. “Guard”).
- Fill in any other relevant fields (Company, Zone, etc.) as needed.
- Save the user record.
Step 4: Create the Login #
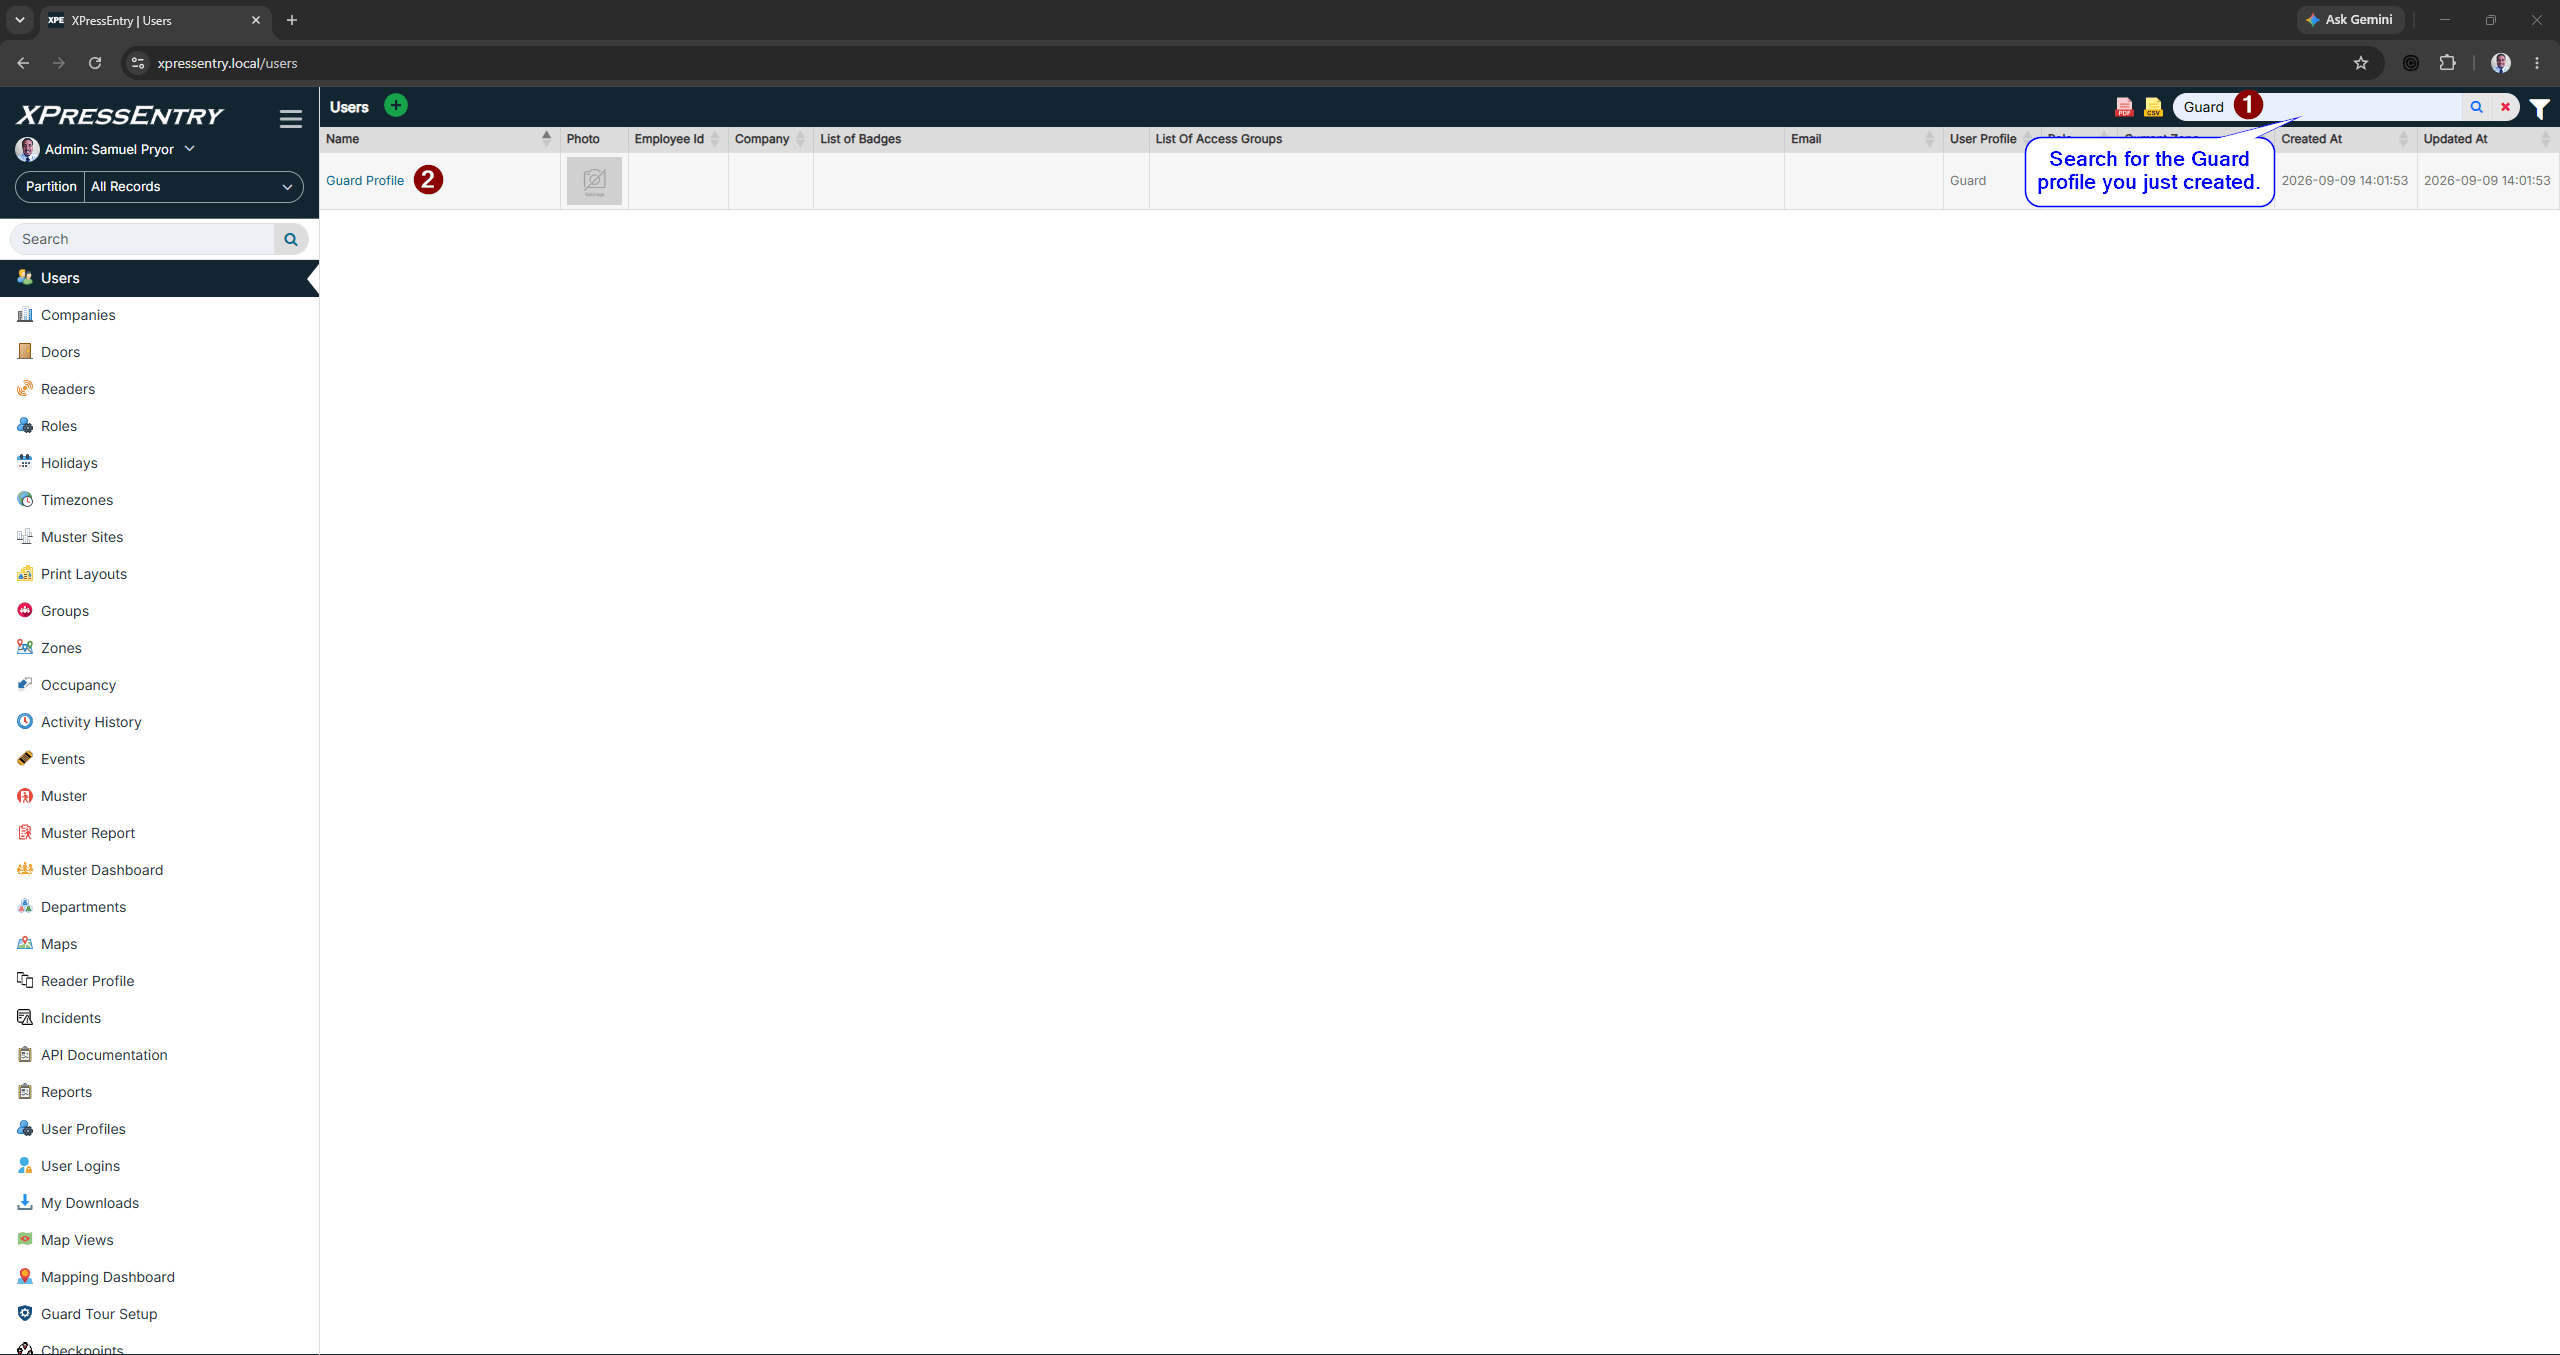
- Open the user record you just created (search for it under Users if needed).
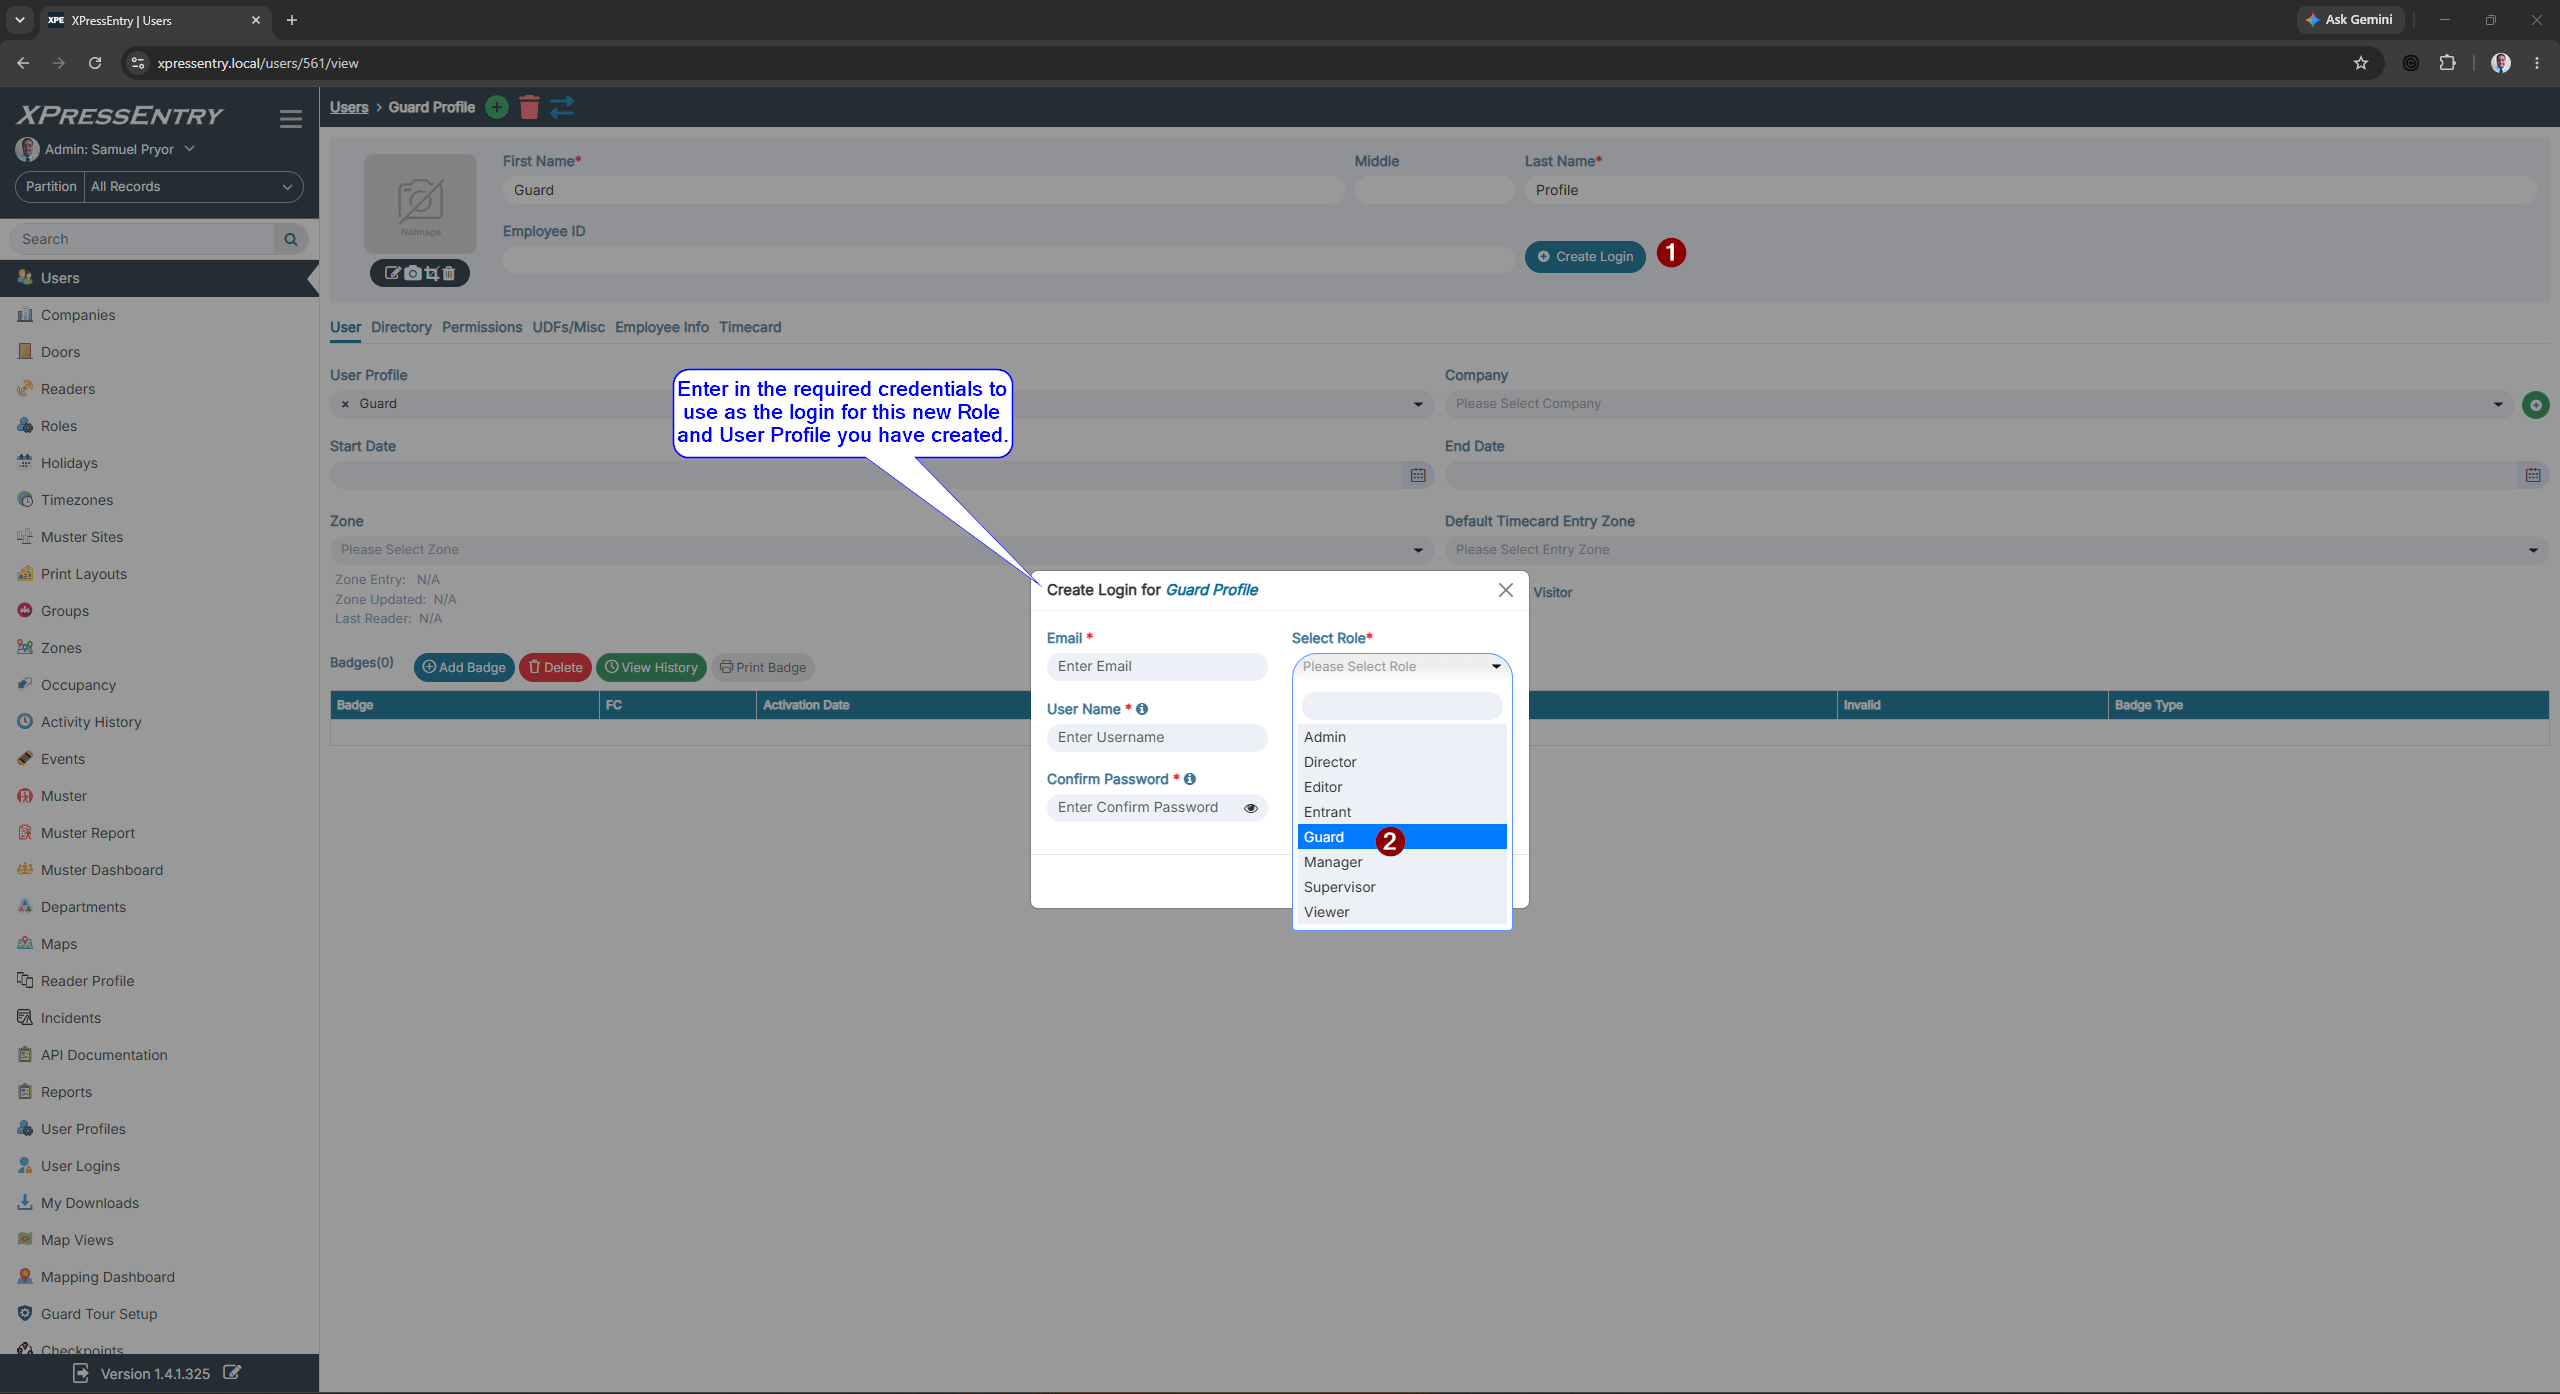
- Click the Create Login button near the top of the record.
- In the Create Login dialog:
- Enter an Email for the login.
- Enter a User Name.
- Under Select Role, choose the Role you created in Step 1 (e.g. “Guard”).
- Enter and confirm a Password.
- Click save/submit to create the login.
The Guard can now use this Username/Password combination to log in to the handheld device — completely separate from the Admin login — with access limited to only what was enabled in the Role’s permissions.
Reusing the setup for additional Guards #
- The same Role and User Profile can be reused for every Guard. You only need to repeat Step 3 and Step 4 (create a User + Login) for each additional guard, using the existing “Guard” Role and User Profile each time.
- Permissions can be adjusted later at any time by editing the Role — every Guard login tied to that Role updates automatically.


