Initial TagMaster Reader Setup #
Begin by applying Power and Network to the TagMaster Reader. For information on how to do this, please see the ACTS Essential Quick Guide which is included with the reader.
Once the reader is installed and on the network, you can navigate to the reader IP address on the network to configure the reader. If this is the first time configuring the reader, the IP Address will be 192.168.1.100. Enter the reader username and password (admin and qwerty) for first time users. For information on how to configure the TagMaster Reader, please view the TagMaster XT-3 documenation.
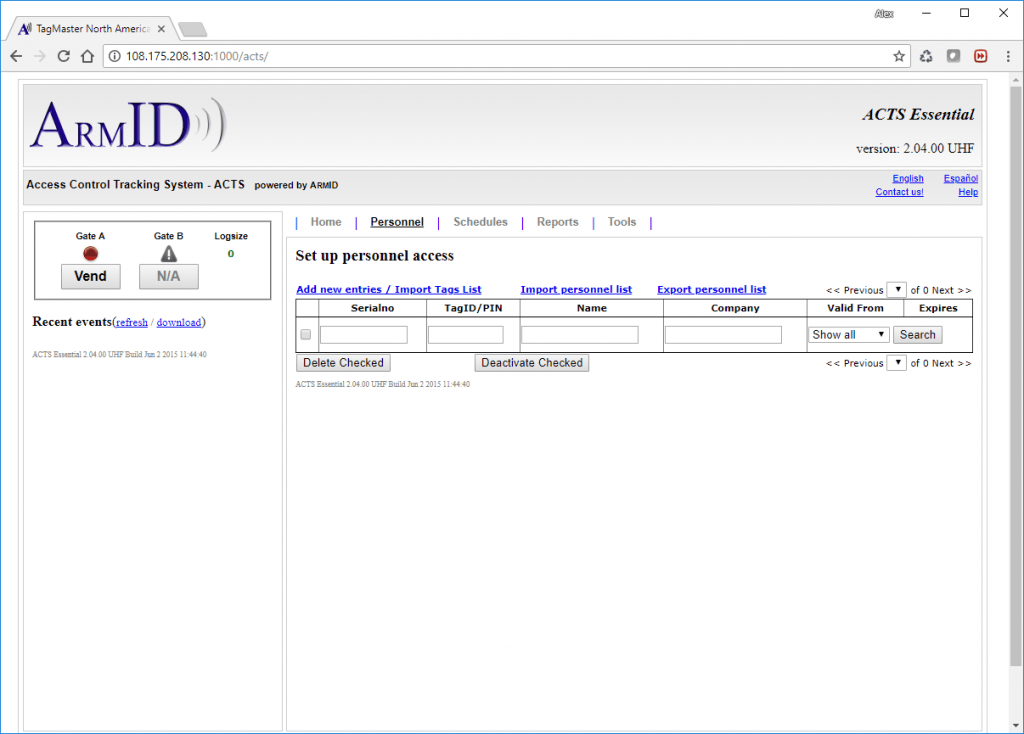
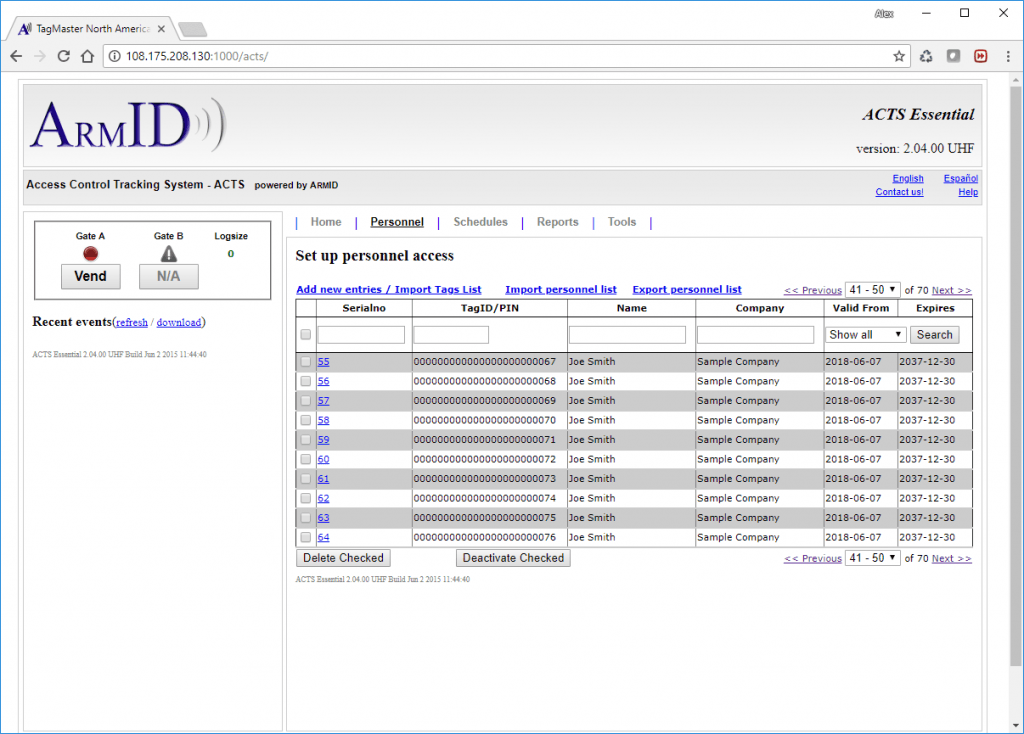
Once the reader configuration is finished, navigate to http://ipaddress/acts. Once in ACTS, you will see all of the users and tags with access to this reader. Initially this will be empty as shown below.
Adding an Tag Master reader to XPressEntry #
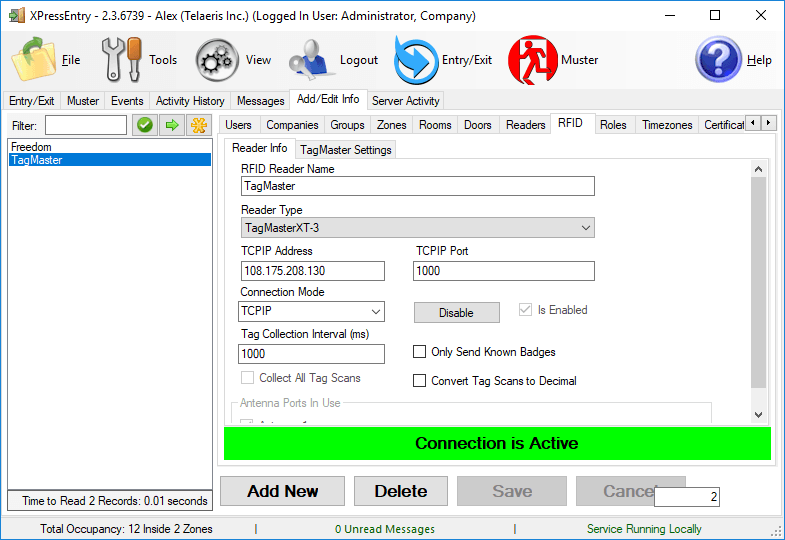
Navigate to the RFID Readers tab
- Add a new RFID Reader
- Select TagMasterXT-3 from the drop down menu
- Enter in the IP address and TCPIP Port as configured on the Reader
- Select save
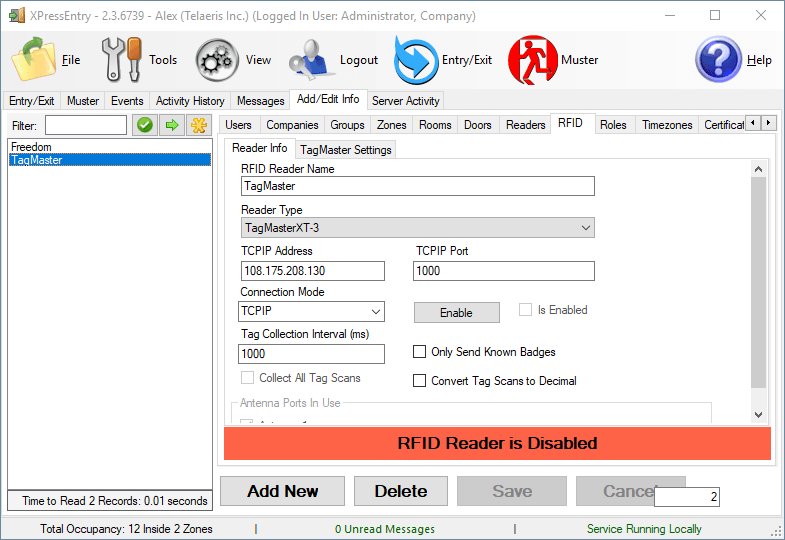
Select the TagMaster Settings Tab. Configure the following settings.
- Milliseconds Relay Open For Manual Vend- When manually triggering the relay from XPressEntry, this is the amount of time until it times out. (5000 suggested)
- Seconds Between Pull Log- XPressEntry pulls activities from the reader every X seconds (Depends on the number of readers, 5 suggested)
- Seconds Between Personnel Updates- XPressEntry updates the Reader’s personnel list every X seconds (Depends on the number of readers, 30 suggested)
- User Name- Username to log onto the reader (admin by default)
- Password- Password to log onto the reader (qwerty by default)
Navigate to the readers tab.
- Add a new reader.
- Give the reader a door, verification zone, and profile. On the right hand side are RFID Settings. Select the TagMaster RFID Reader in the drop down and the mode. Trend should be unchecked and Same Zone Entry should be checked as shown below.
- Select Save
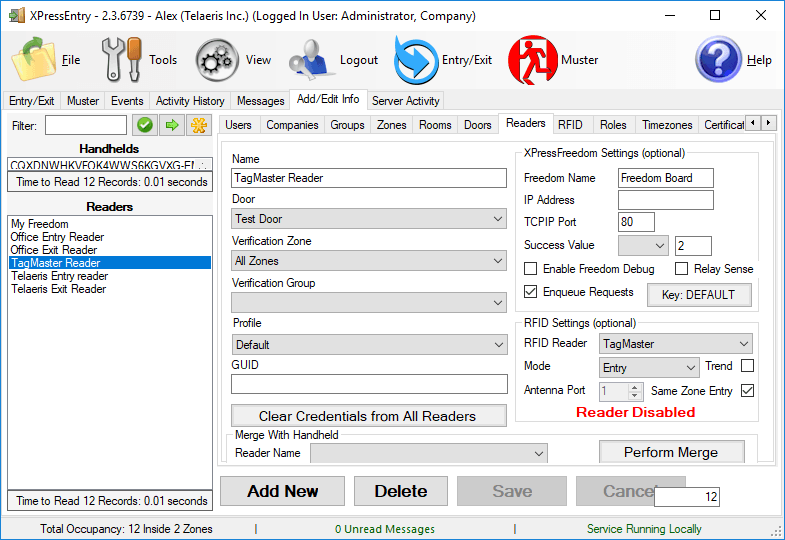
XPressEntry Readers Tab TagMaster
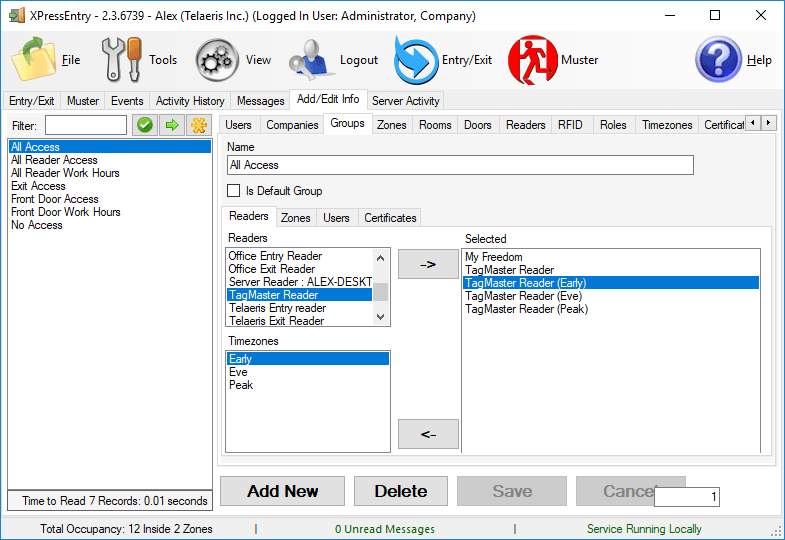
Now that you have a reader configured, you can assign it to an access group.
- Navigate to the groups tab.
- You can create a new group here, or use the existing All Access Group.
- On the Readers sub tab, select the TagMaster Reader that was created and move it to the selected box. This will give the group access to the reader without time restraints.
- Alternatively, you can assign assign a range of times in which access is granted. These time ranges are called Timezones and must have specific names. Timezones can be configured in the Timezones tab under Add/Edit Info. The specific hours of the timezone do not matter. All that matters is the name, because the Timezones themselves are configured directly on the reader. Below on the Timezone names you may add
- Early
- Peak
- Eve
- Save the group.
The Timezone names Early, Eve, And Peak map to a schedule in ACTS. To configure this, log onto ACTS on the reader and navigate to schedules
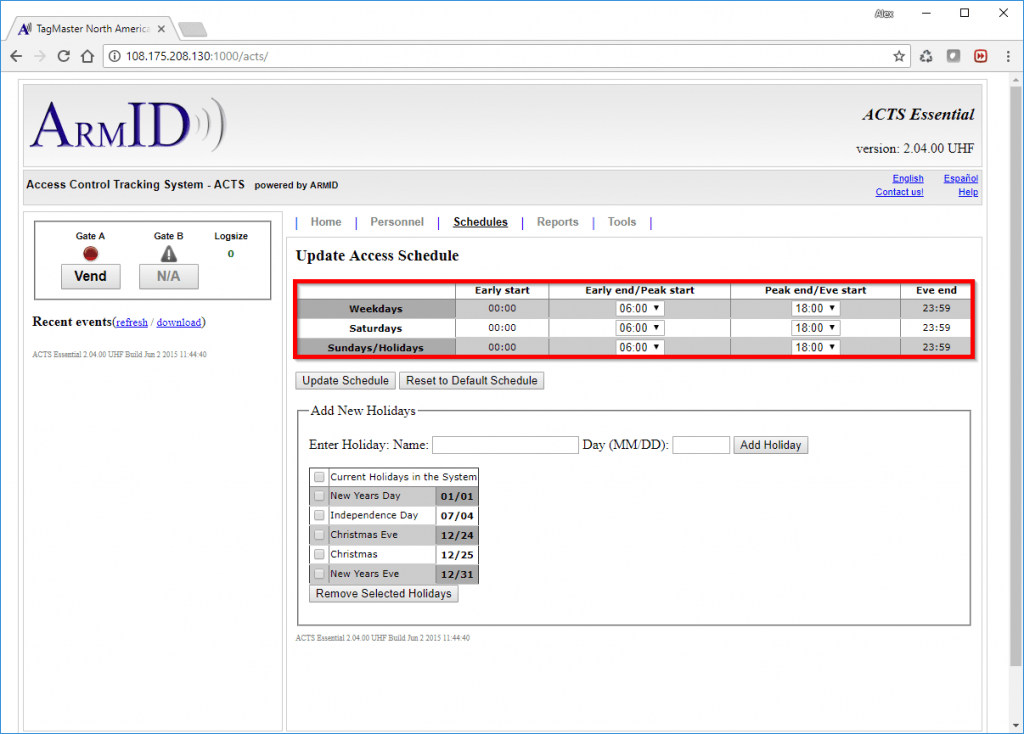
Example-
I assign TM Reader 1 (Early) to Mornings Access Group.
I assign Alex Jacobsma to Mornings Access Group.
Alex Jacobsma will have access to the reader anytime before 6 AM according to the image above.
Badge Configuration #
You will need to configure a badge type in order to give people access to a TagMaster Reader. If you do not see the badge types tab, you need to enable it in the settings shown below. It is also suggested that you set a default badge type that will be applied globally to all new users who are added in the system.
One this setting is saved, the badge types tab will appear in add/edit info. The only important setting under the badge type is “Is UHF”. Make sure that this box is checked and save.
Navigate to the Users Tab under add/edit info. Each user that you would like to have access to the board requires the following.
- Badge
- Valid Badge Number
- Badge Number must have a Badge type
- Cannot be expired, expired badges are removed from the board
- Cannot be Invalid, invalid box in grid must be empty
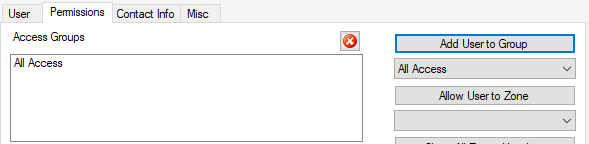
- Permission
- On the permissions tab, must be part of the Access Group containing our TagMaster Reader
Below is an example of a new badge being added-
We are ready to connect XPressEntry to the TagMaster Reader. Navigate back to the RFID Readers Tab.
Press the Enable button on the TagMaster record. The bottom of the form should momentarily appear yellow and then turn to green.
If properly configured, all user badges in the system that have access to the board should be pushed to the board.
Troubleshooting #
RFID Status Bar remains in “Attempting to Connect…” state and the bar remains yellow. #
Verify the IP Address and the TCPIP Port are correct. If both check out, type in the IP address into a browser on the same computer to verify that the PC can reach this IP Address. If the browser connects to the reader, check to make sure the username and password are configured correctly in XPressEntry. If the reader will still not connect, check the Server activity tab for any RFID errors.


