XPressEntry – RS2 Documentation

1.Introduction
This document will serve as a guide for getting XPressEntry and RS2 integrated and working together.
1.1.Communication Methods
There are two technologies being used for this integration.
Primary: SQL Server for pulling data from RS2. We are making direct database queries.
Secondary: COM Object (AIEUtils.dll) action to add activities to RS2 and see events come into the Event Log live.
The Windows account you are using to try to insert events must exists within Access It! Universal.NET as a user and the domain user box within the user properties needs to be checked.
This was a primary change between V5 and V6.
2.RS2 Reader/Panel Configuration
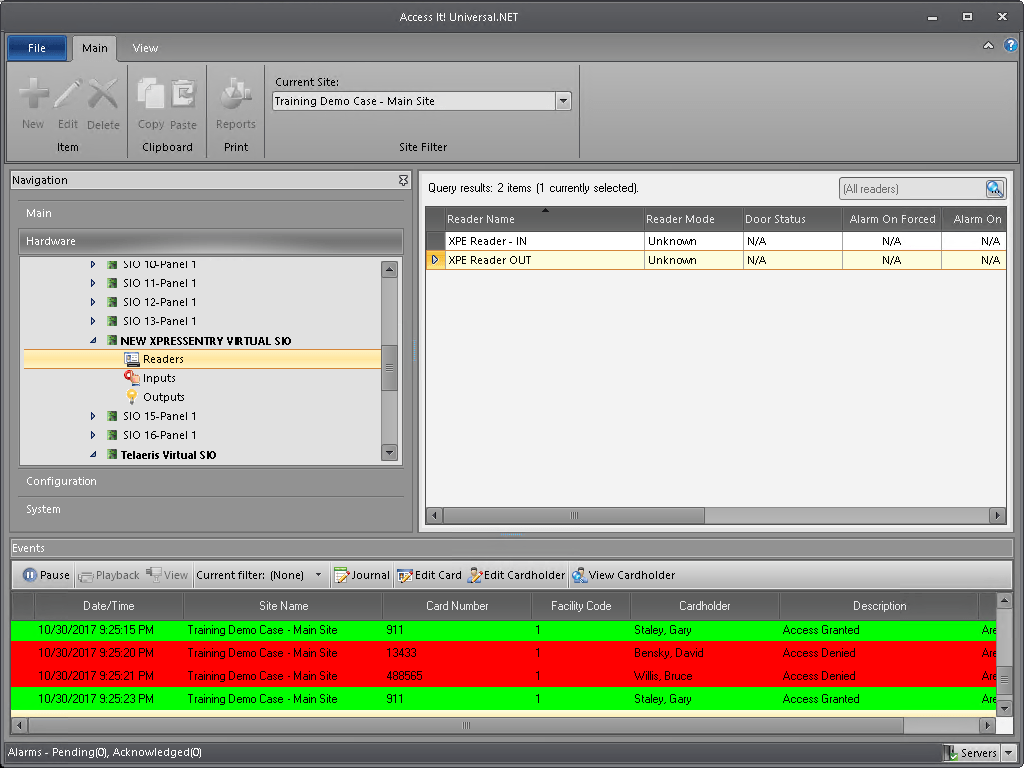
RS2 will need some placeholder readers for XPressEntry. These are used to receive the activities from the handheld devices.
If this is an Entry/Exit system, you’ll need two RS2 readers(Entry/Exit) for each handheld device.
If this is a Mustering system, you’ll want one RS2 Reader for each handheld device.
Create a new SIO in RS2. The Model should be a “Virtual SIO”
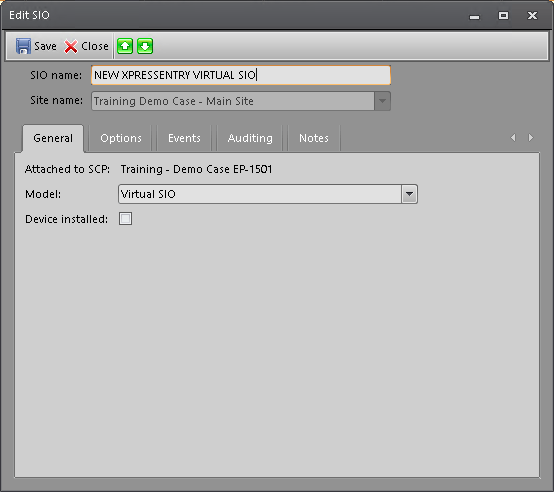
It must be marked as “Device Installed” for the readers to be available.
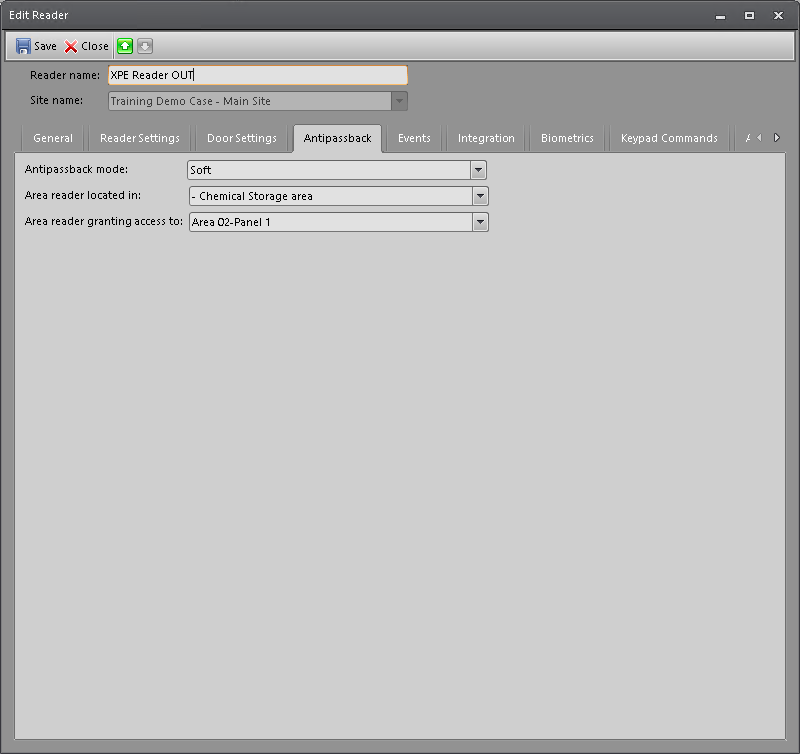
Create an Entry and Exit reader and set up their AntiPassback appropriately for your configuration.
Lastly, you’ll want to add those readers to the appropriate Access Levels within RS2.
3.XPressEntry Configuration
3.1.SQL Server Connection
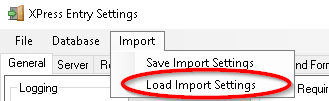
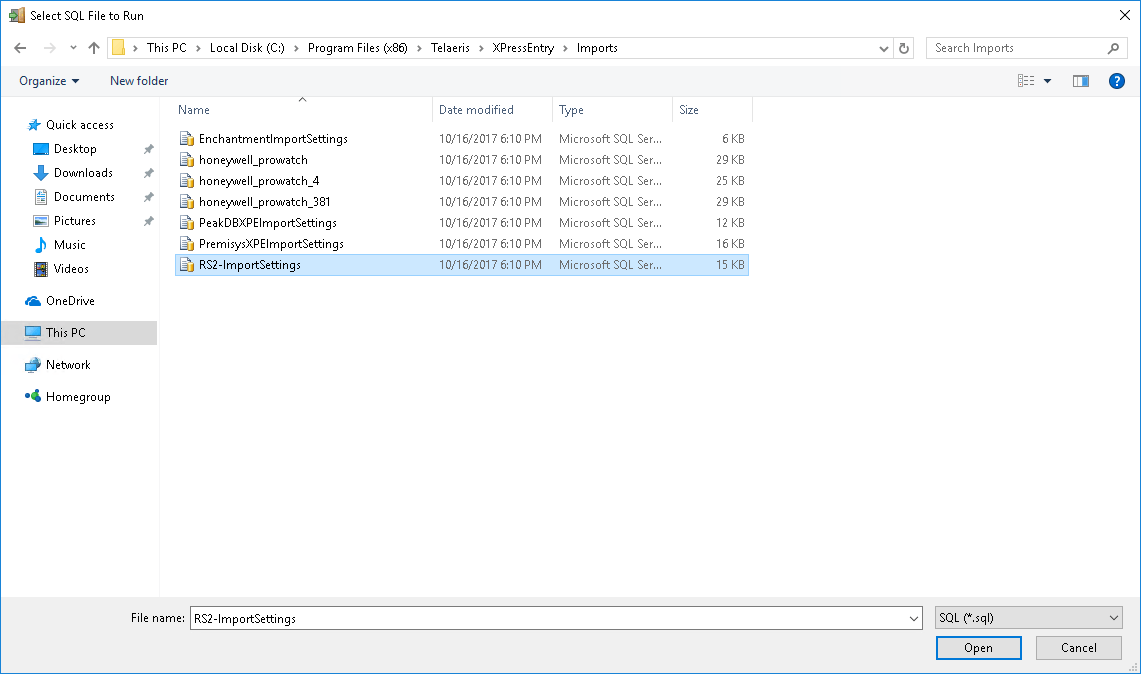
3.1.1.Load SQL Import from Disk
XPressEntry uses a direct connection to the RS2 SQL Server Database to do most of the data synchronization. This is configured within XPressEntry.
Go to Tools -> Settings then the menu item Import -> Load Import Settings
Navigate to the folder “C:\Program Files (x86)\Telaeris\XPressEntry\Imports”
Select the RS2-ImportSettings.sql file and press “Open”
3.1.2.Set Up Connection String
Next we need to set up the Connection String for the SQL Server connection. The default is set up for XPressEntry and RS2 on the same server
Go to the SQL Import/Export tab. If you need to change the Connection String, do the following.
Select RS2 on the left.
If you need to, you can change the Connection String. This is connecting using the native System.Data.SQLClient from Microsoft. Press “Run Test Query”. If it’s successful, press “Save”
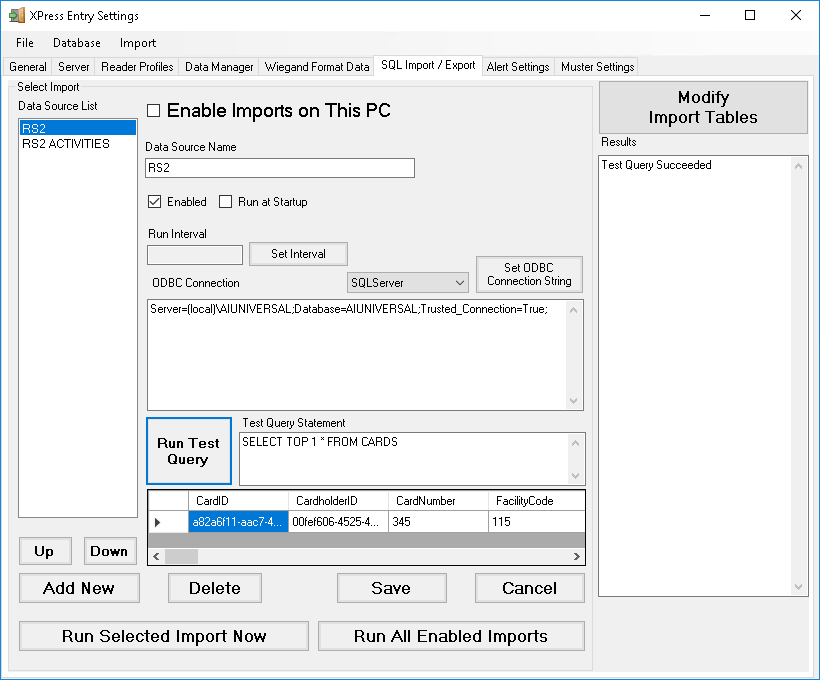
Do the same thing for the RS2 ACTIVITIES import on the left.
3.1.3.Set Up Data Manager
Go to the Data Manager tab. Press the Setup Data Manager button
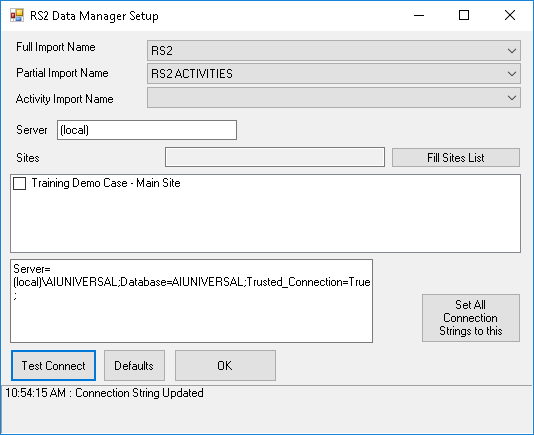
Select the Full Import to be RS2, the Partial Import to be “RS2 ACTIVITIES” Import.
If you’re running on a different machine, change the Server field as specified by RS2.
Select the Sites you’re trying to track.
Press “Test Connect”
Press OK when done.
4.Readers/Doors
For each Handheld, you’ll want to set up a Reader in XPressEntry.
Further instructions on this are available here: