Before you Add or Edit the Timezone information in XPressEntry, you should understand how they’re used for authentication. See the following article for that:
Each Timezone is made up of multiple Timezone Intervals. There is no practical limit to these intervals, you can define them however you want.
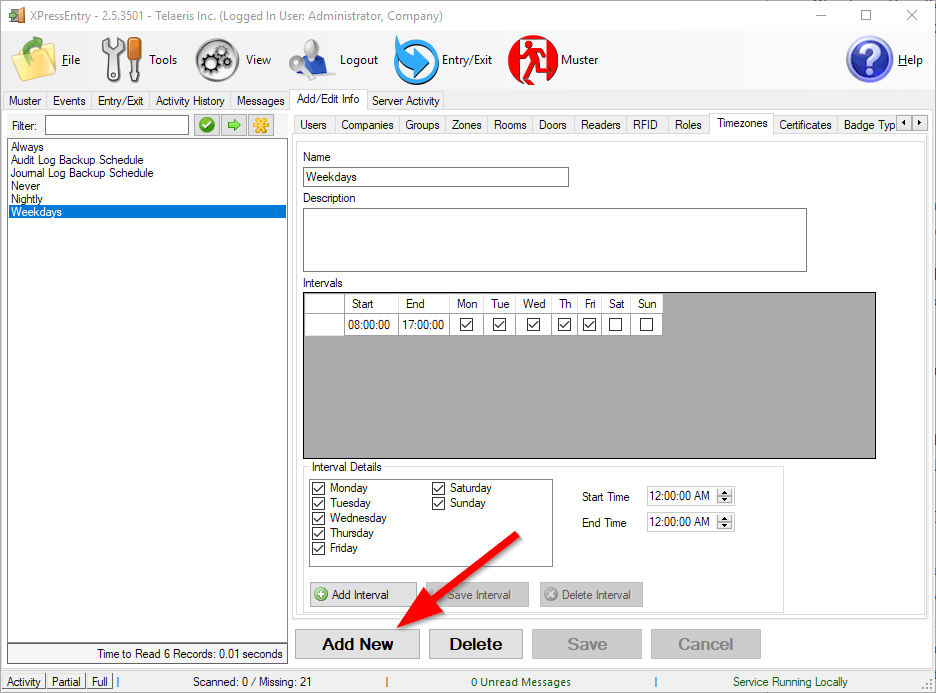
Adding Timezones #
To Add a Timezone to XPressEntry, in the Main application go to the Add/Edit Info Tab. You will need to be logged in as an Administrator for this.
Select the Timezones tab.
Press the “Add New” button at the bottom.
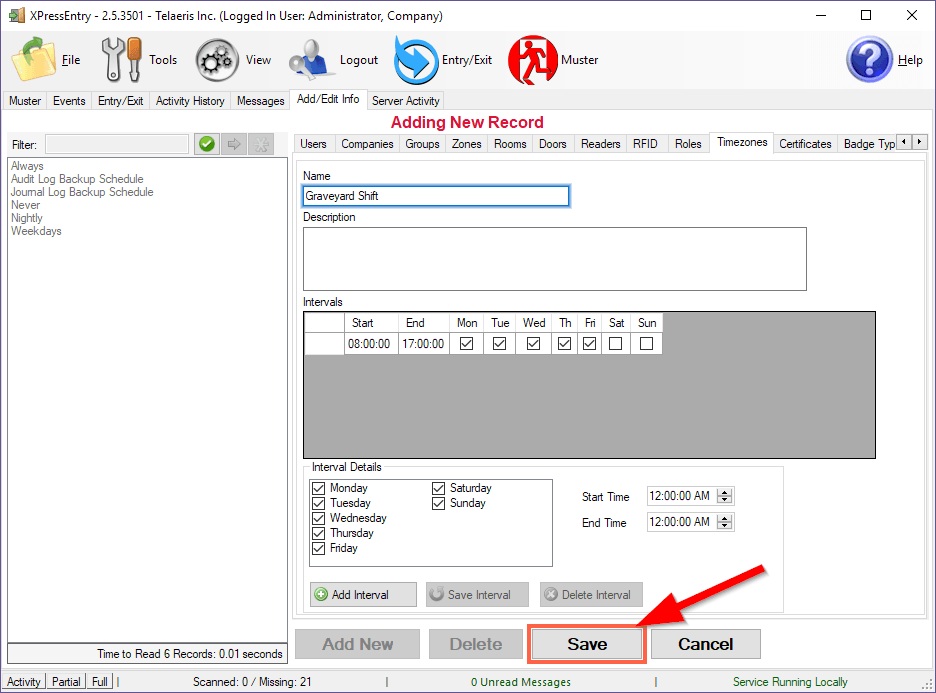
Set the name and press Save
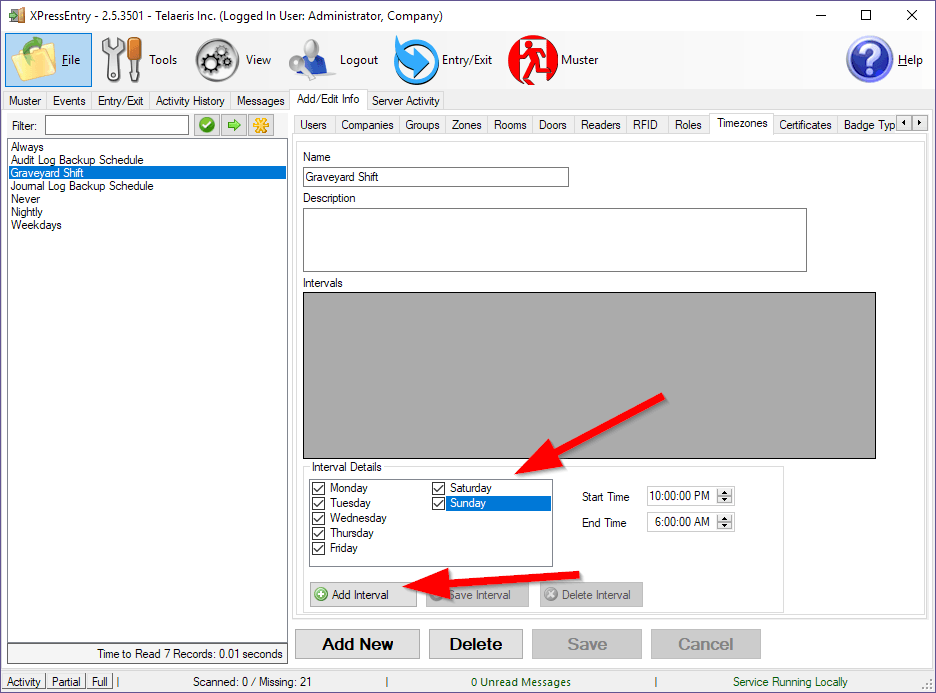
Adding/Updating/Deleting Intervals #
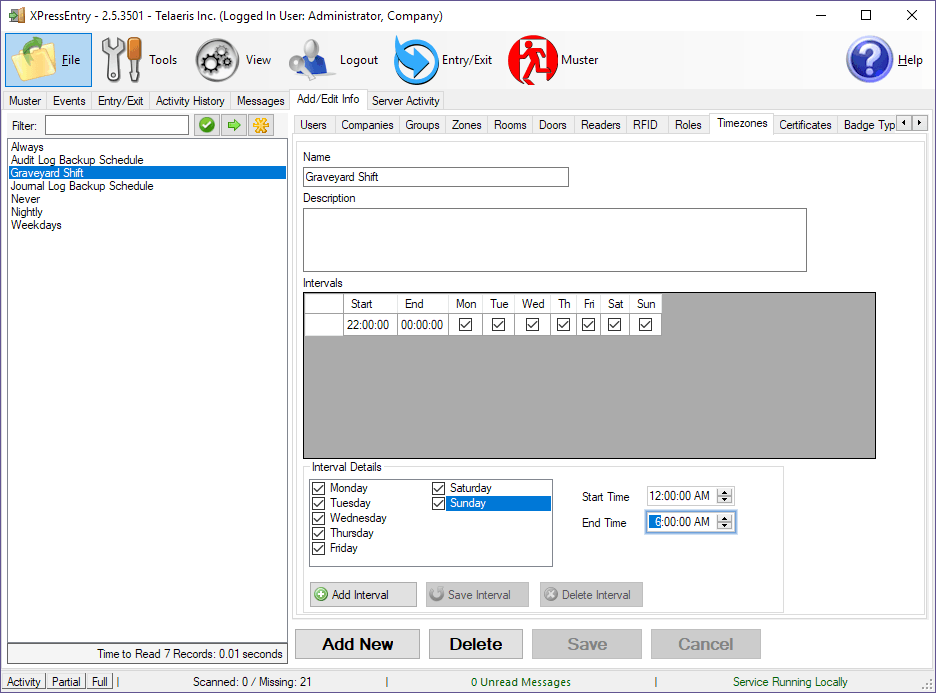
You can now add intervals to the new Timezone. Just set the days/times and press “Add Interval”.
You can update intervals by selecting the row, changing the data, and pressing “Save Interval”. You might need to click on a Gray area in the gridview and then back on the row you’re editing for the edit to take. It depends on your version of Windows and is a known bug.
You can remove intervals by selecting the row and pressing “Delete Interval”.
NOTE: Intervals can NOT go over the midnight boundary. To add a 10PM to 6AM shift, you’ll need to add a 10PM to 12AM and then a 12AM to 6AM interval.
These changes should be automatically pushed to the appropriate devices shortly after you press Save or Add Interval.


