XPressEntry Doors #
To open the Doors tab, open the main XPressEntry Application and select the Add/Edit Info Tab. Find the Doors tab underneath that.
You must be logged in as an Administrator or a User with Add/Edit permissions.
Doors and Permissions #
Doors are critical to the way XPressEntry authenticates cardholders. Think of each door as a portal. It might be a physical gate or a boundary between areas monitored by a guard. Each Door can move you from one Area to another, and allow for dynamic authentication of a Cardholder.
If you’re tied into an External Data Manager, you can use assign the Readers(and their appropriate Access Levels/Clearances) to be checked at a Door. Use the External Entry/Exit Reader fields for this purpose.
Fields #
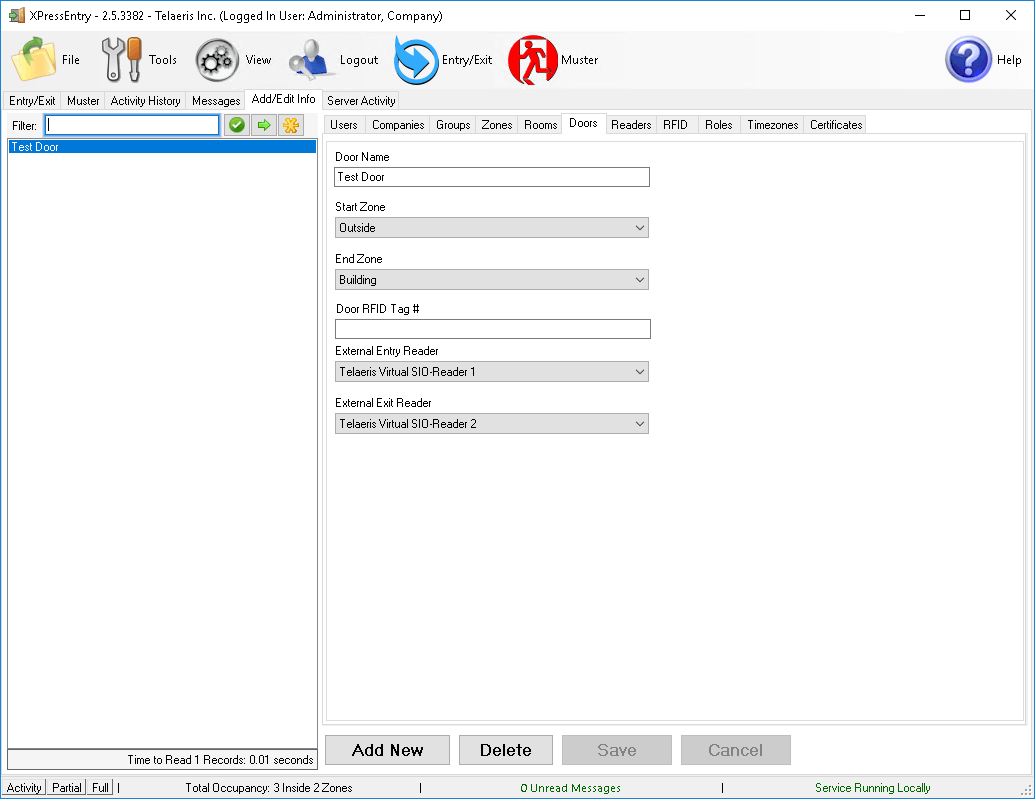
Name – The name of the door.
Start Zone – The area we are moving the cardholder out of.
End Zone – the Area the Cardholder will end up in when they’ve scanned on a Reader at this Door.
Door RFID Tag # – You can set up a comma separated list for allowing a Barcode or Badge to be scanned for the door. Enter the barcode field or the badge number here. Don’t enter that card into your External access control system. When that card is scanned, the Reader will be assigned this door.
External Entry Reader – Reader from the External Data Manager which we are using to authenticate the cardholder permissions on an Entry scan.
External Exit Reader – Reader from the External Data Manager which we are using to authenticate the cardholder permissions on an Exit scan.


