Overview #
In order to use the XPID with an Ethernet connection, there are a few requirements beyond normal WIFI configuration.
- USB to Ethernet Dongle
- Correctly configured network settings on the device
- Switch Ethernet Application installed on the device (if using Ethernet through the Dock)
XPID-100 Model #
USB to Ethernet Dongle #
The USB to Ethernet Dongle should be included in the purchase of any XPressEntry system where Ethernet was specified as the method of communication. It can be plugged into the side of the device and used to communicate over the network right out of the box. To use this device plugged into the dock, please see section 3, “Switch Ethernet Application”
Network Settings #
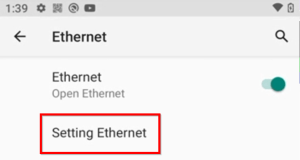
To configure the Ethernet settings, navigate to the Android Settings on the device. Select Ethernet.
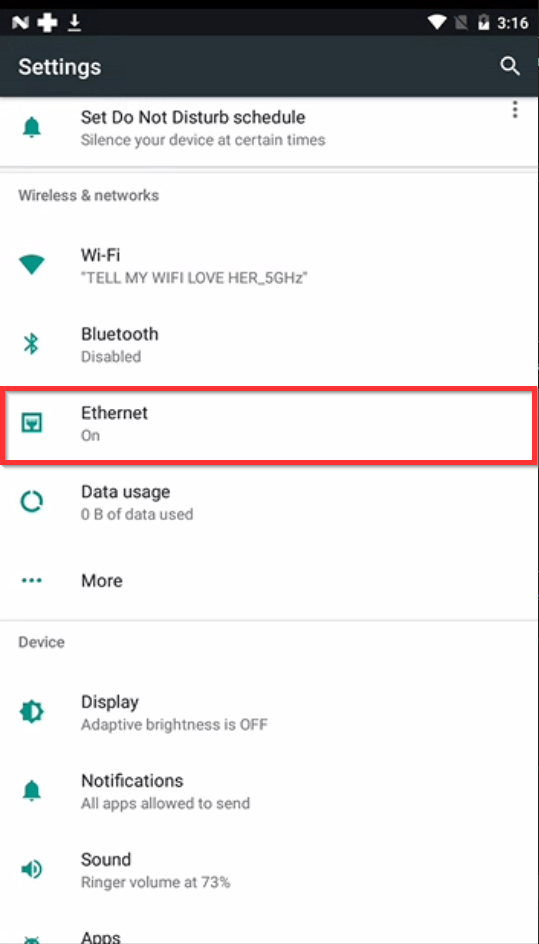
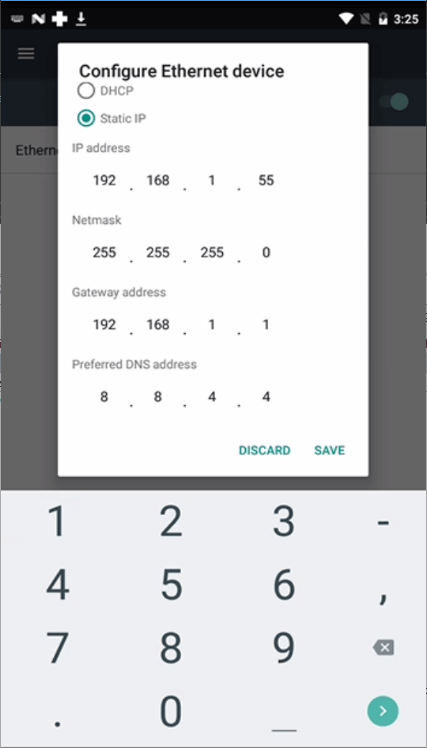
Make sure the Ethernet option is on. Inside “Ethernet Configuration”, you can specify if you are using a static IP or DHCP.
Note- If you are connecting directly to a PC (Not over a network), you will need to specify a static IP address on the same subnet as the Ethernet port on the PC you are connected to. Do not forget to scroll down and add a DNS Address.
 #
#
Using Ethernet dongle through the dock #
To use the Ethernet dongle through the back of the dock, you need to run the “Switch” app on the device.
Open the switch App and select Open Device. This will disable USB communication on the side of the device, but allow it through the dock. To automatically start this app when a device restarts, select the checkbox at the top, “Auto Start Ethernet On Boot”.
Selecting “Close Device” will disable communication through the dock, but re-enable communication through the side USB of the device.
XPID-200 Model #
USB to Ethernet Dongle #
Similar to the XPID-100, the USB to Ethernet Dongle should be included in the purchase of any XPressEntry system where Ethernet was specified as the method of communication. It can be plugged into the side of the device and used to communicate over the network right out of the box. To use this device plugged into the dock, please see section 3, “Switch Ethernet Application”.
Network Settings #
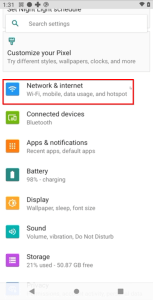
To configure the Ethernet settings, navigate to the Android Settings on the device. Select Network & Internet.
Select Ethernet
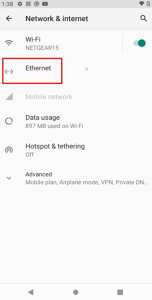
Ethernet Settings #
Make sure the Ethernet option is on.
Note- If you are connecting directly to a PC (Not over a network), you will need to specify a static IP address on the same subnet as the Ethernet port on the PC you are connected to. Do not forget to scroll down, add a DNS Address and save configuration.


