- Initial Board Network Setup
- Initial Board Reader Setup
- XPressEntry Setup
- Troubleshooting
- Freedom Status Bar remains in "Attempting to Connect..." state and the bar remains yellow.
- Freedom Board connects but no badges are uploaded to the board
- Badge number I scan does not match the badge number in XPressEntry
- If you have any questions regarding this setup, please contact Telaeris!
- [email protected]
The XPressFreedom board can now perform as an access panel for small installations. If you want to use the Freedom board as an Ethernet to Wiegand converter, this is not the article for you. If you want to configure the XPressFreedom board as an access panel, keep on reading and we will show you how it is done.
Initial Board Network Setup #
To configure the board, start by powering the board on and connecting it to the network via Ethernet.
Here is an image that shows you where to apply power and how to plug in Ethernet-
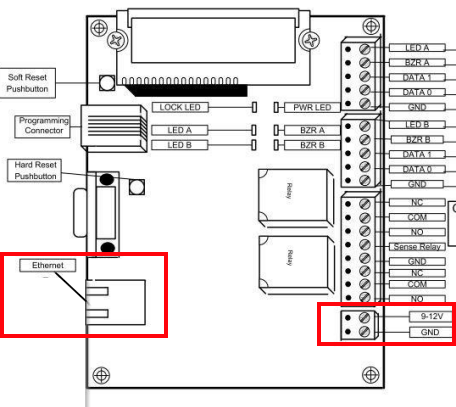
Freedom Diagram (Power)Once the board boots, it will use DHCP to obtain an IP Address which it will display on its LCD screen.
On your PC, enter this IP into a web browser to verify the version and mode the board is in as shown below.
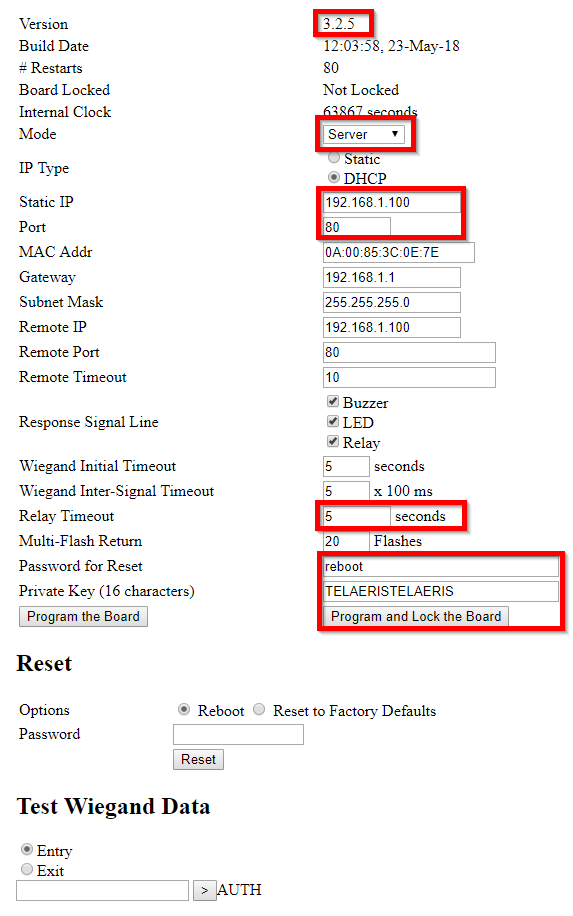
XPressFreedom Web PageIf your board is not in server mode, or is not version 3.2.5 or newer, please contact Telaeris before proceeding.
On this web page, you can assign the board a static IP address and Port, Password for Reset, and Private Key. The other potentially important option is the relay timeout, which determines how long a door will remain open when a user successfully scans. Once this is done, select Program and Lock Board.
The board will reset at this point and to browse to it, you will need to navigate to the new IP address that you entered.
Initial Board Reader Setup #
The following information is for a single reader setup. To setup two readers on one Freedom Board, please contact Telaeris for instructions.
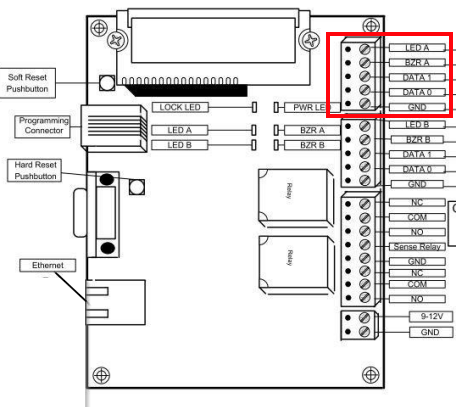
Reader -> Board
Data 0 -> BZR A
Data 1 -> LED A
0V or Ground -> GND
XPressEntry Setup #
Depending on the type of reader and credential you are using, you may need to configure a Wiegand format. That however is a question for another day. If you end up scanning cards and the numbers returned to XPressEntry do match up to what you expect, feel free to reach out to Telaeris!
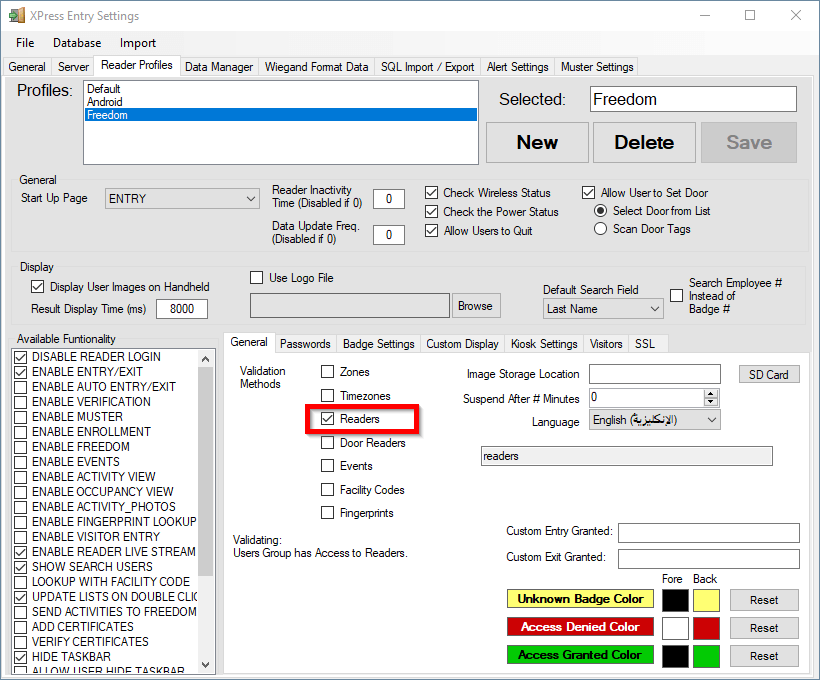
First, lets set up a Reader Profile for our Freedom Access Readers. If you have an installation with interfaces other than Freedom Access panels, such as handhelds, you should create a reader profile specifically for the Freedom Access Readers. If your system consists of only Freedom Access Boards, you can use the default profile.
The only important setting is that the Validation Method is set to Readers as shown below. Select only Readers and select save at the top right.
Reader ProfilesNext, you will need to navigate to the badge types tab in Add/Edit info. If you do not see the badge types tab, you need to enable it in the settings shown below. It is also suggested that you set a default badge type that will be applied globally to all new users who are added in the system.
One this setting is saved, the badge types tab will appear in add/edit info.
The important settings here are as follows.
- Is UHF- Check this.
- Uses Default Facility Code- Check this if all or most of your cards use the same facility code.
- Default Facility Code- Enter the facility code if Use Default Facility Code is checked.
- Wiegand Format- Select the format of this badge type from the list of default formats, or a format that you created.
Press Save.
If there are a number of users that already have a badge of this badge type, but need the format applied to it, select “Update Wiegand Format For All Badges with this Badge Type”. This does not need to be selected for new badges in the future unless the format of the badge is changed.
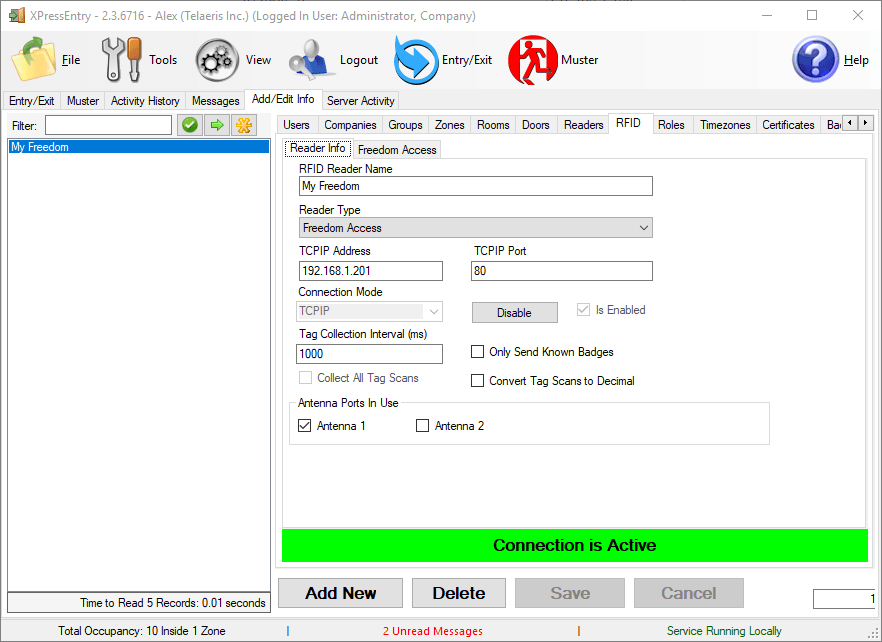
Navigate to the RFID Readers tab.
- Add a new RFID Reader
- Select Freedom Access from the drop down menu
- Enter in the IP address and TCPIP Port as configured on the Board earlier
- Make sure Antenna 1 is selected
- Select save
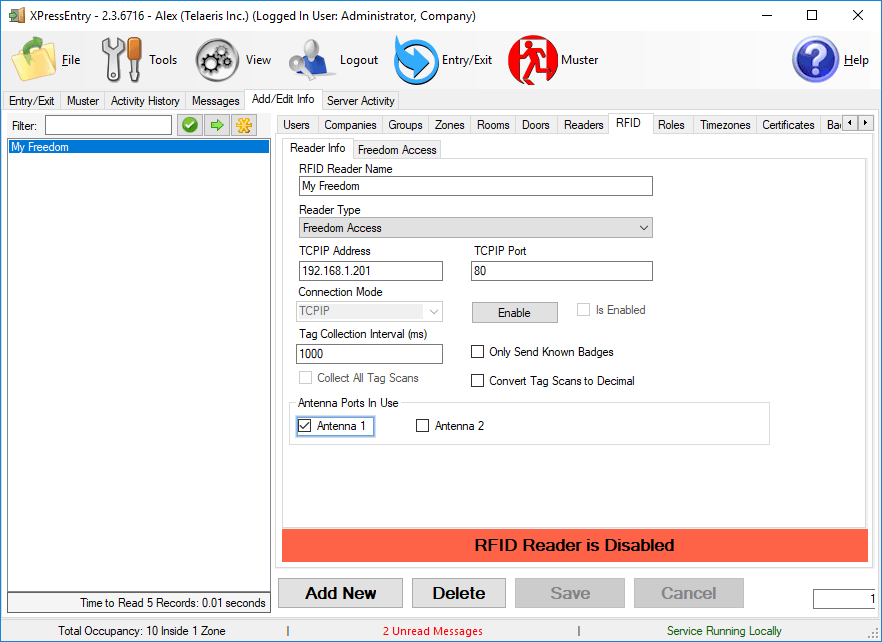
Select the Freedom Access tab.
- Select the Key:DEFAULT button and set the Private Key of the board, as configured in the board’s web page.
- Next, press Save.
- This page also gives you a view of how many badges are currently on the board.
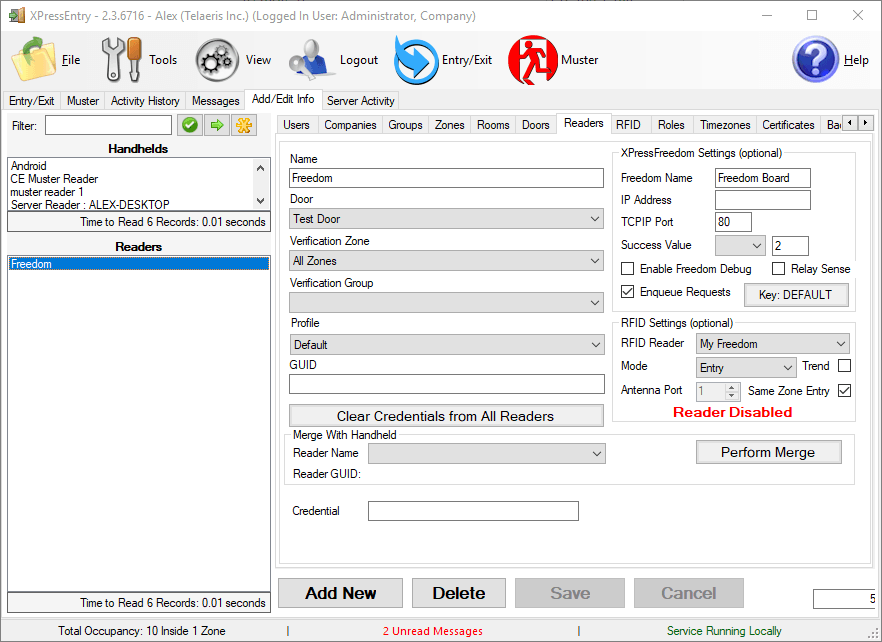
Navigate to the readers tab.
- Add a new reader.
- Give the reader a door, verification zone, and profile. On the right hand side are RFID Settings. Select the freedom board in the drop down and the mode. Trend should be unchecked and Same Zone Entry should be checked as shown below.
- Select Save
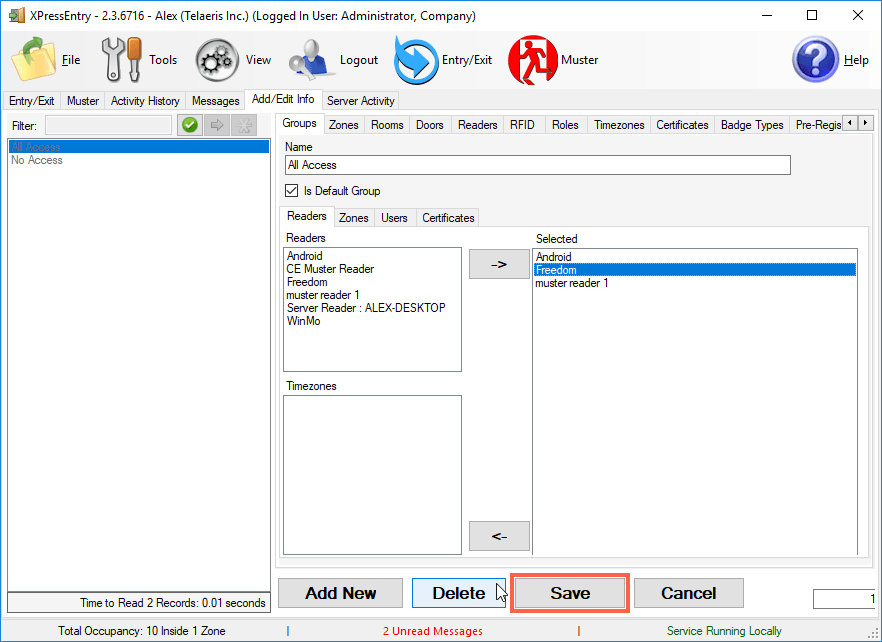
Now that you have a reader configured, you can assign it to an access group.
- Navigate to the groups tab.
- You can create a new group here, or use the existing All Access Group.
- On the Readers sub tab, select the Freedom Reader that was created and move it to the selected box.
- Save the group.
Lets talk about the people that are going to be uploaded to the board.
Navigate to the Users Tab under add/edit info. Each user that you would like to have access to the board requires the following.
- Badge
- Valid Badge Number
- Badge Number must have a Badge type with the correct Wiegand Format selected (configured earlier)
- Cannot be expired, expired badges are removed from the board
- Cannot be Invalid, invalid box in grid must be empty
- Valid Facility Code (Greater than -1)
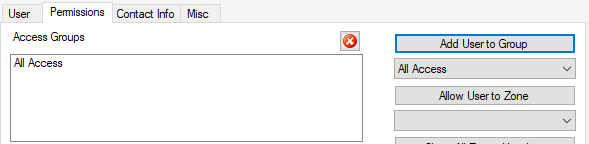
- Permission
- On the permissions tab, must be part of the Access Group containing our Freedom Board
Below is an example of a new badge being added-
We are ready to connect XPressEntry to the freedom board. Navigate back to the RFID Readers Tab.
Press the Enable button on the Freedom Access Board. The bottom of the form should momentarily appear yellow and then turn to green.
If properly configured, all user badges in the system that have access to the board should be pushed to the board. You can verify the number of badges that are on the board by selecting the Freedom Access Tab where it displays both the number of badges on the board, and the number of available badge slots.
Troubleshooting #
Freedom Status Bar remains in “Attempting to Connect…” state and the bar remains yellow. #
Verify the IP Address and the TCPIP Port are correct. If both check out, type in the IP address into a browser on the same computer to verify that the PC can reach this IP Address.
If the board is locked, also verify that the Private Key is set both in XPressEntry and on the board and the Private Key is the same on both sides.
Freedom Board connects but no badges are uploaded to the board #
This requires us to run down the settings and make sure everything is configured.
- User has a badge
- Badge has a badge type
- Badge type has a Wiegand Format Assigned to it. Is UHF is also checked under badge type
- User has access to a group
- Group contains the Freedom Reader
- The Freedom Reader is assigned to the Freedom Access Board (RFID Settings)
If all of the above checks out, please contact Telaeris for further support.
Badge number I scan does not match the badge number in XPressEntry #
There are a number of factors here, and it depends on the Reader output and the Wiegand Format.
In XPressEntry, you store the decimal number of a card number. XPressEntry converts this to HEX and sends it to the board. This is why you may have already noticed, adding a non numeric number to the badge field does not work if there is a badge type with a Wiegand Format attached. The Freedom board takes input from the reader and converts it to HEX to compare against it’s stored badge numbers.
What does any of this mean?
You need to know what the reader is outputting so that it can match the HEX number stored in the Freedom board.
Simple Example- UHF Wiegand Reader (DL920), assuming standard 26 bit Wiegand Format and Facility Code = 0
UHF Tag is encoded with 000000000000000000001000
We enter tag number 1000 into XPressEntry.
What XPressEntry will see is an invalid tag number (4096). This is because HEX 1000 (UHF is encoded in HEX) = DECIMAL 4096. You have two options here.
- Change the badge Number in XPressEntry to 4096
- Re-encode the tag to 3EB (equals DEC 1000)


